
This is a series of blog post about MLOPS, the series consists of 4 posts, which we will discuss:
1 - Deploying and setting up MLFlow
2 - Deploying and setting up Kubeflow
3 - Deploying Machine Learning endpoints with different tools
4 - Deploying Streamlit applications using various ML endpoints for a user interface
To follow along this blog post, the repo is here
Architecture
Here is an overview of the MLOPS workflow with MLFlow
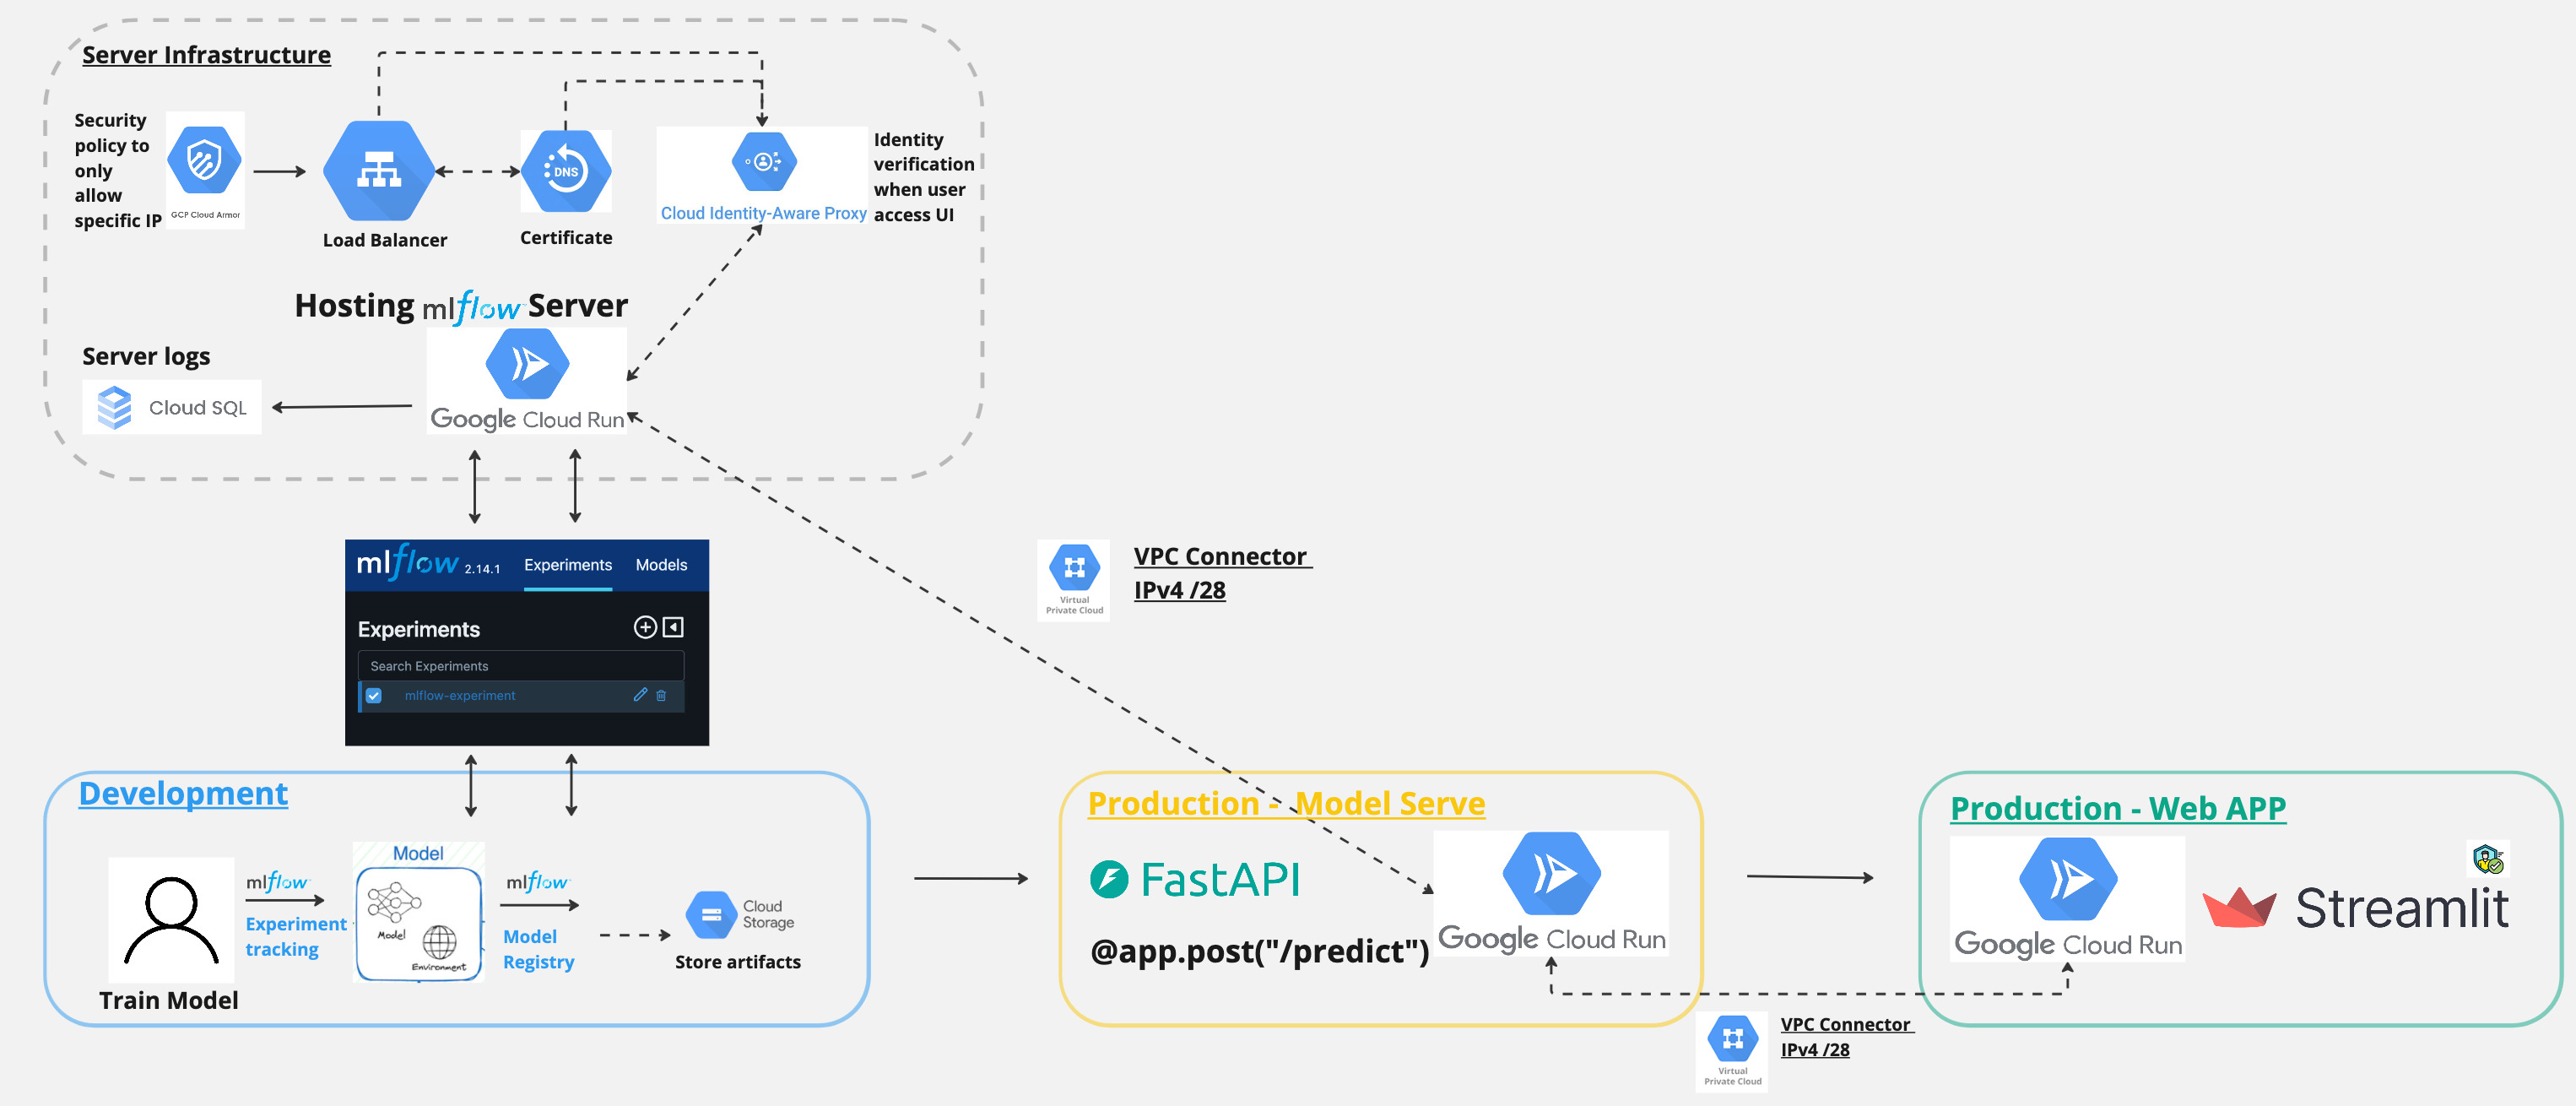
And in today’s post, we will focus on this part.

What is MLFlow?
MLflow is an open-source platform to manage the end-to-end machine learning lifecycle. It tackles three primary functions: tracking experiments to record and compare parameters and results, packaging code into reproducible runs, and sharing and deploying models. MLflow is library-agnostic and can be used with any machine learning library, and in any programming language, since all functions are accessible through REST APIs and CLI commands. It is designed to work with any existing ML library or framework, and can be easily integrated with scikit-learn, TensorFlow, and PyTorch.
To start off the series, in today’s post, we will be
1 - Deploying MLFlow on Google Cloud Platform (GCP) using Cloud Run.
2 - Set up load balancing, cloud armor policy, custom domain, and SSL certificate for the MLFlow server for restrcited access.
3 - Set up a secret manager to store the MLFlow server’s credentials and access them in the deployment process.
4 - Deploy a simple machine learning model using MLFlow and test the deployment.
Deploying MLFlow on GCP
Basic Configuration
1 - Create a service account with neccessary permissions to access the GCP resources. At the minimum, the service account should have the following roles:
- Cloud Run Invoker
- Storage Object Viewer
- Secret Manager Secret Accessor
- Cloud container admin
For example, the following command can be used to add the roles to the service account:
gcloud projects add-iam-policy-binding gcp-prj-id-123 \
    --member "serviceAccount:svc@gcp-prj-id-123.iam.gserviceaccount.com" \
    --role "roles/secretmanager.secretAccessor" \
    --role "roles/cloudobjectstorage.objectViewer" \
    --role "roles/container.admin" \
    --role "roles/cloudrun.invoker"
2 - Obtain a credential file for the service account.
You can do so by navigating to IAM & Admin > Service Accounts > Select the service account > Keys > Add Key > Click on the "Create Key" button.
3 - Create Cloud storage bucket to store the MLFlow artifacts.
Confirm the the service account that will be used to deploy the application has the necessary permissions to access the bucket.
4 - Create a Cloud SQL instance to store the MLFlow metadata.
You can choose either MySQL or PostgreSQL as the database engine. In this example, we will use PostgreSQL.
Fill in the instance name, password, and other necessary details.
Create a database and a user for the MLFlow server.
To create database
SQL component > Databases > Create Database
To create user
SQL instance details > Users > Add User Account
Enable SSL connection to the database.
SQL component > Connections > Create Database > Security > Manage SSL mode >
Allow only SSL connections under SSL mode
Then under Manage client certificates, click on the “Create client certificate” button to download the client certificate.
5 - Create a secret in the Secret Manager to store the database credentials.
Create Secret:
mlflow_artifact_url: Storage Bucket where MLflow artifacts are stored, for example, gs://mlflow
mlflow_database_url: Sample value
postgresql+psycopg2://<db-user>:<db-pass>@/<db-name>?host=/cloudsql/gcp-prj-id-123:us-central1:<cloud-sql-instance-name>
Not that the Cloud SQLinstance name can be copied from Cloud SQL instance overview page
mlflow_tracking_username: Basic HTTP auth username for MLflow (your choice) mlflow_tracking_password: your choice
Deploying server
Folder structure for the project:
.
├── Dockerfile
├── README.md
├── app
│   ├── __init__.py
│   ├── get_secret.py
│   └── mlflow_auth.py
├── deploy
│   └── production
│       └── service.yaml
├── entry-point.sh
├── poetry.lock
├── pyproject.toml
└── skaffold.yaml
Dockerfile as below:
FROM python:3.10-slim

ENV PYTHONUNBUFFERED=True

ENV POETRY_VERSION=1.7.1 \
    USERNAME=nonroot

WORKDIR /usr/src/app

RUN adduser $USERNAME
USER $USERNAME

ENV HOME=/home/$USERNAME
ENV PATH="$HOME/.local/bin:$PATH"

RUN pip install pipx
RUN pipx install poetry==${POETRY_VERSION}

COPY ./poetry.lock ./pyproject.toml /usr/src/app/

RUN poetry install -nv --no-root

COPY app .

COPY entry-point.sh ./entry-point.sh

ENTRYPOINT ["/usr/bin/env", "bash", "./entry-point.sh"]

EXPOSE 8080
Set up skaffold.yaml as below:
apiVersion: skaffold/v4beta2
kind: Config
metadata:
  name: mlflow-gcp
build:
  artifacts:
  - image: us-central1-docker.pkg.dev/gcp-prj-id-123/mlflow-gcp/mlflow-gcp
    docker:
      dockerfile: Dockerfile
    platforms:
      - "linux/amd64"
profiles:
- name: production
  manifests:
    rawYaml:
    - deploy/production/service.yaml
deploy:
  cloudrun:
    projectid: gcp-prj-id-123
    region: us-central1
And the service.yaml file in the deployment/production folder as below:
apiVersion: serving.knative.dev/v1
kind: Service
metadata:
  name: mlflow-gcp
spec:
  template:
    metadata:
      annotations:
        run.googleapis.com/cloudsql-instances: gcp-prj-id-123:us-central1:mlflow-pgsql
        run.googleapis.com/startup-cpu-boost: 'true'
    spec:
      serviceAccountName: svc@developer.gserviceaccount.com
      containers:
      - image: us-central1-docker.pkg.dev/gcp-prj-id-123/mlflow-gcp/mlflow-gcp
        ports:
        - name: http1
          containerPort: 8080
        env:
        - name: GCP_PROJECT
          value: gcp-prj-id-123
        resources:
          limits:
            memory: 1Gi
            cpu: 1000m
To deploy the server, run the following command:
skaffold run -p production
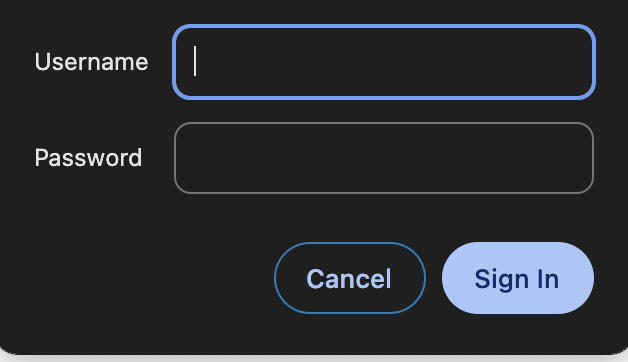
And here you go, after successful deployment, you can access the MLFlow server at the URL provided in the Cloud Run service details.
And when clicked on it, it will prompt for the username and password that you have set in the secret manager.
Setting up restricted access to MLFlow server
Now, the next set up our MLFlow UI so that it is only accessible to the users who are on the specific IP addresses, instead of making the application public and only protected by the basic HTTP auth.
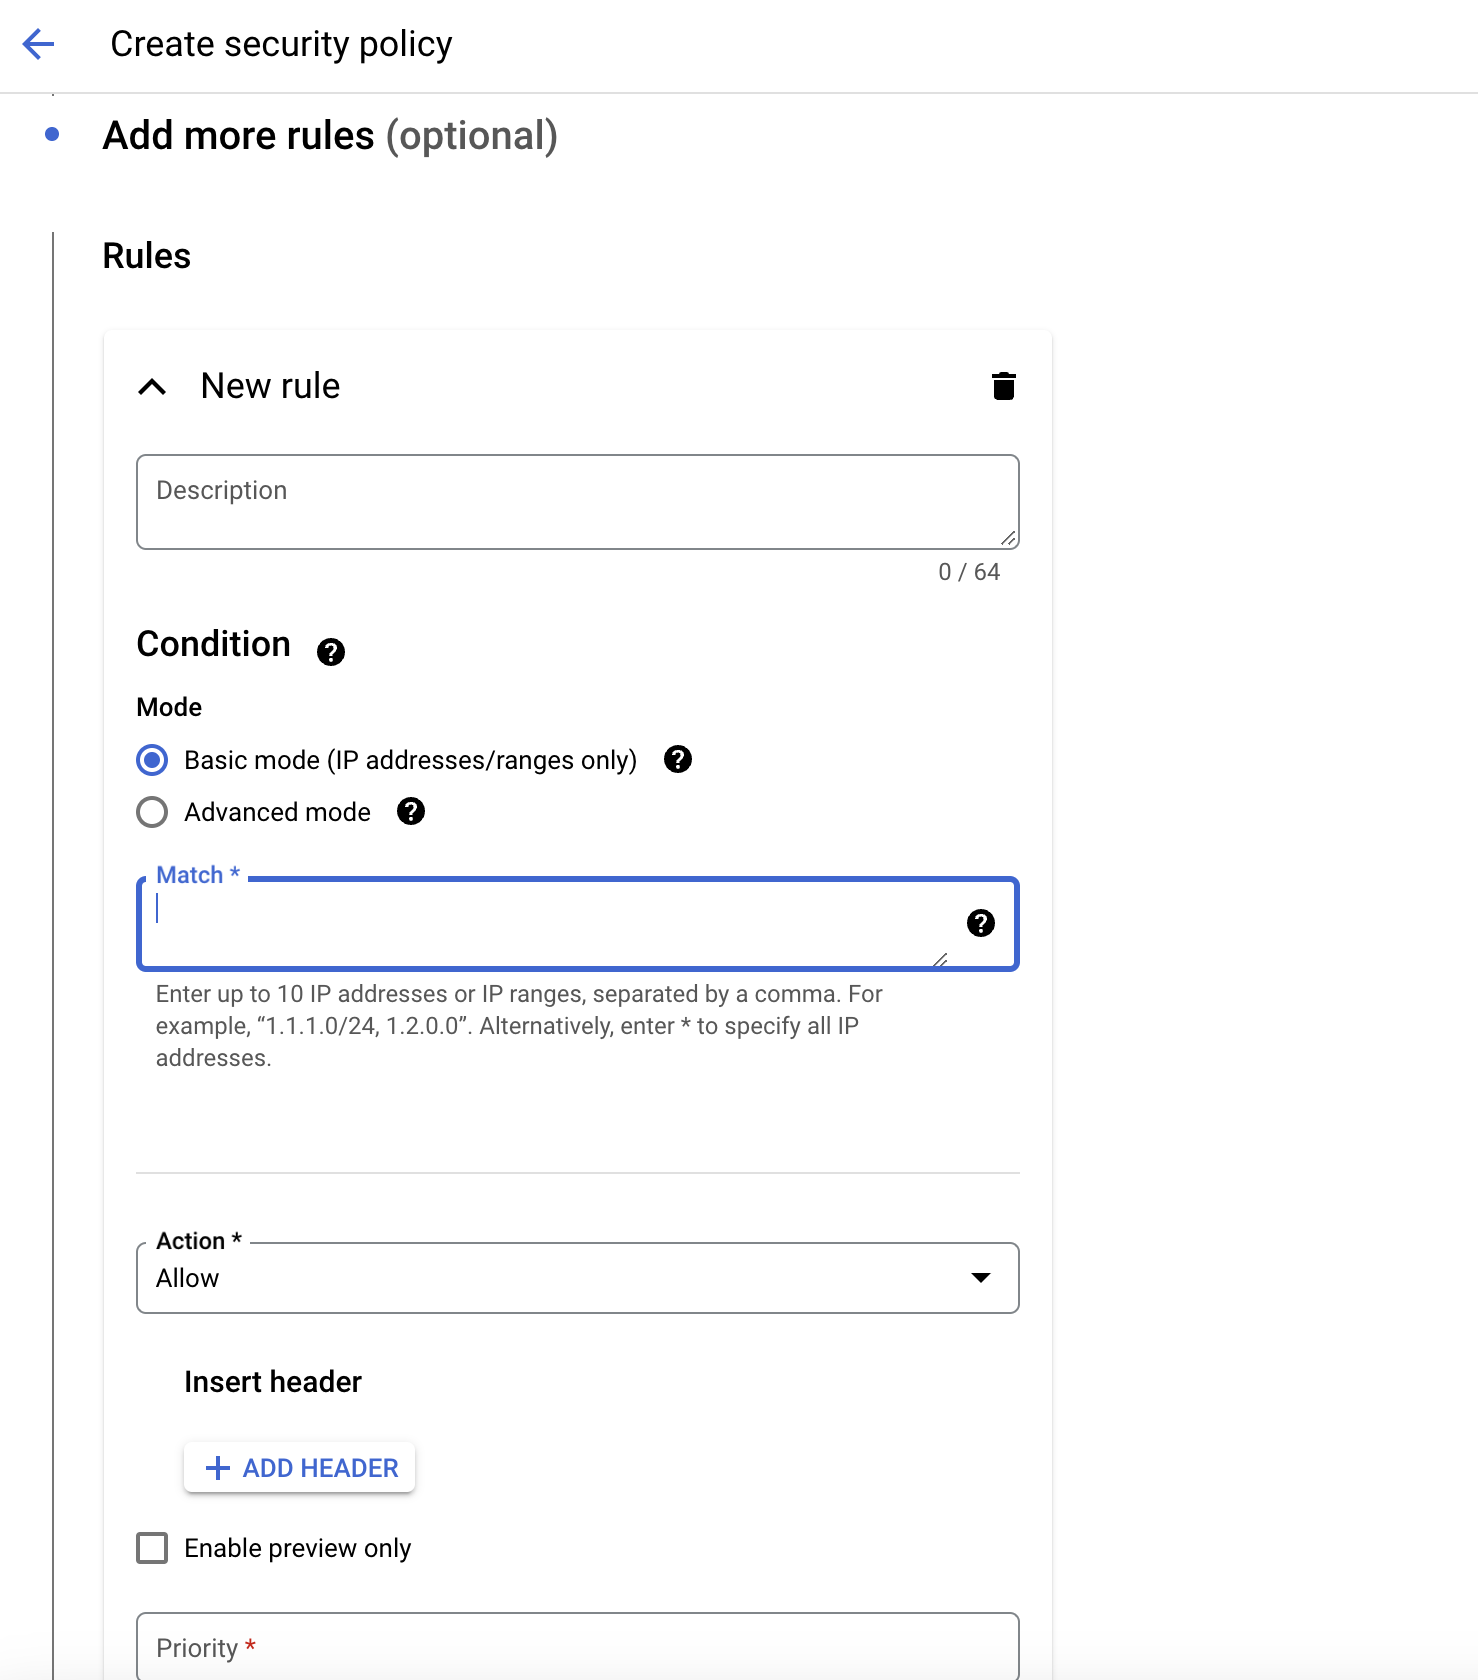
Custom restriction access with Cloud Armor
Under Network Security > Cloud Armor Policies > Create Policy
For Policy type, select Backend security policy
Fill in the necessary details and choose the Allow action and add the IP addresses that you want to allow access to the MLFlow server.
Creating up SSL certificate
Under Security > SSL Certificates > Create Certificate > Fill in the necessary details and choose Create Google-managed certificate then click on the Create button.
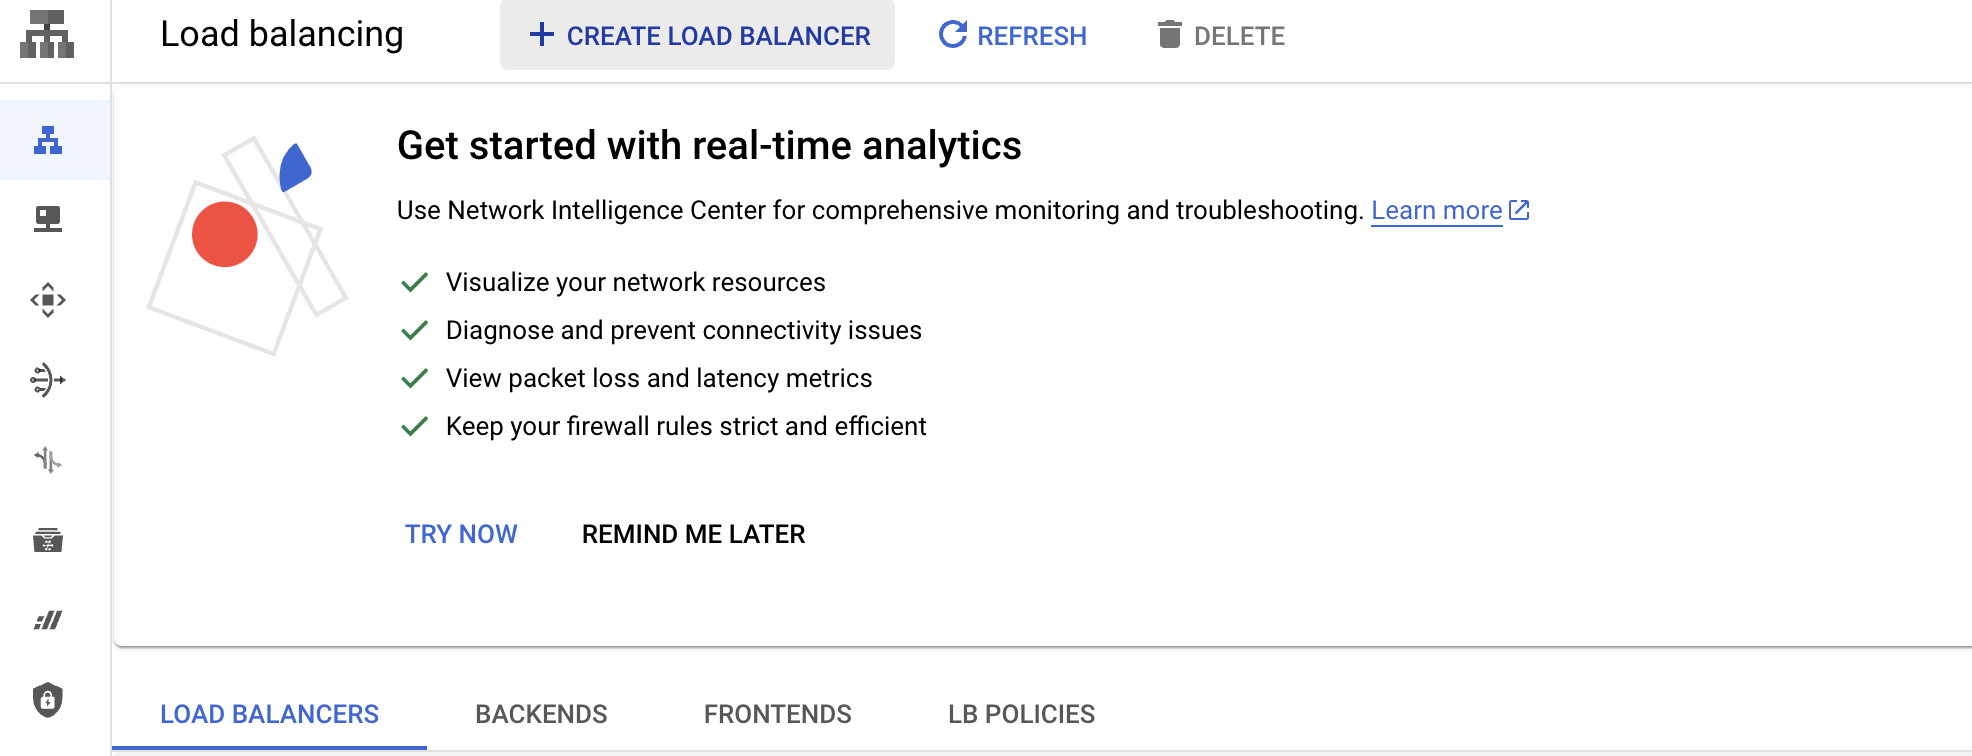
Setting up Load Balancing
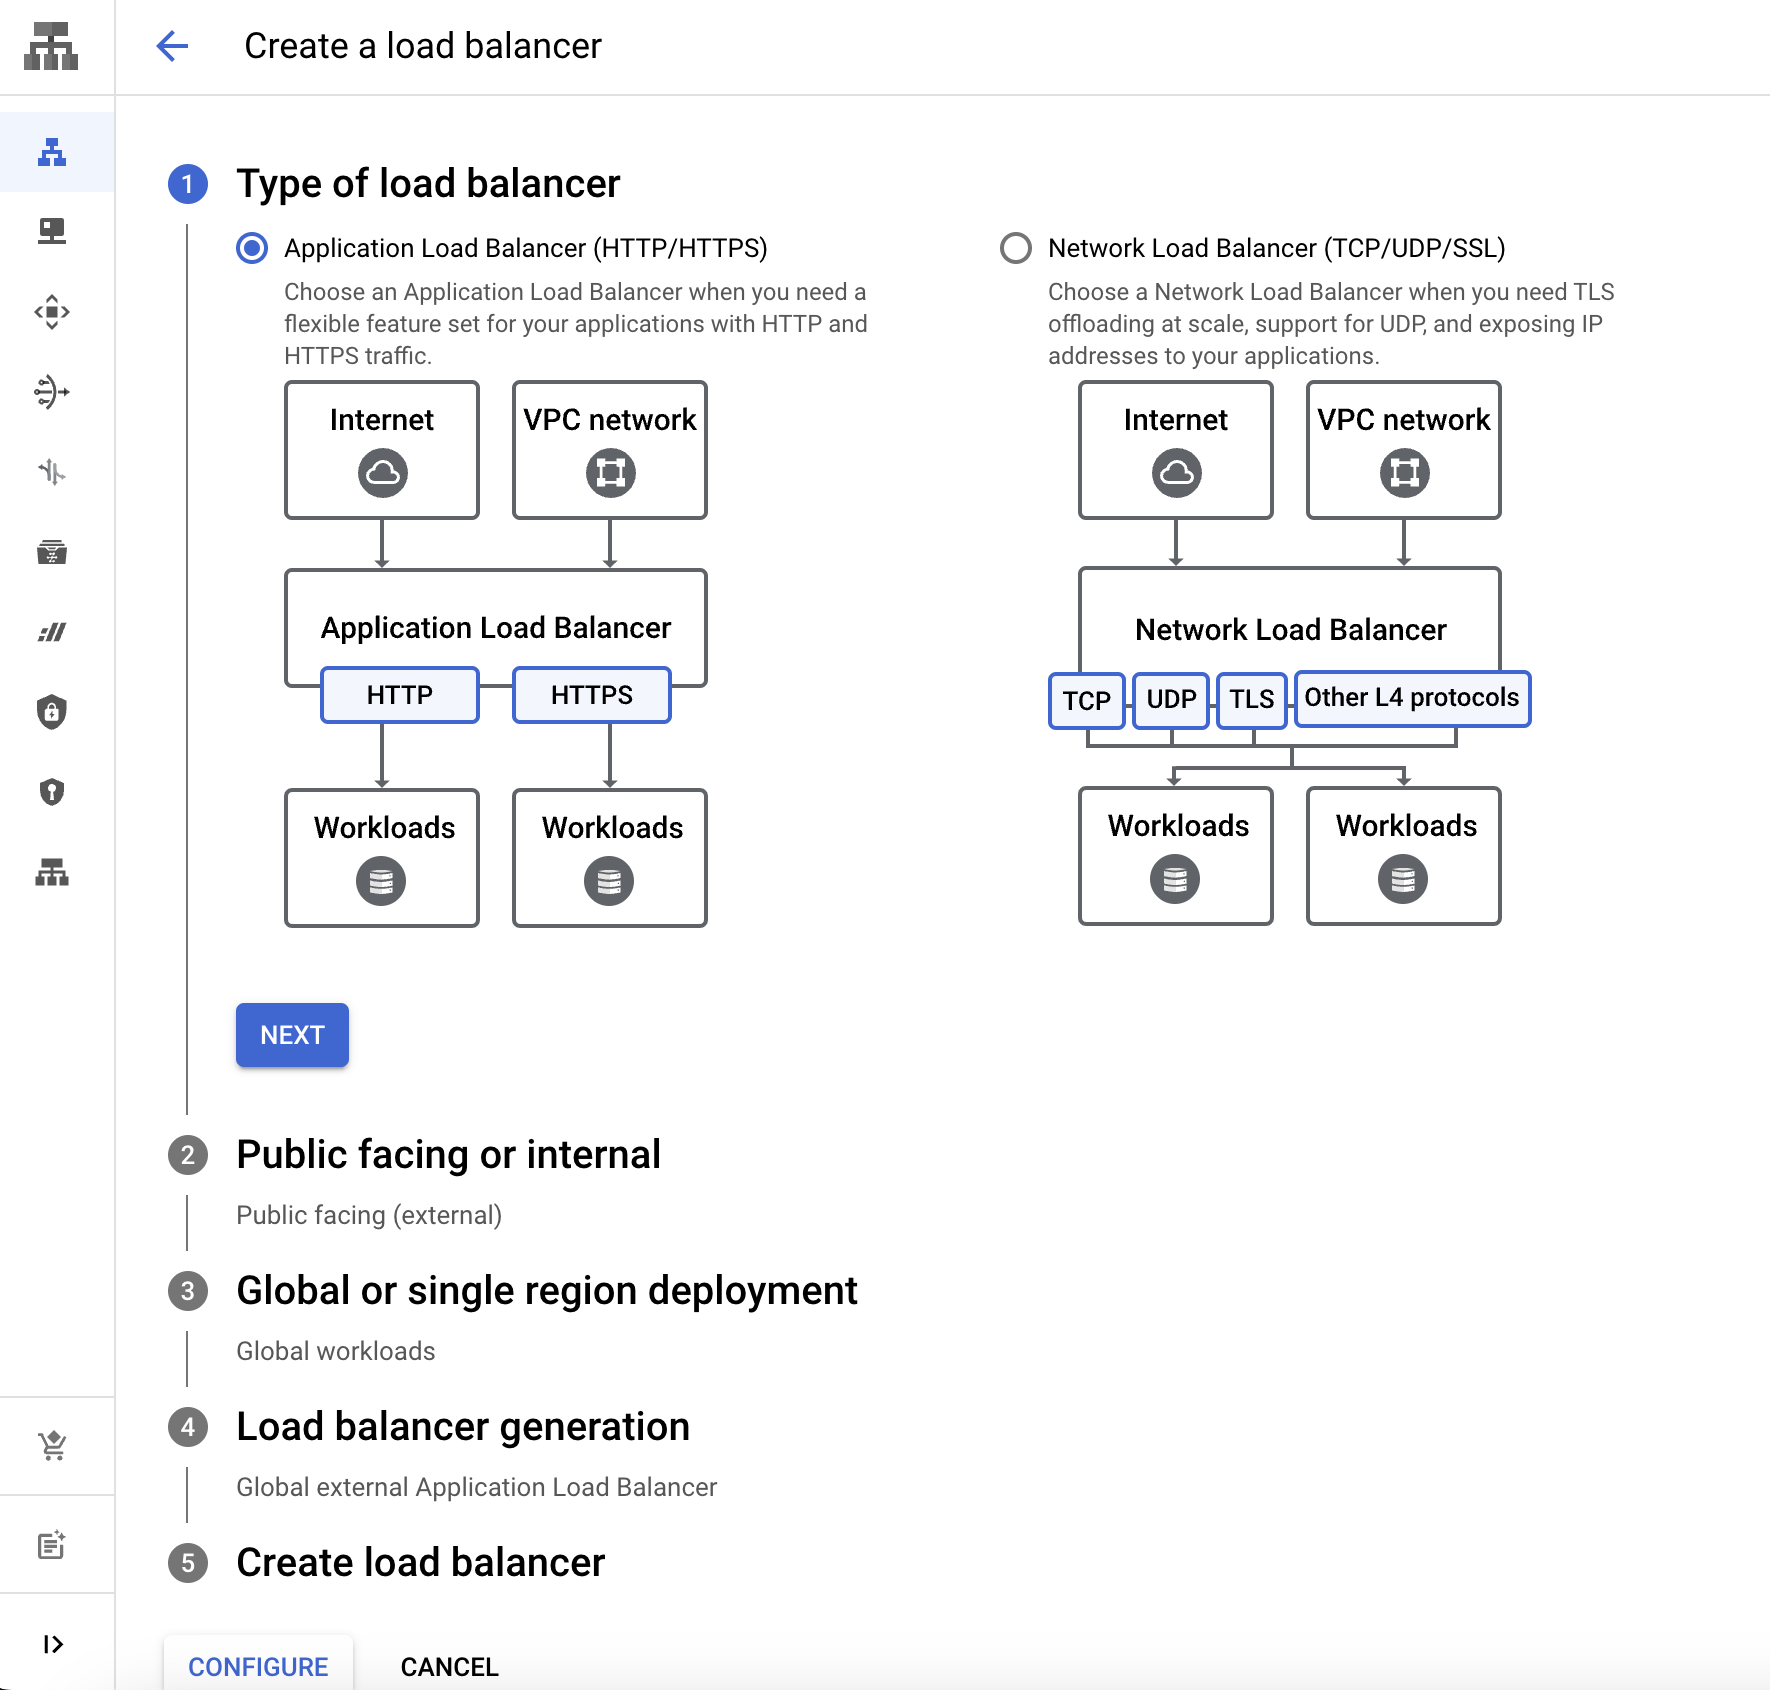
To set up the load balancer, navigate to the Cloud network services > Load balancing > Create Load Balancer.
For type of load balancer, choose HTTP(S) Load Balancing, and follow the default settings.
The next step is to set up the frontend configuration, for protocol choose HTTPS and for certificate, choose the SSL certificate that we created in the previous step.

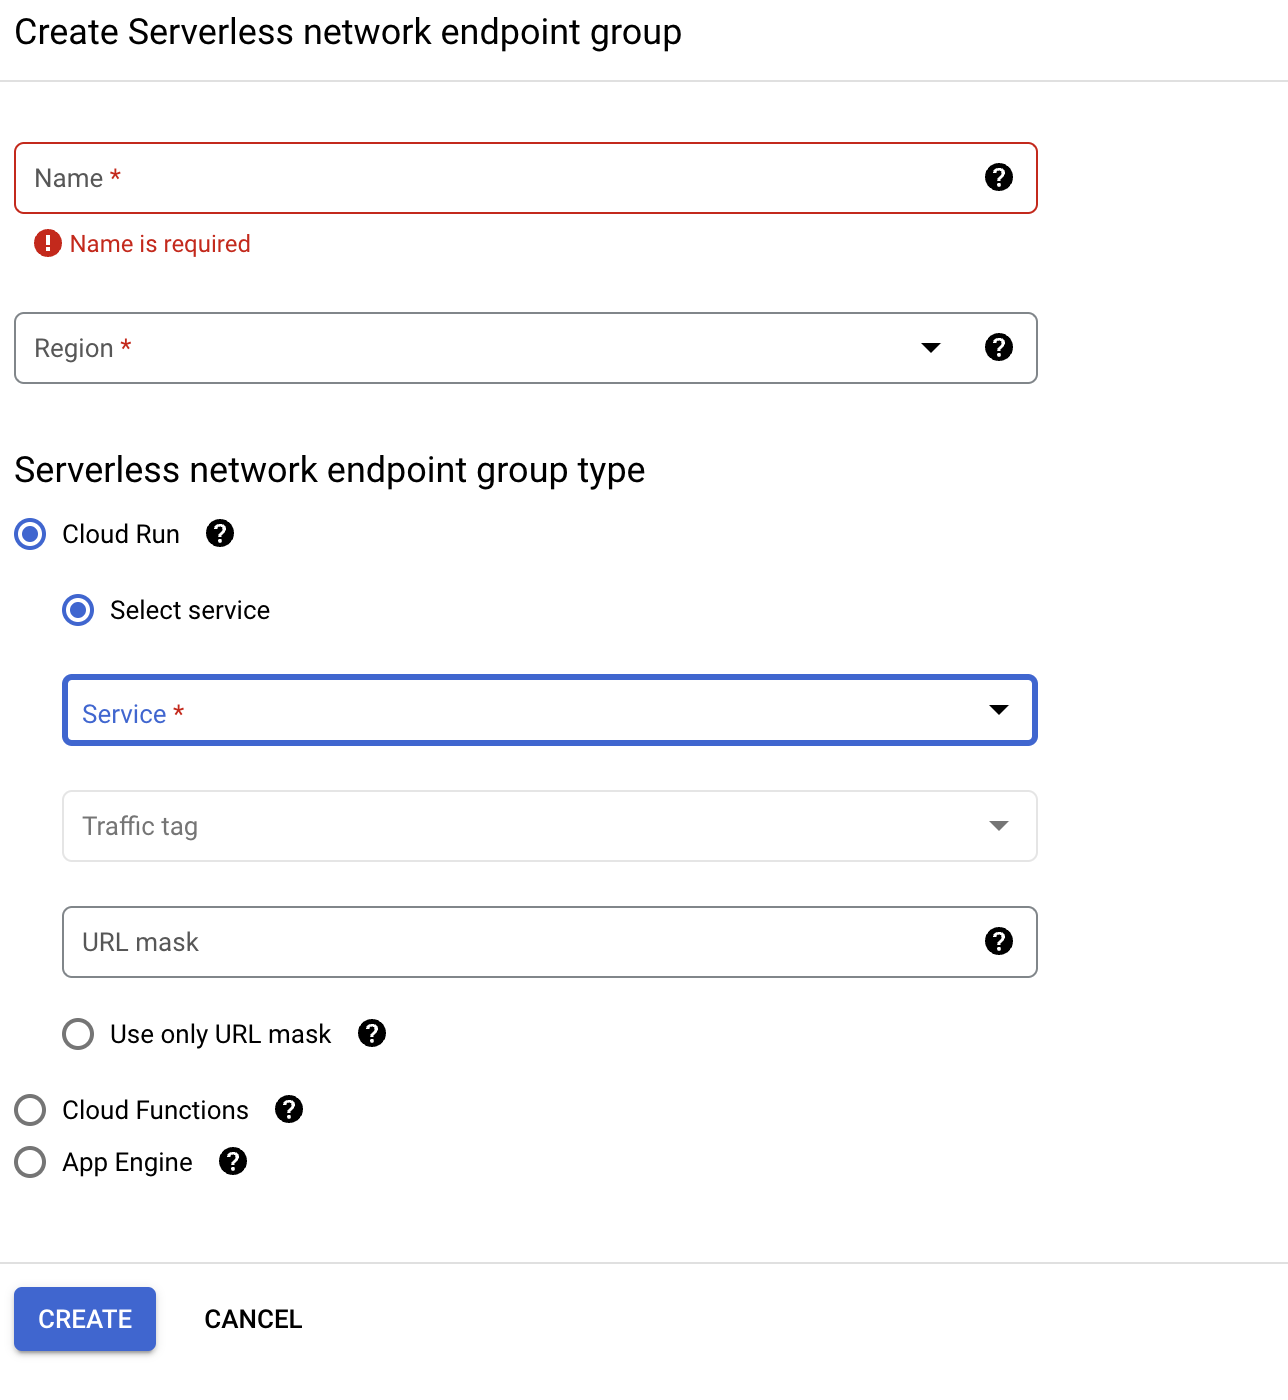
For the backend configuration, click on Create a backend service, for backend type choose Serverless network endpoint group and under Backend clcik on Add backend.
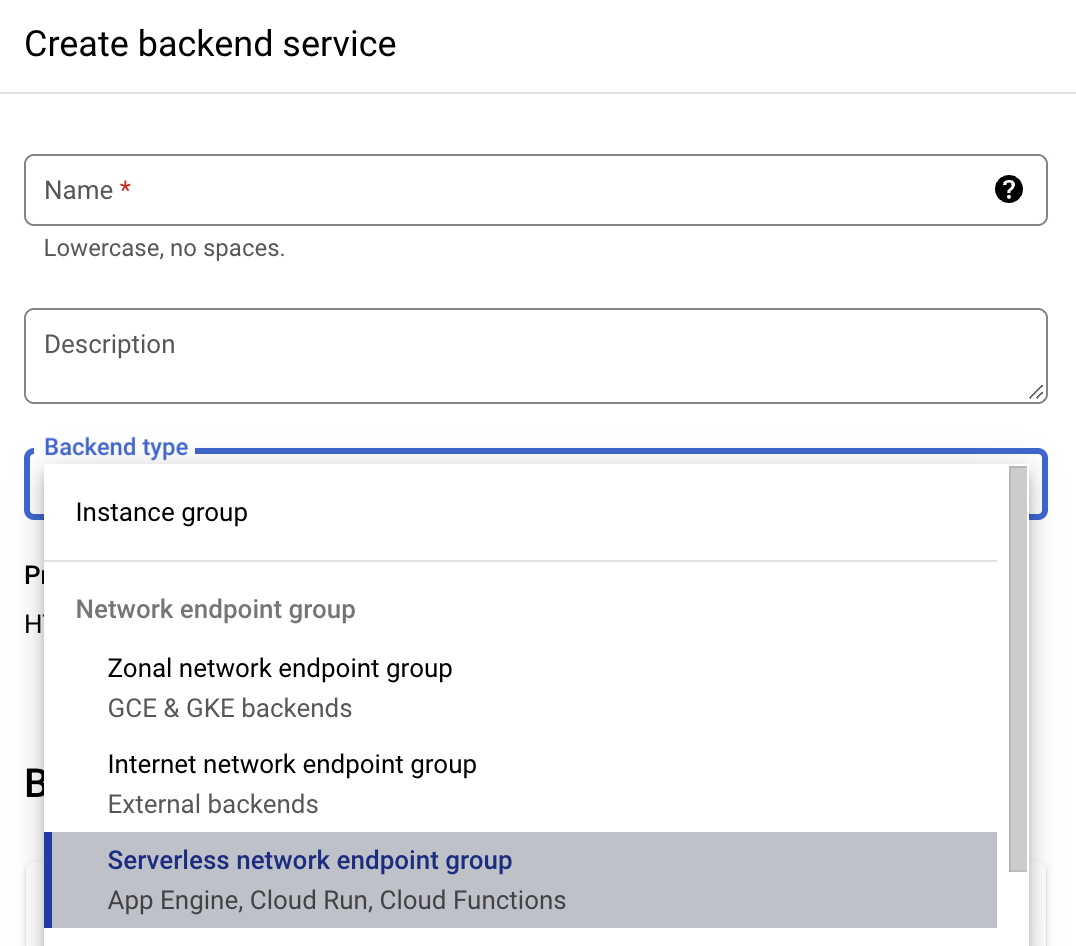
Then under click Create Serverless network endpoint group, under select service, choose the cloud run app that we created for MLFlow.
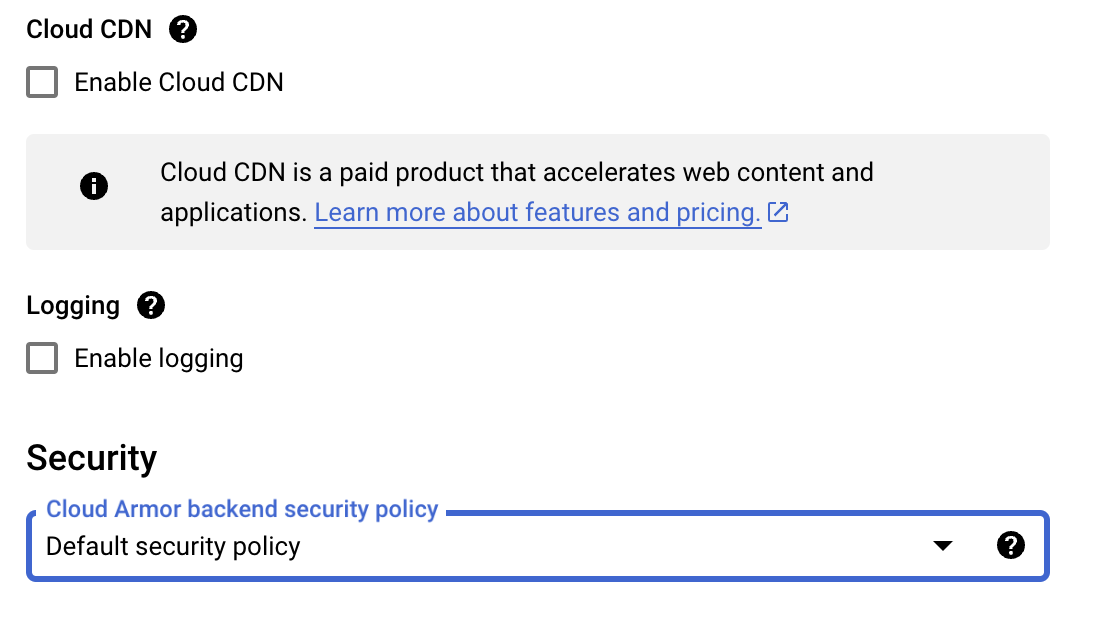
Under Cloud CDN disable the Cloud CDN.
Under Security, choose the Cloud Armor policy that we created in the previous step.
After all of the above steps, click on the Create button to create the load balancer.
Setting up IAP
Navigate to Security > Identity-Aware Proxy, If you don’t see the IAP option, you may have to add it by clicking on the Connect Application button.
Turn on IAP for the load balancer backend services of the Cloud Run servic under All Web Services > Backend Services.
Setting up custom domain
To begin with is step, we will have to enable the Cloud DNS API on the GCP project.
Then, we can navigaye to the Network Services > Cloud Doains > Reguster Domain > Fill in the necessary details and click on the Create button.
Setting up Cloud DNS
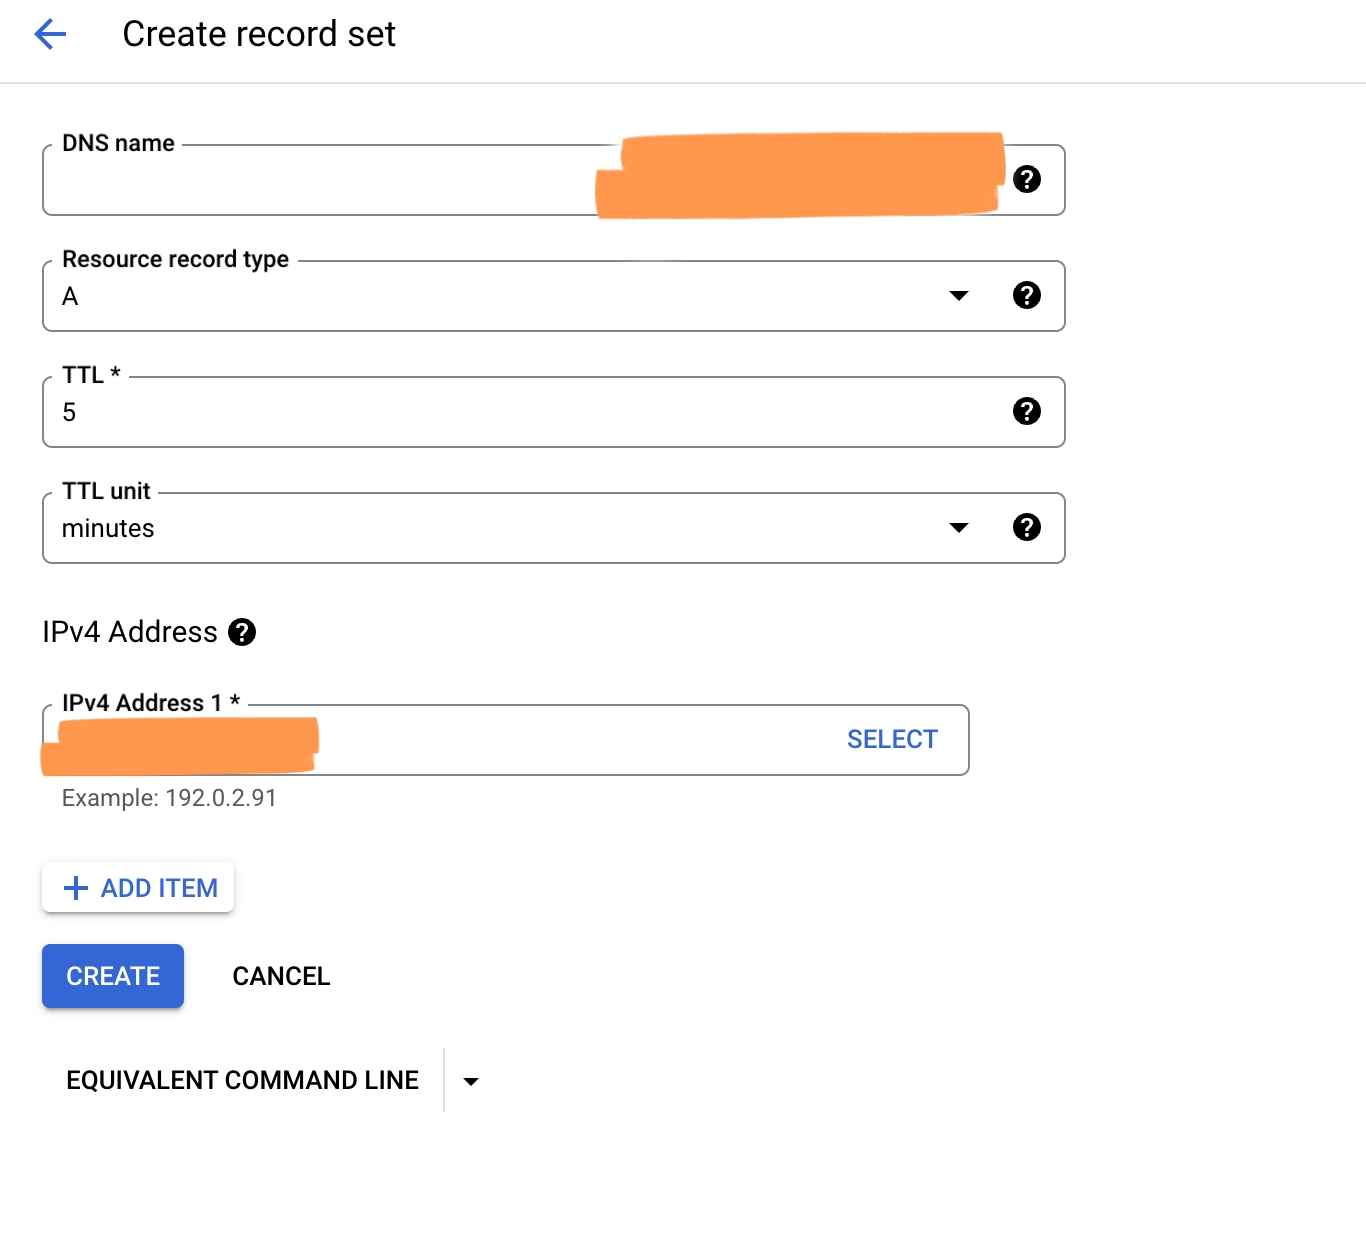
To set up the Cloud DNS, navigate to the Cloud DNS page and the domain that we chose from the above step should already be showing there. Click on the domain name and then click on the Add Standard under Record Set.
Under Resource Type, choose A
And for IPv4 Address, place the IP address of the load balancer that we created in the previous step.
Setting up OAuth Consent Screen
Navigate to API and Services > OAuth consent screen > Add our domain to the Authorized domains
Restricting access to Cloud Run ingress
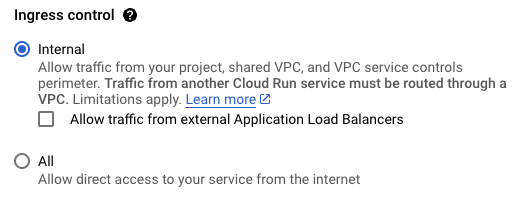
Now as the final step, we will restrict the access to the Cloud Run ingress.
Navigate to the Cloud Run service details > Networking > Ingress Control > Allow internal traffic only
Or if we don’t want to do it manually on the GCP Console, we can modify the deploy/production/service.yaml to as below
apiVersion: serving.knative.dev/v1
kind: Service
metadata:
  name: mlflow-gcp
  annotations:
    run.googleapis.com/ingress: internal-and-cloud-load-balancing
    run.googleapis.com/ingress-status: internal-and-cloud-load-balancing
spec:
# Rest of the original spec
Now, if you are not connecting to the MLFlow server from the allowed IP addresses, you will not be able to access the server and it will return a 403 forbidden response.
Simple Machine Learning Model
Now, with everything set up, let’s deploy a simple machine learning model using MLFlow and test the deployment.
As a first step, let’s preprocess the data and prepare it for training.
white_wine = pd.read_csv(".winequality-white.csv", sep=";")
red_wine = pd.read_csv("./winequality-red.csv", sep=";")

red_wine['is_red'] = 1
white_wine['is_red'] = 0
data = pd.concat([red_wine, white_wine], axis=0)
data.rename(columns=lambda x: x.replace(' ', '_'), inplace=True)

high_quality = (data.quality >= 7).astype(int)
data.quality = high_quality
Next, let’s split the data into training, validation, and test sets.
from sklearn.model_selection import train_test_split
X = data.drop(["quality"], axis=1)
y = data.quality

X_train, X_rem, y_train, y_rem = train_test_split(X, y, train_size=0.6, random_state=123)

X_val, X_test, y_val, y_test = train_test_split(X_rem, y_rem, test_size=0.5, random_state=123)
Set up the necessary classes and functions to log the model and deploy it using MLFlow.
class SklearnModelWrapper(mlflow.pyfunc.PythonModel):
  def __init__(self, model):
    self.model = model
  def predict(self, context, model_input):
    return self.model.predict_proba(model_input)[:,1]

class GCPSecrets:
    def __init__(self) -> None:
        self.client = secretmanager.SecretManagerServiceClient()
        self.base_url = f"projects/{PROJECT_ID}/secrets"

    def get_secret(self, secret):
        secret_response = self.client.access_secret_version(
            name=f"{self.base_url}/{secret}/versions/latest"
        )
        creds = secret_response.payload.data.decode("UTF-8")
        return creds
Set up the MLFlow configuration.
os.environ["MLFLOW_TRACKING_URI"]  = secrets.get_secret("mlflow_tracking_url")
os.environ["MLFLOW_TRACKING_USERNAME"] = secrets.get_secret("mlflow_tracking_username")
os.environ["MLFLOW_TRACKING_PASSWORD"] = secrets.get_secret("mlflow_tracking_password")
Now, let’s train the model and log it using MLFlow.
with mlflow.start_run(run_name='untuned_random_forest'):
  n_estimators = 10
  model = RandomForestClassifier(n_estimators=n_estimators, random_state=np.random.RandomState(123))
  model.fit(X_train, y_train)

  predictions_test = model.predict_proba(X_test)[:,1]
  auc_score = roc_auc_score(y_test, predictions_test)
  mlflow.log_param('n_estimators', n_estimators)
  mlflow.log_metric('auc', auc_score)
  wrappedModel = SklearnModelWrapper(model)
  signature = infer_signature(X_train, wrappedModel.predict(None, X_train))

  conda_env =  _mlflow_conda_env(
        additional_conda_deps=None,
        additional_pip_deps=["cloudpickle=={}".format(cloudpickle.__version__), "scikit-learn=={}".format(sklearn.__version__)],
        additional_conda_channels=None,
    )
  mlflow.pyfunc.log_model("random_forest_model", python_model=wrappedModel, conda_env=conda_env, signature=signature)
Examine the learned feature importances output by the model as a sanity-check.
feature_importances = pd.DataFrame(model.feature_importances_, index=X_train.columns.tolist(), columns=['importance'])
feature_importances.sort_values('importance', ascending=False)
Now, let’s register the model and transition it to the “Production” stage.
from mlflow.tracking import MlflowClient
client = MlflowClient()

run_id = mlflow.search_runs(filter_string='tags.mlflow.runName = "untuned_random_forest"').iloc[0].run_id

model_name = "wine_quality"
model_version = mlflow.register_model(f"runs:/{run_id}/random_forest_model", model_name)

client.set_registered_model_alias(name=model_name, alias="Production", version=model_version.version)
client.transition_model_version_stage(
  name=model_name,
  version=model_version.version,
  stage="Production",
)
Finally, load the model and test it.
model = mlflow.pyfunc.load_model(f"models:/{model_name}@Production")

print(f'AUC: {roc_auc_score(y_test, model.predict(X_test))}')

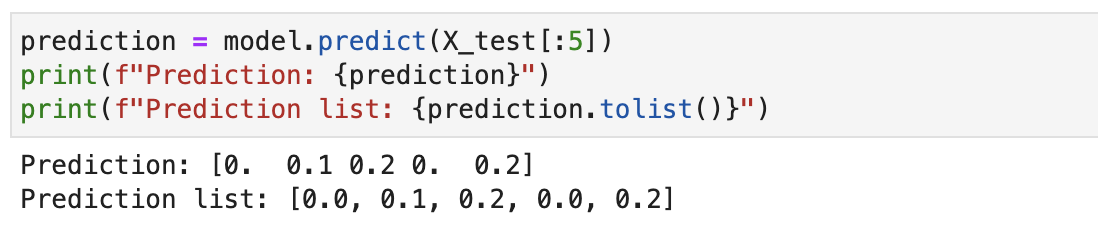
Making a prediction with the model
prediction = model.predict(X_test[:5])

print(f'Prediction: {prediction}')
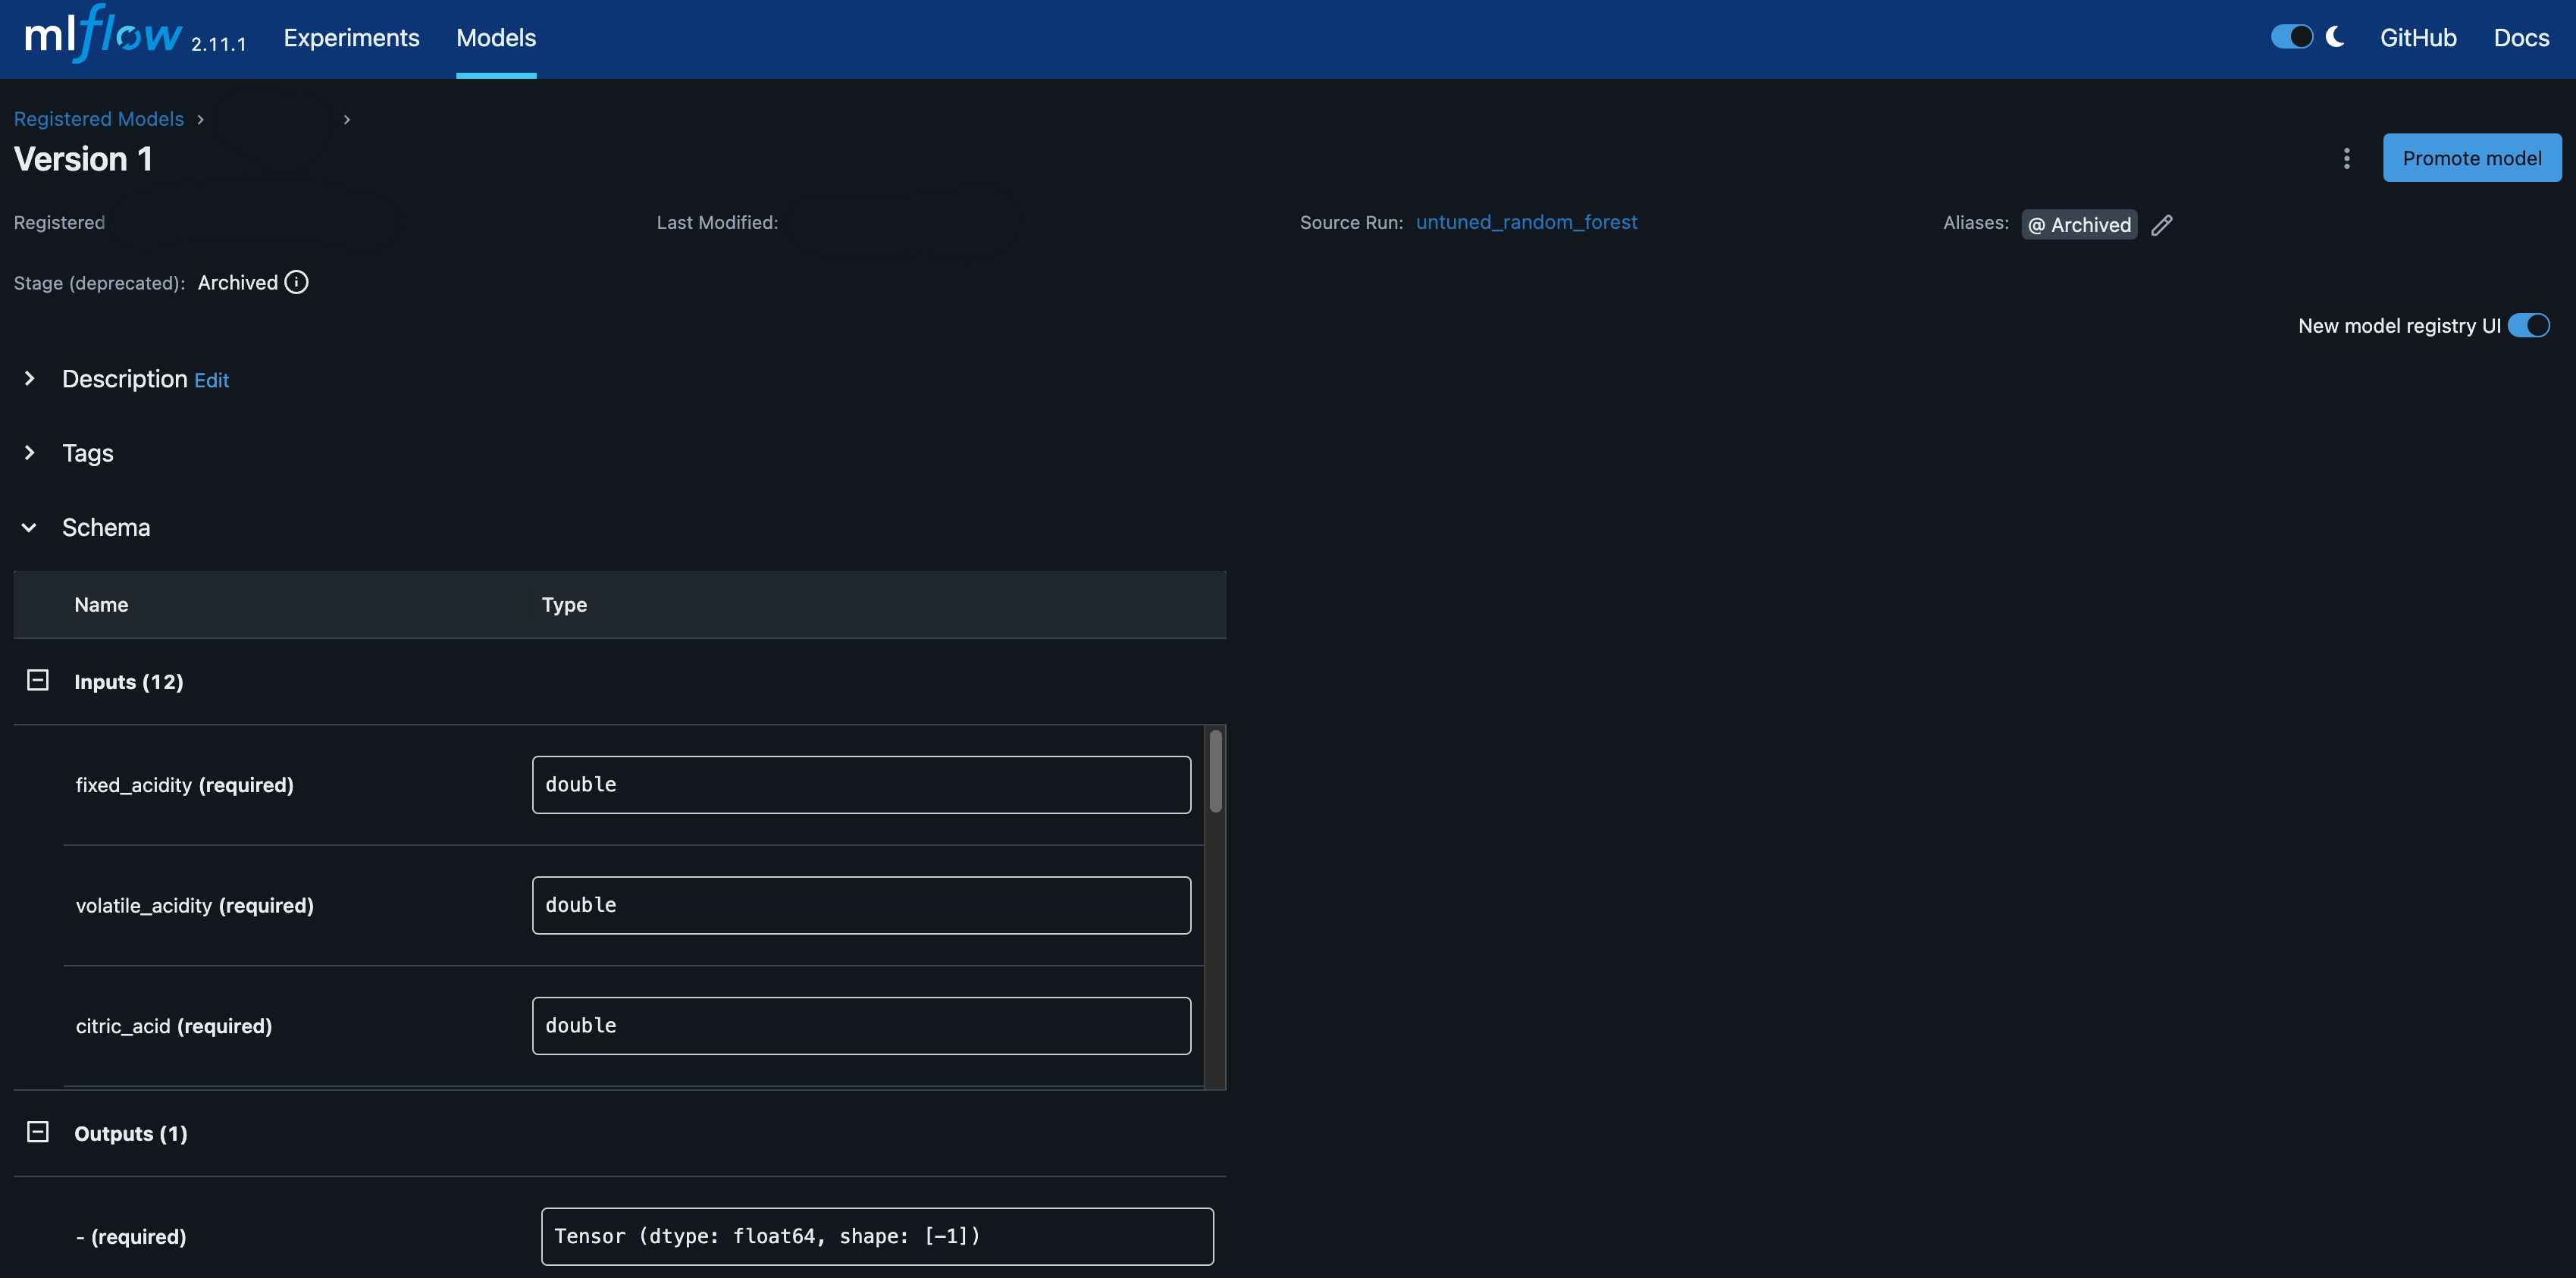
Now, if we navigate to the MLFlow UI, we should see the model’s artifacts.
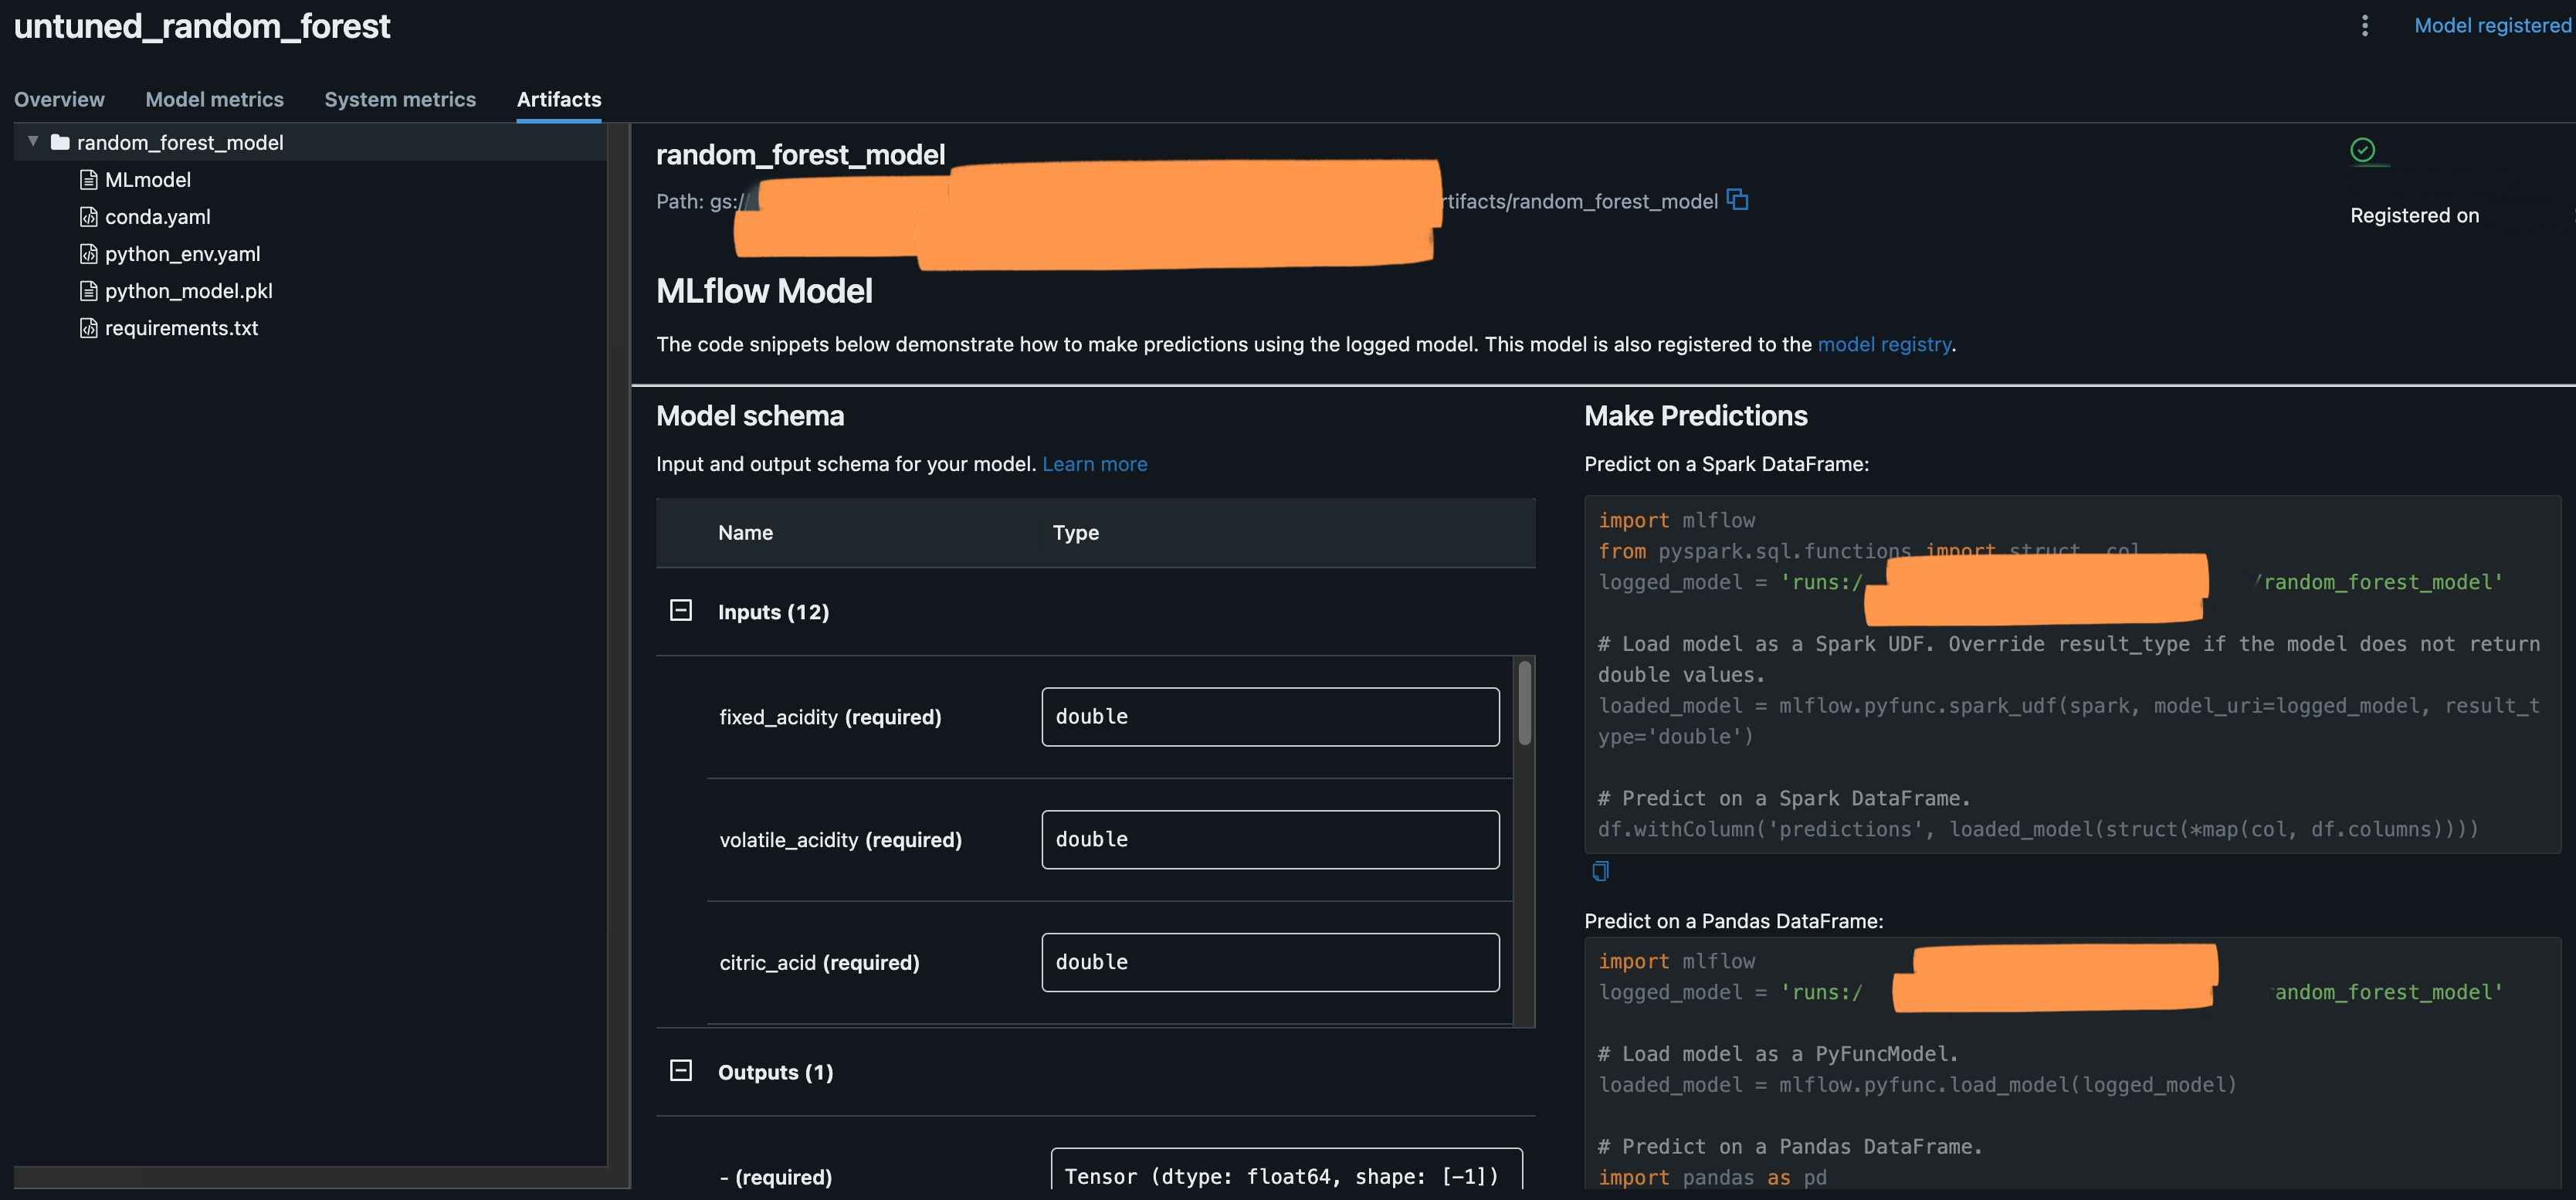
You will also see the model is registered under model registry.
And that’s it!
We have successfully deployed a simple machine learning model using MLFlow on GCP and tested the deployment.
Thank you for reading and have a nice day!