In the past, I have wrote blog posts on how to setup Google Kubernetes Engine (GKE) and deploy an application, and how to deploy a python endpoint using Azure Container Apps. This time, I will blog about how to setup Azure Kubernetes Service (AKS) and deploy a simple python application.
Prerequisites
1 - Install Helm if you haven’t already.
Helm is a package manager for Kubernetes. It is a tool that streamlines installing and managing Kubernetes applications. You can install Helm by running the following command:
brew install helm
2 - Install Azure CLI if you haven’t already.
brew install azure-cli
az login
Setup Required Resources
1 - Follow the step from the official documentation to create a resource group and AKS cluster.
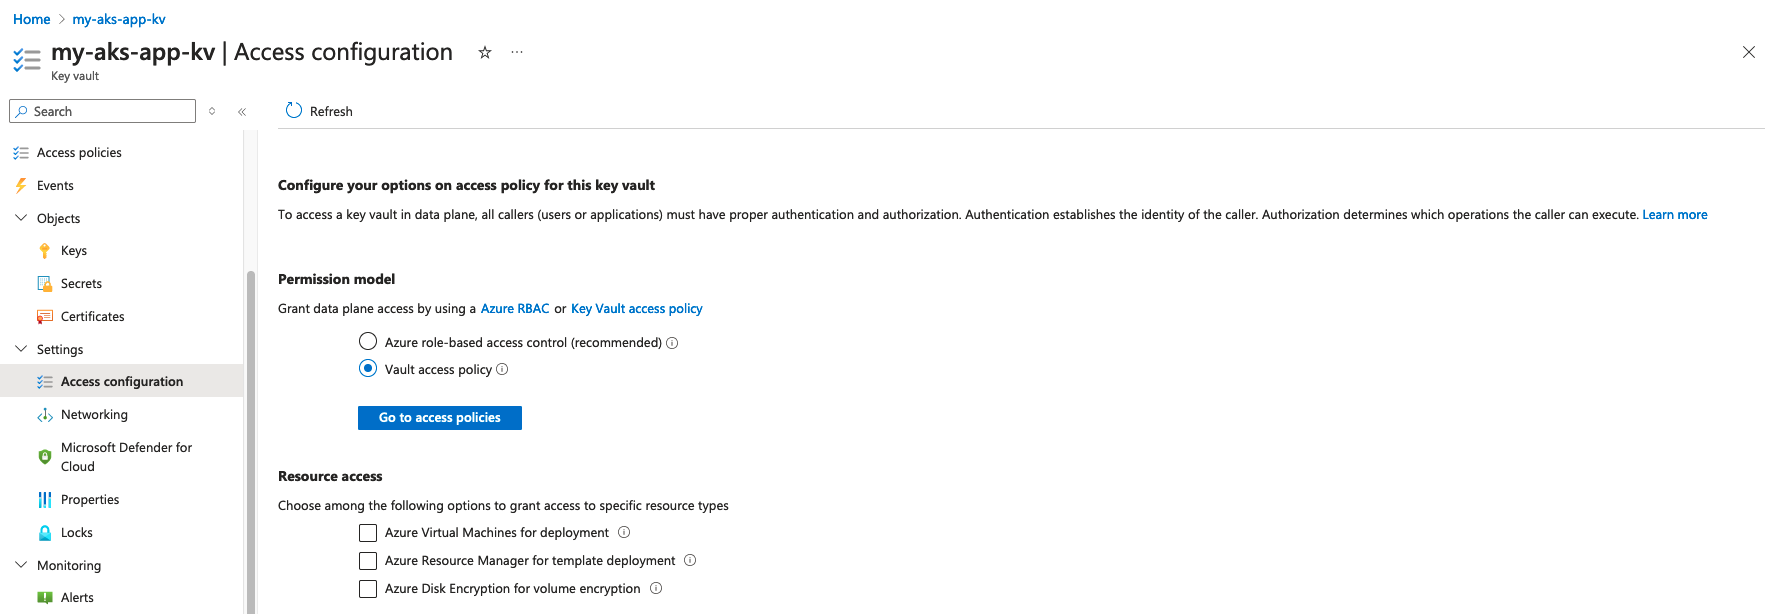
2 - Set up a Key Vault
Under the resource group where the AKS cluster is created, create a Key Vault.
Under Settings > Access Configuration, select Vault access policy for permissions model.
Then under Objects > Secrets, create the secrets that will be used in the application.
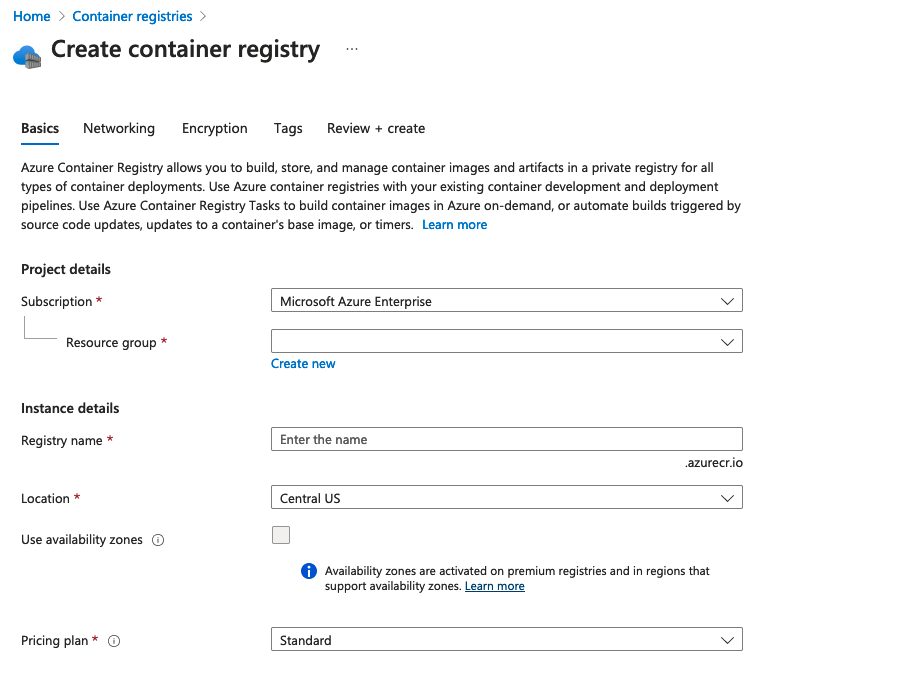
3 - Set up a Container Registry
Under the resource group where the AKS cluster is created, create a Container Registry.
After the container registry is created, make sure you have your docker running locally and authenticate to the container registry by running the following command:
az acr login --name myaksapp

az acr update --name myaksapp --admin-enabled true

az acr credential show --name myaksapp

docker login myaksapp.azurecr.io --username myaksapp --password <password2-from-prev-step>
Create an image pull secret
kubectl create secret docker-registry acr-secret \
  --docker-server=myaksapp.azurecr.io \
  --docker-username=myaksapp \
  --docker-password=<password2-from-prev-step> \
  --docker-email=<your-email> \
  --namespace=automations
Configure AKS
1 - Connect to the AKS cluster by running the following command:
az aks get-credentials --resource-group myAKSResourceGroup --name myAKSCluster
2 - Verify the connection
kubectl get nodes

kubectl config get-contexts
kubectl config current-context

3 - Create a new namespace for the application (optional)
k create ns automations
4 - Install CSI driver for Azure
helm repo add csi-secrets-store-provider-azure https://azure.github.io/secrets-store-csi-driver-provider-azure/charts
helm install csi csi-secrets-store-provider-azure/csi-secrets-store-provider-azure --namespace kube-system
To verify the installation
kubectl --namespace=kube-system get pods -l "app=secrets-store-csi-driver"
kubectl get crd
5 - Enable Azure Key Vault Provider on AKS
az aks enable-addons --addons azure-keyvault-secrets-provider --name myAKSCluster --resource-group myAKSResourceGroup
To verify the installation
az aks show --resource-group <resource-group> --name <cluster-name> --query addonProfiles.azureKeyvaultSecretsProvider.identity.objectId -o tsv
az aks show --resource-group <resource-group> --name <cluster-name> --query addonProfiles.azureKeyvaultSecretsProvider.identity.clientId -o tsv
So for example, in our case, it would be:
az aks show --resource-group myAKSResourceGroup --name myAKSCluster --query addonProfiles.azureKeyvaultSecretsProvider.identity.objectId -o tsv

az aks show --resource-group myAKSResourceGroup --name myAKSCluster --query addonProfiles.azureKeyvaultSecretsProvider.identity.clientId -o tsv
The object id from the first output will be used to set as the managed identity for the Key Vault access policy.
The client id from the second output will be used in later steps when creating a SecretProviderClass.
Ready to Deploy
Let’s first have a look at the folder structure of the application.
.
├── Dockerfile
├── README.md
├── app
│   ├── helpers
│   │   └── azure_kv.py
│   ├── main.py
│   └── settings.py
├── deploy
│   ├── common
│   │   ├── deployment.yaml
│   │   ├── kustomization.yaml
│   │   └── secretproviderclass.yaml
│   └── production
│       └── kustomization.yaml
├── poetry.lock
├── pyproject.toml
└── skaffold.yaml
The app folder contains the python application. The deploy folder contains the deployment files. The skaffold.yaml file is used to deploy the application. The Dockerfile is used to build the docker image of the application.
The azure_kv.py file contains the code to access the secrets from the Key Vault, it looks like below:
from azure.identity import ManagedIdentityCredential
from azure.keyvault.secrets import SecretClient
import logging


logger = logging.getLogger(__name__)


class AzKeyVault:
    def __init__(self) -> None:
        self.credential = ManagedIdentityCredential(
            client_id="client-id"
        )
        self.key_vault_url = f"https://my-aks-app-kv.vault.azure.net/"
        self.client = SecretClient(
            vault_url=self.key_vault_url,
            credential=self.credential,
            logging_enable=True,
        )

    def get_secret(self, secret):
        secret_response = self.client.get_secret(secret)
        creds = secret_response.value
        return creds
Now for the deployment manifest files.
Starting with the SecretProviderClass, in this case, we can create a secretproviderclass.yaml file under the deploy/common directory.
apiVersion: secrets-store.csi.x-k8s.io/v1
kind: SecretProviderClass
metadata:
  name: azure-kvname
  namespace: automations
spec:
  provider: azure
  parameters:
    usePodIdentity: "false"
    useVMManagedIdentity: "true"
    userAssignedIdentityID: "clientid-from-above"
    keyvaultName: "my-aks-app-kv"
    objects: |
      array:
        - |
          objectName: secret1
          objectType: secret
        - |
          objectName: secret2
          objectType: secret
    tenantId: "tenent-id"
For the deployment.yaml file, we can create a deployment.yaml file under the deploy/common directory. Note that the imagePullSecrets is used to authenticate to the container registry, and it is created from the early step by kubectl create secret docker-registry acr-secret.
The file can look like this:
apiVersion: apps/v1
kind: Deployment
metadata:
  name: my-aks-app
  labels:
    app: my-aks-app
spec:
  replicas: 1
  selector:
    matchLabels:
      app: my-aks-app
  template:
    metadata:
      labels:
        app: my-aks-app
    spec:
      containers:
        - name: my-aks-app
          image: myaksapp.azurecr.io/my-aks-app:latest
          imagePullPolicy: Always
          resources:
            limits:
              memory: 512Mi
              cpu: 500m
            requests:
              memory: 512Mi
              cpu: 500m
          volumeMounts:
            - name: secrets-store-inline
              mountPath: "/mnt/secrets-store"
              readOnly: true
      volumes:
        - name: secrets-store-inline
          csi:
            driver: secrets-store.csi.k8s.io
            readOnly: true
            volumeAttributes:
              secretProviderClass: "azure-kvname"
      imagePullSecrets:
        - name: acr-secret
Apply SecretProviderClass to the namespace where the pod will be running
kubectl apply -f deploy/common/secretproviderclass.yaml -n automations
Verification for SecretProviderClass
kubectl get secretproviderclass azure-kvname -n automations -o json
For the actual deployment, we will be using skaflold. Our skaffold.yaml can look like this:
apiVersion: skaffold/v2beta28
kind: Config
metadata:
  name: my-aks-app
build:
  tagPolicy:
    envTemplate:
      template: "{{.IMAGE_NAME}}:lastest"
  artifacts:
  - image: myaksapp.azurecr.io/my-aks-app
    context: .
    docker:
      dockerfile: Dockerfile
      noCache: true
deploy:
  kubeContext: myAKSCluster
  kustomize:
    paths:
    - deploy/common
profiles:
- name: production
  deploy:
    kustomize:
      paths:
      - deploy/production
And to deploy the application, we can run the following command:
kubectl config use-context myAKSCluster
skaffold run -p production -v info
To verify the deployment
kubectl get pods -n automations

And that’s it! You have successfully deployed a python application on Azure Kubernetes Service (AKS).
Thank you for reading and have a nice day!