
To follow along this blog post, the repo is here
Introduction
I have a couple of previous blog post that talks about my journey in building chat bots with Webex and Discord, and using them as an AI assistant with the combination of LLM. In th past, I have also built chat bots on various other platforms like Line, Telegram, Slack, and WhatsApp.
With the current popularity of LLM, one way to interact with the model is through chat bots.
In this blog post, I will share with you the step by step guide to building a simple function chat bot on various platforms, and hopefully by the end of the post, you will be able to take away some ideas on how to build your own chat bot on your preferred platform and integrate with your own AI model!
I will go through the steps of setting up chat bots on the following platforms: Discord, Line, Slack, Telegram, Webex and WhatsApp.
The complete code for this blog post is here.
Discord
Step 1: Create a Discord Bot
To do so, we will have to create a Discord bot on the Discord Developer Portal.
Go on to the Discord Developer Portal and click on the "New Application" button. Give your application a name and click on the "Create" button.

Step 2: Code implementation with Python
There are various discord libraries that you can use to build your bot. In this example, I will be using the pycord library.
To follow along, you can find the code implementation on my GitHub.
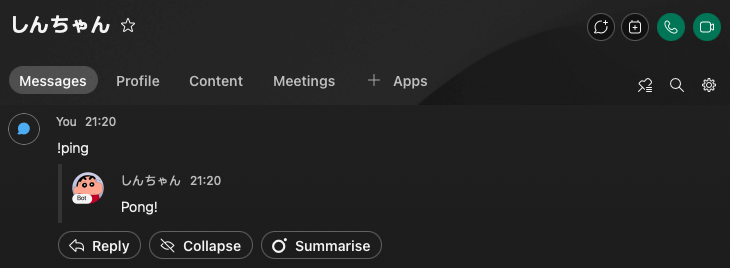
The below code is a simple implementation of a Discord bot that listens to a !ping command and responds with a Pong! message.
It shows how to create a normal command and a slash command.
from settings import app_config
from discord.ext import commands
import discord
import logging

logger = logging.getLogger(__name__)


status = discord.Status.online

bot = commands.Bot(
    command_prefix="!",
    intents=discord.Intents.all(),
    activity=discord.Activity(
        type=discord.ActivityType.competing, name="/help"
    ),
)


@bot.event
async def on_ready():
    logger.info(f"We have logged in as {bot.user}")


@bot.command(help="Simple ping command")
async def ping(ctx, *, args):
    received_msg = "".join(args)

    logger.info(f"Received message: {received_msg} from user {ctx.author} ")

    await ctx.send("Pong!")


@bot.slash_command(
    name="ping",
    guild_ids=[app_config.DC_SER_ID],
    description="Ping slash command",
)
async def ping(ctx):
    await ctx.defer()
    await ctx.respond("Pong!")
For further setup and production deploy, you can refer to my previous blog post on how I integrate the Discord bot with GCP Vertex AI and the corresponding code base on my GitHub here.
Line
Step 1: Create a Line Bot
To do so, we will have to create an application on the Line Developer Console.
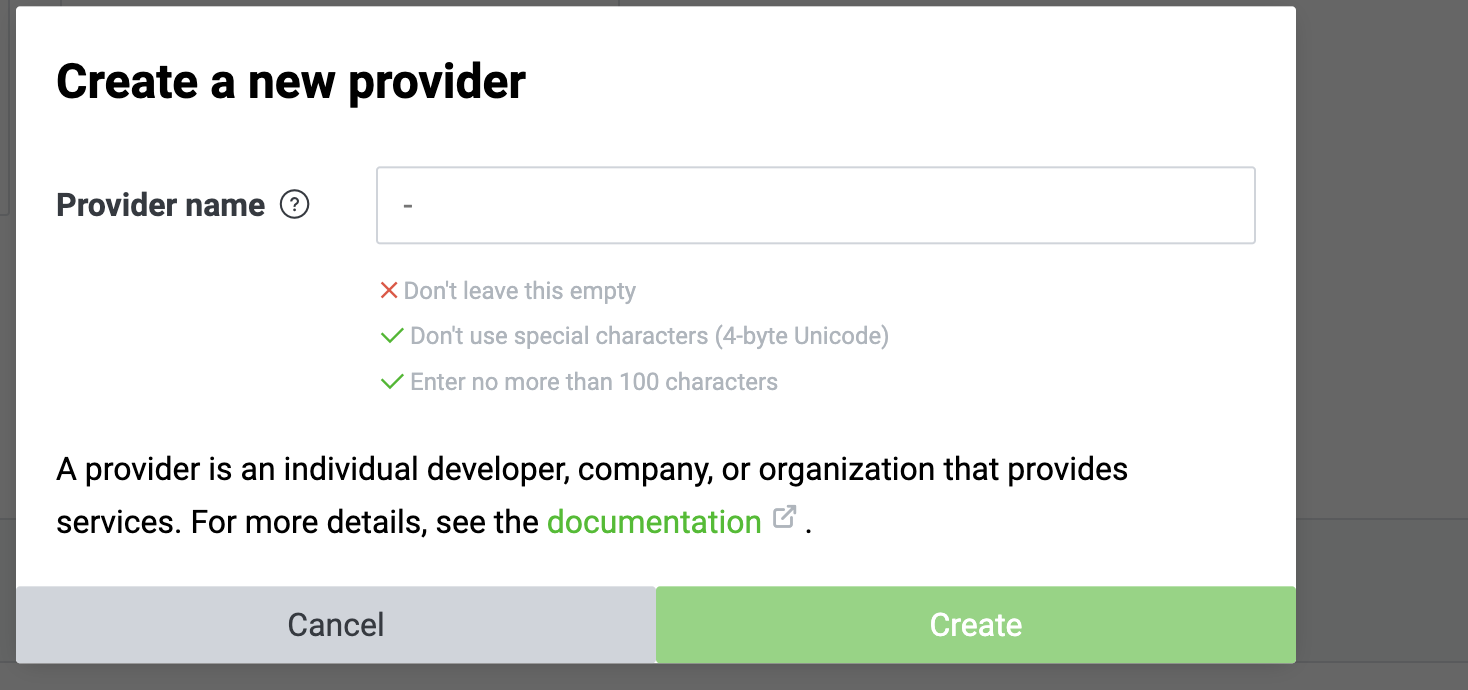
1 - Create a provider. Click on the "Create Provider" button and fill in the necessary details.
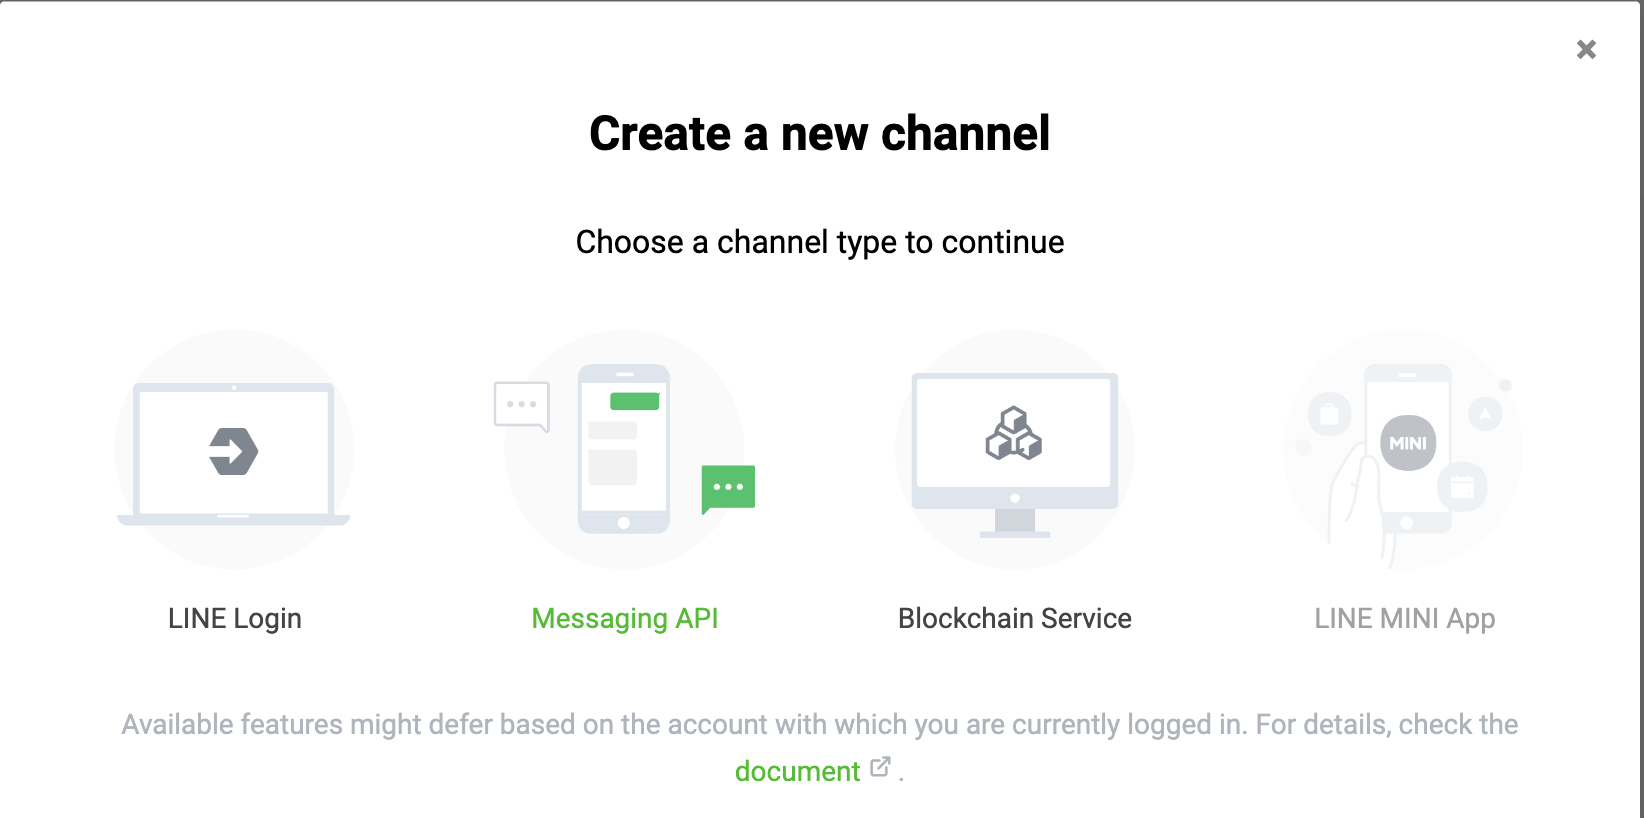
2 - Click on the "Create New Channel" button, you will see there are different channel type, in our case, to create a Line bot, we will select the "Messaging API" channel type.
3 - Fill in the necessary details for our channel.
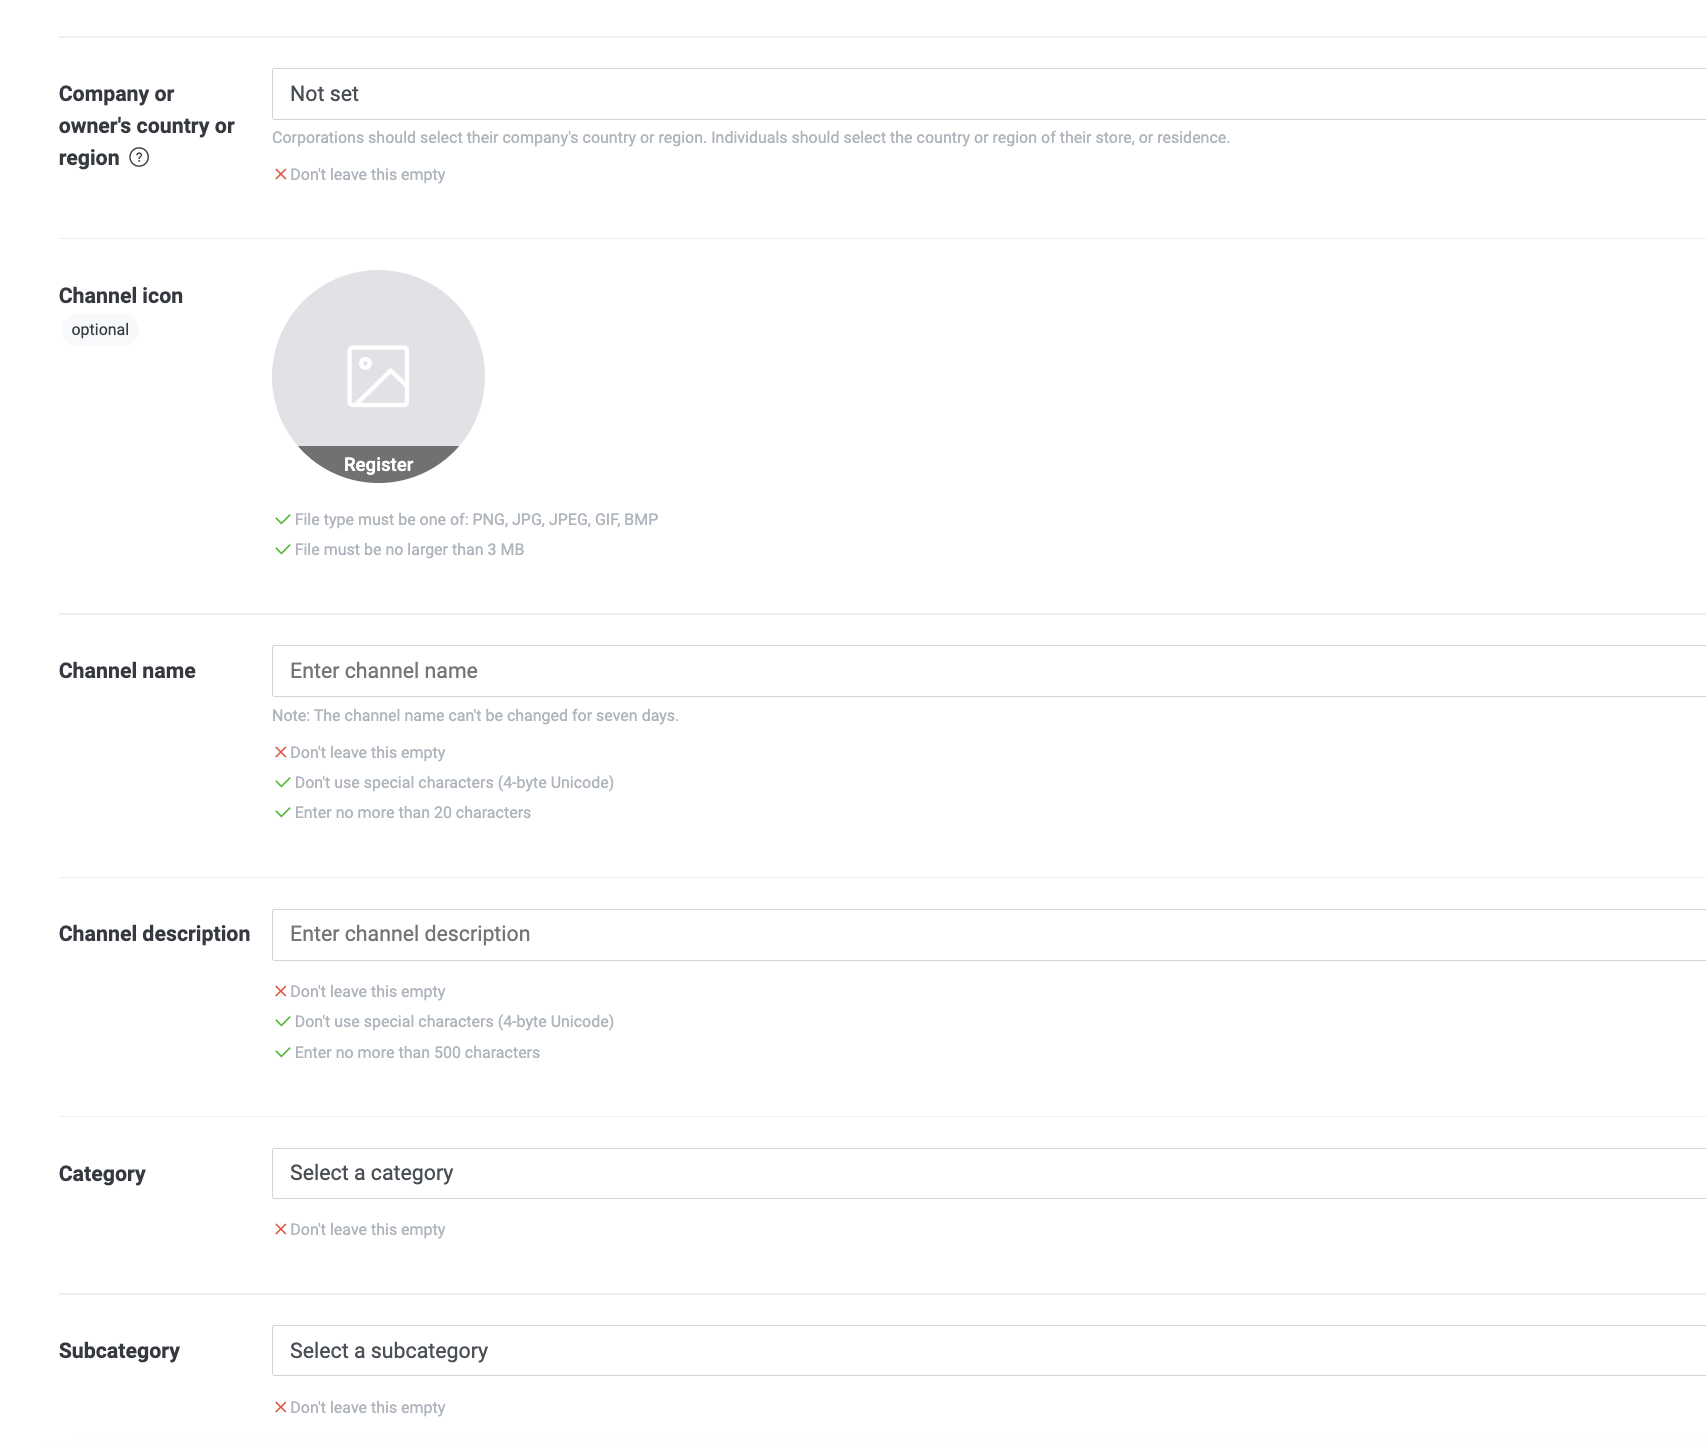
4 - After creating the channel, you will be able to see the some of the basic information of the channel.
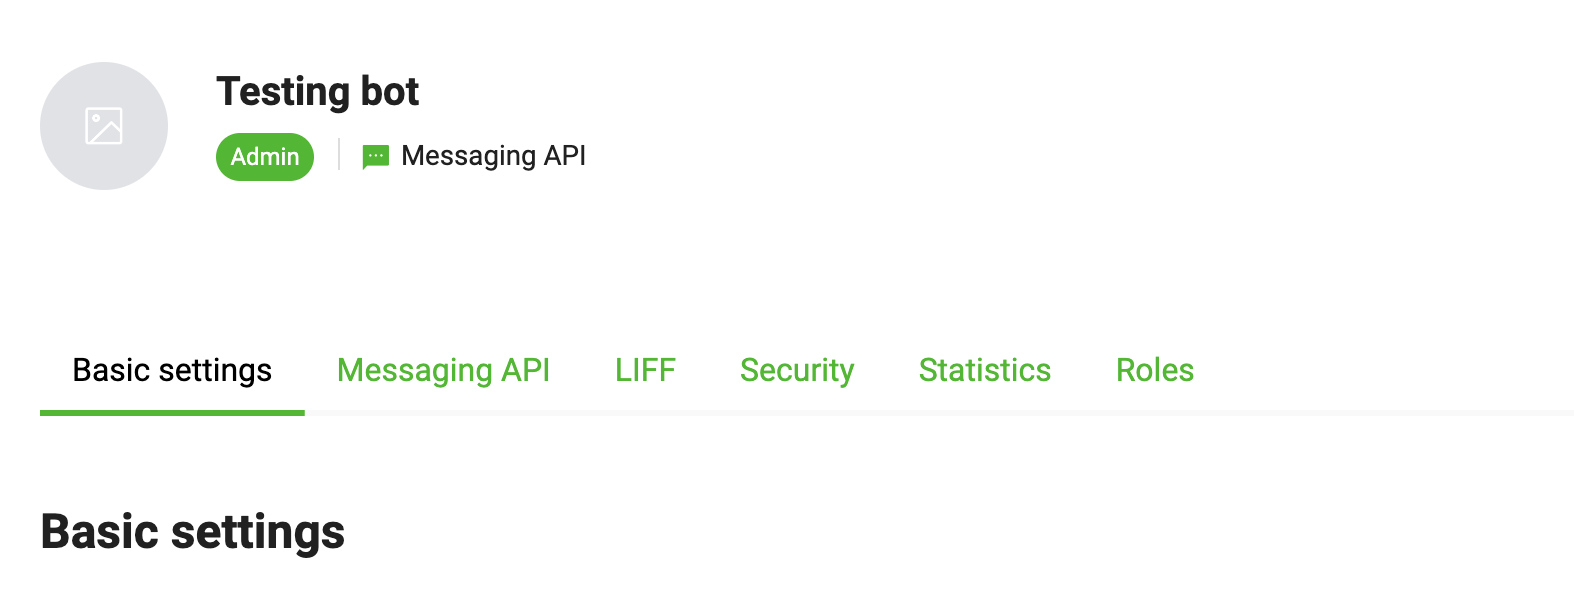
If we navigate to Basic settings, we will be able to see the Channel Secret, and under messaging API, we will be able to see the Channel Access Token and the field to add a webhook URL.
We will need these information to authenticate our bot.
Step 2: Code implementation with Python
We can use either Flask or FastAPI to create a webhook server to listen to the incoming messages from Line.
For this example, I will be using FastAPI and deploy the webhook server on GCP Cloud Run.
If you are interested in Flask implementation, you can refer to my old repo that I have created a Line bot with Flask and use ngrok for webhook during local development here.
To follow along, you can find the code implementation on my GitHub.
In the below code, I have created a simple webhook server that listens to incoming messages from Line and responds with a Pong! message when the user sends a !ping message, and if the user sends any other message, the bot will echo back with the same message.
from fastapi import FastAPI, HTTPException, Request

from linebot.v3.webhook import WebhookParser
from linebot.v3.messaging import (
    AsyncApiClient,
    AsyncMessagingApi,
    Configuration,
    ReplyMessageRequest,
    TextMessage,
)
from linebot.v3.exceptions import InvalidSignatureError
from linebot.v3.webhooks import (
    MessageEvent,
    TextMessageContent,
)

from settings import app_config
from os import getenv
import google.cloud.logging
import logging


if (env := getenv("ENV")) and env == "prod":
    client = google.cloud.logging.Client()
    client.setup_logging()

logging.basicConfig(
    level=logging.INFO,
    format="[%(asctime)s] {%(filename)s:%(lineno)d} %(name)s - %(message)s",
)
logger = logging.getLogger(__name__)

app = FastAPI()

channel_secret = app_config.LINE_CHANNEL_SECRET
channel_access_token = app_config.LINE_TOKEN

configuration = Configuration(access_token=channel_access_token)

async_api_client = AsyncApiClient(configuration)
line_bot_api = AsyncMessagingApi(async_api_client)
parser = WebhookParser(channel_secret)


@app.get("/health")
async def health():
    return "ok"


@app.post("/line/events")
async def handle_callback(request: Request):
    signature = request.headers["X-Line-Signature"]

    body = await request.body()
    body = body.decode()

    try:
        events = parser.parse(body, signature)
    except InvalidSignatureError:
        raise HTTPException(status_code=400, detail="Invalid signature")

    for event in events:
        logging.info(event)
        if not isinstance(event, MessageEvent):
            continue
        if not isinstance(event.message, TextMessageContent):
            continue

        if event.message.text == "!ping":
            await line_bot_api.reply_message(
                ReplyMessageRequest(
                    reply_token=event.reply_token,
                    messages=[TextMessage(text="pong!")],
                )
            )
        else:
            await line_bot_api.reply_message(
                ReplyMessageRequest(
                    reply_token=event.reply_token,
                    messages=[TextMessage(text=event.message.text)],
                )
            )

    return "OK"
To deploy our webhook server on GCP Cloud Run, we will need to create a Dockerfile, skaffold.yaml and a service.yaml
Dockerfile
FROM python:3.10-slim

WORKDIR /usr/src/app

ENV PYTHONUNBUFFERED=1 \
    PYTHONDONTWRITEBYTECODE=1 \
    POETRY_VERSION=1.7.1 \
    USERNAME=nonroot

RUN adduser $USERNAME
USER $USERNAME

ENV HOME=/home/$USERNAME
ENV PATH="$HOME/.local/bin:$PATH"

RUN pip install pipx
RUN pipx install poetry==${POETRY_VERSION}

COPY ./poetry.lock pyproject.toml /usr/src/app/
RUN poetry install -nv --no-root

COPY creds creds
COPY app .
CMD ["poetry", "run", "uvicorn", "main:app", "--host", "0.0.0.0", "--port", "80"]
skaffold.yaml
apiVersion: skaffold/v4beta2
kind: Config
metadata:
  name: line-bot-fastapi-app
build:
  artifacts:
  - image: us-central1-docker.pkg.dev/gcp-prj-123/my-app/line-bot-fastapi-app
    docker:
      dockerfile: Dockerfile
    platforms:
      - "linux/amd64"
profiles:
- name: production
  manifests:
    rawYaml:
    - deploy/production/service.yaml
deploy:
  cloudrun:
    projectid: gcp-prj-123
    region: us-central1
service.yaml
apiVersion: serving.knative.dev/v1
kind: Service
metadata:
  name: line-bot-fastapi-app
spec:
  template:
    spec:
      serviceAccountName: svc@gcp-prj-123.iam.gserviceaccount.com
      containers:
      - image: us-central1-docker.pkg.dev/gcp-prj-123/my-app/line-bot-fastapi-app
        ports:
        - name: http1
          containerPort: 80
        env:
        - name: GCP_PROJECT_ID
          value: gcp-prj-123
        - name: ENV
          value: prod
After setting up all the necessary files, we can deploy our webhook server on GCP Cloud Run by running the following command:
skaffold run -p production -v info
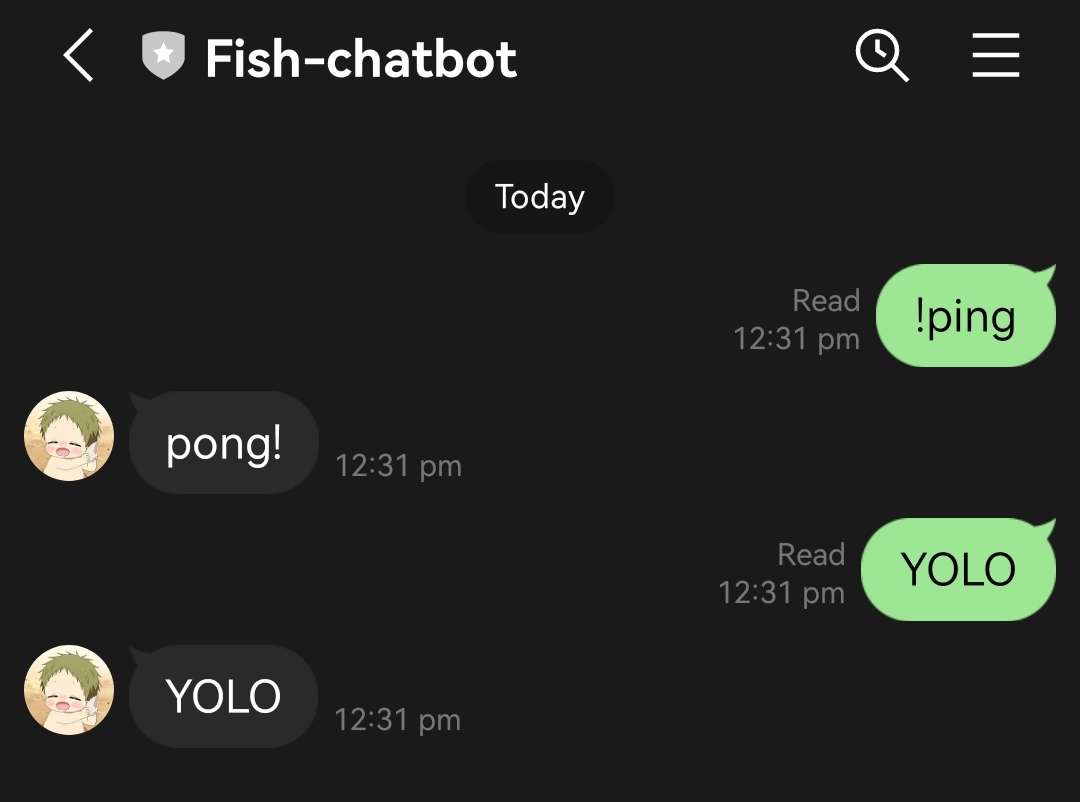
And here is the result of the Line bot responding to our message.
Slack
Step 1: Create a Slack Bot
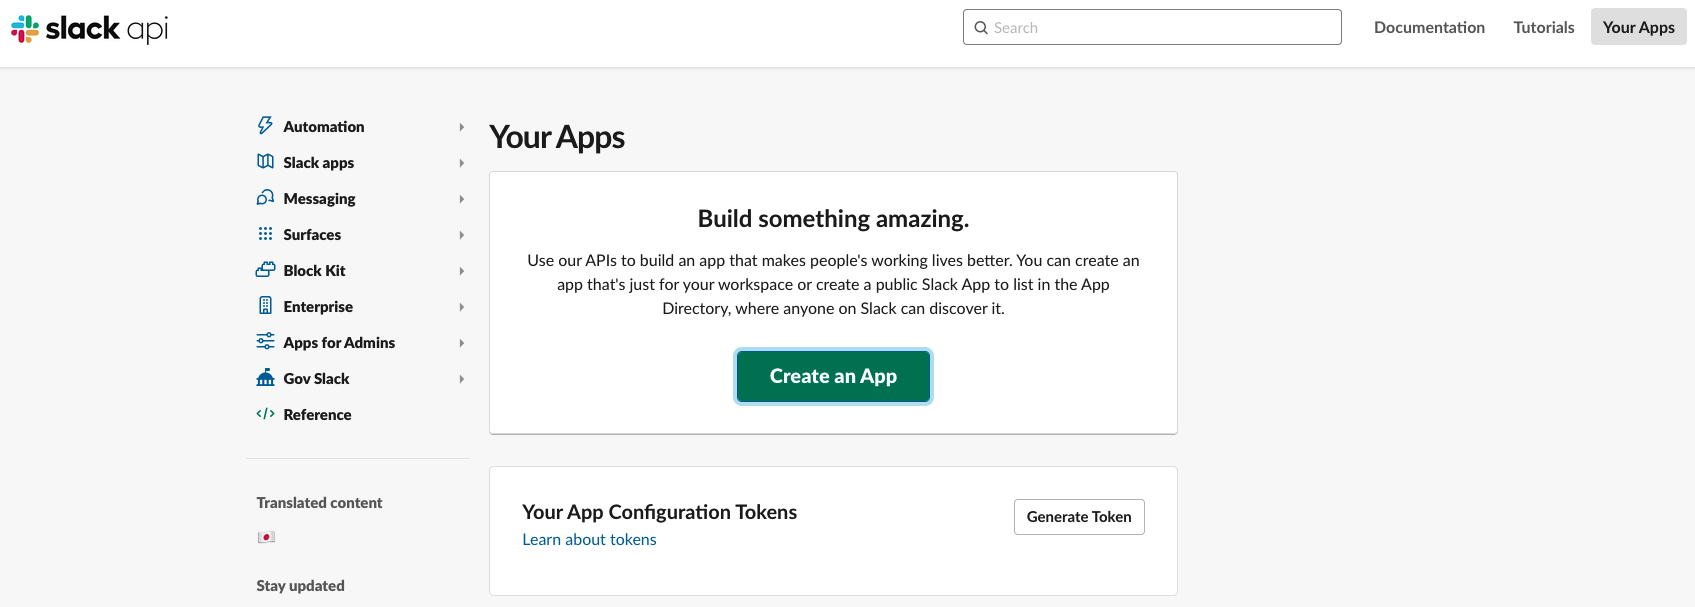
1 - Create a Slack bot on the Slack API page.
2 - Start with Create an App
3 - Select From scratch
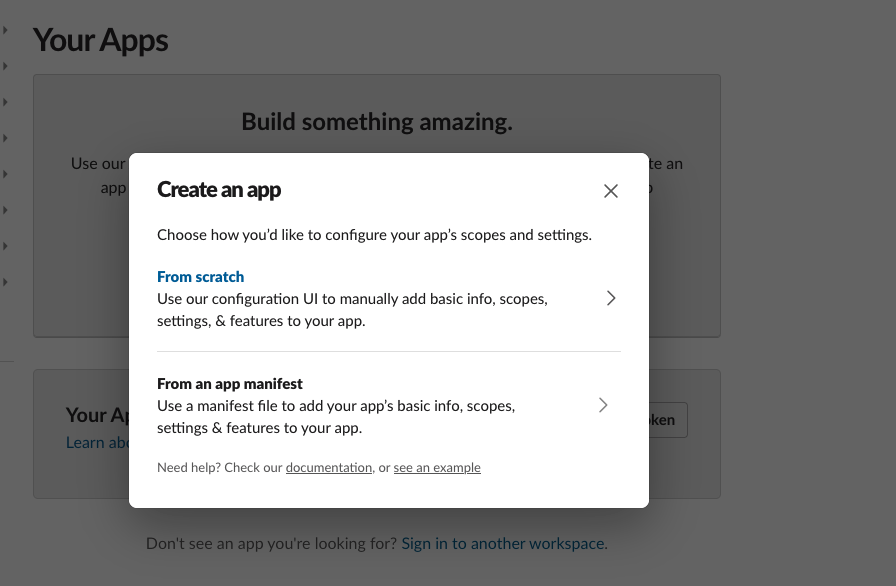
After setting up, you will see this page.
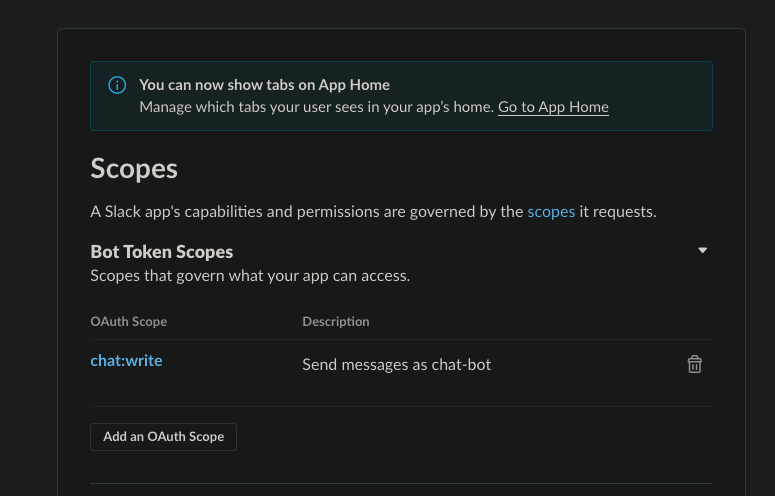
4 - Under OAuth & Permissions, you will be able to see the Bot Token Scopes, you can add the necessary scopes for your bot to interact with the Slack workspace, at the minimum, you will need the chat:write scope to send messages to the workspace.
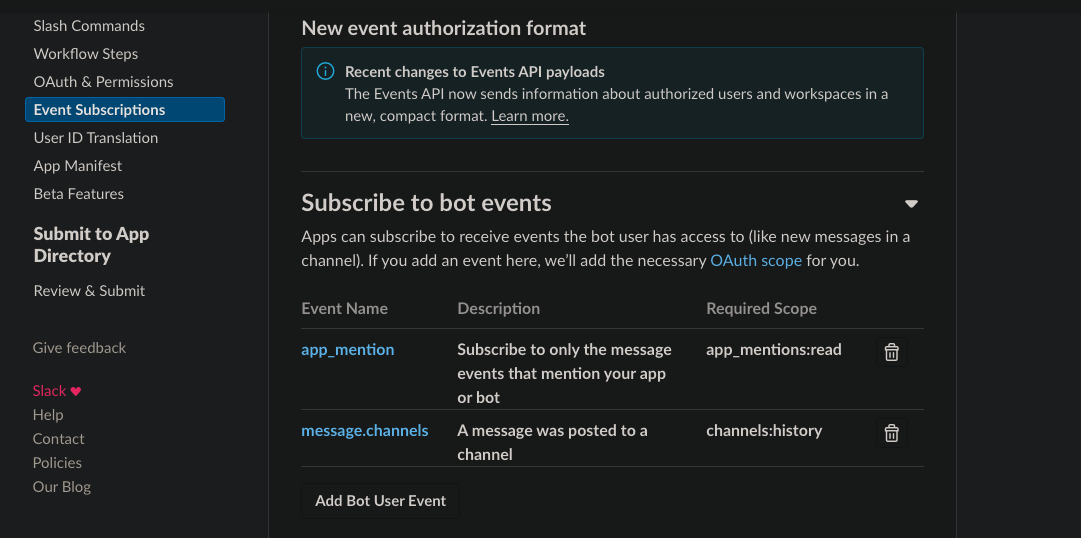
5 - On event subscriptions, you can subscribe to the necessary events that you want the bot to listen to, in our case, we will be subscribing to the message.channels and app_mention event.
6 - Install the app to your workspace.
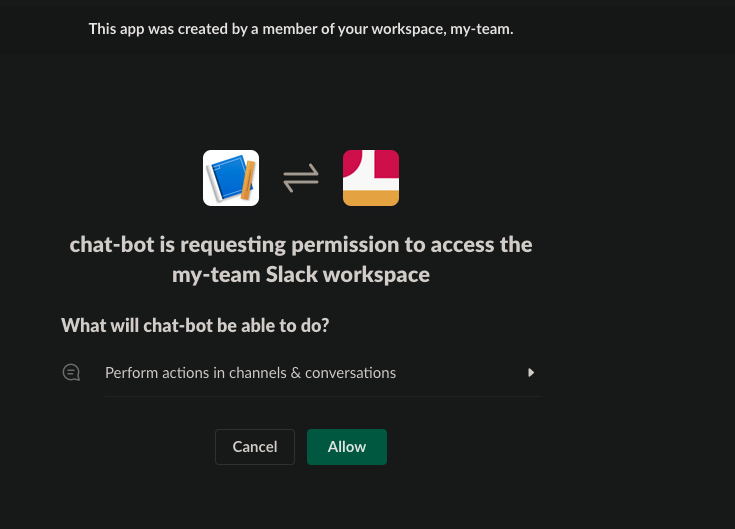
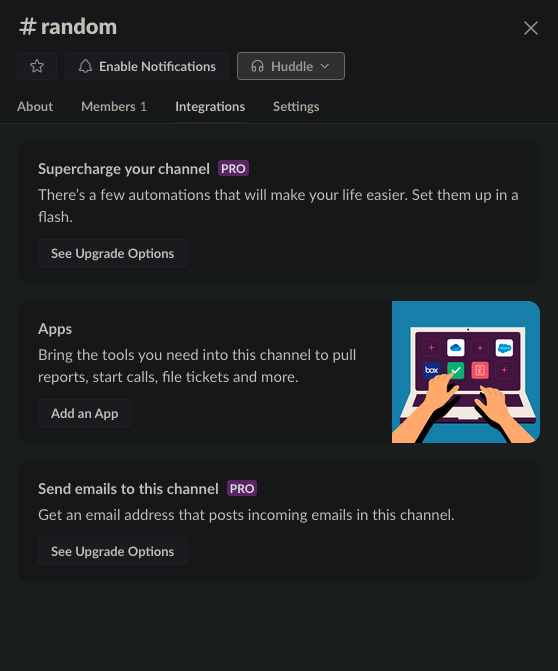
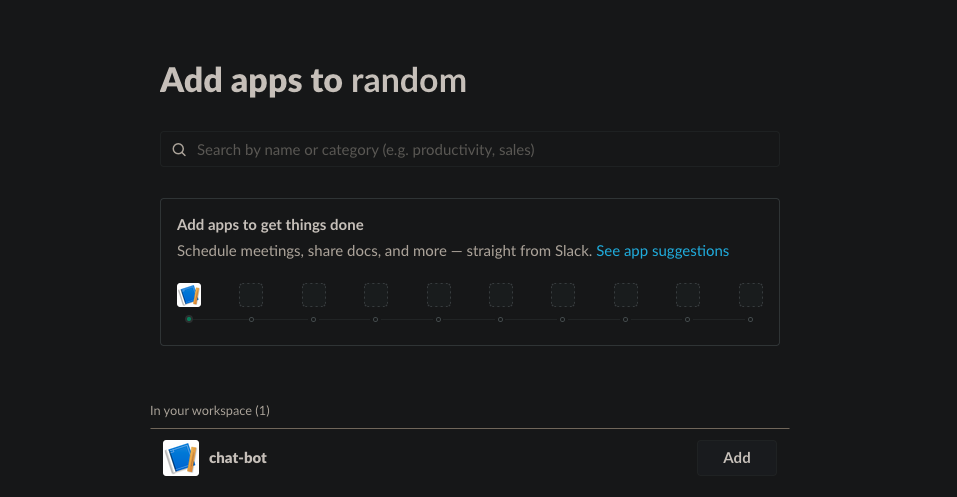
7 - On the slack channel, click on Add an App to add the bot to the channel that you want the bot to listen to.
Confirming adding the bot to the channel.
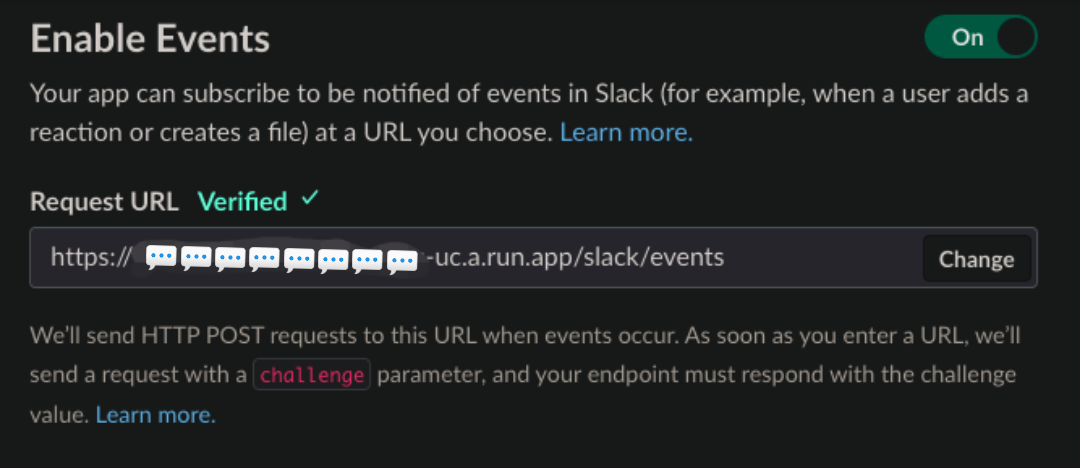
8 - Add the webhook URL to the event subscription. To add the webhook URL, Slack will send a verification request to the URL, you will need to respond with the challenge code to verify the URL.
An example of the verification code is as below:
if body.get("type") == "url_verification":
        return JSONResponse(
            content={"challenge": body.get("challenge")}, status_code=200
        )
Step 2: Code implementation with Python
Slack uses webhooks to subscribe to events and send messages to the bot, here we will be using the FastAPI to create a webhook server to listen to the incoming messages from Slack, the setup is similar to the Line bot and the service will be deployed on GCP Cloud Run. Again, we can use ngrok for local development.
To follow along, you can find the code implementation on my GitHub.
There is multiple ways to interact with the slack bot, you can use the slack_bolt library, or you can use the requests library to send messages to the Slack workspace.
1 - Implementation of using requests library to send messages to the Slack workspace:
from fastapi import FastAPI, Request, Response
from fastapi.responses import JSONResponse, PlainTextResponse
import httpx

from settings import app_config

from os import getenv
import google.cloud.logging
import logging


if (env := getenv("ENV")) and env == "prod":
    client = google.cloud.logging.Client()
    client.setup_logging()

logging.basicConfig(
    level=logging.INFO,
    format="[%(asctime)s] {%(filename)s:%(lineno)d} %(name)s - %(message)s",
)
logger = logging.getLogger(__name__)

app = FastAPI()

SLACK_BOT_TOKEN = app_config.SLACK_BOT_TOKEN


@app.get("/health")
async def health():
    return "ok"


async def send_message_to_slack(channel_id, message):
    url = "https://slack.com/api/chat.postMessage"
    headers = {
        "Authorization": f"Bearer {SLACK_BOT_TOKEN}",
        "Content-type": "application/json",
    }
    payload = {"channel": channel_id, "text": message}
    async with httpx.AsyncClient() as client:
        await client.post(url, headers=headers, json=payload)


@app.post("/slack/events")
async def handle_events(request: Request):
    body = await request.json()

    if body.get("type") == "url_verification":
        return JSONResponse(
            content={"challenge": body.get("challenge")}, status_code=200
        )

    if body.get("type") == "event_callback":
        event = body.get("event", {})
        logger.info(f"Event: {event}")

        if (
            event.get("type") == "message"
            and "subtype" not in event
            and "bot_id" not in event
        ):
            channel_id = event.get("channel")
            message_text = event.get("text", "")
            user_id = event.get("user")

            logger.info(
                f"Channel ID: {channel_id}\nMessage Text: {message_text}\nUser ID: {user_id}"
            )

            if message_text.strip() == "!ping":
                await send_message_to_slack(channel_id, "pong!")
            else:
                await send_message_to_slack(
                    channel_id, f"{user_id} said: {message_text}"
                )

            return Response(status_code=200)

    return JSONResponse(content={}, status_code=200)
2 - Implementation of using slack_bolt library to interact with the Slack workspace:
from settings import app_config

from fastapi import FastAPI, Request
from slack_bolt import App
from slack_bolt.adapter.fastapi import SlackRequestHandler

from os import getenv
import google.cloud.logging
import logging


if (env := getenv("ENV")) and env == "prod":
    client = google.cloud.logging.Client()
    client.setup_logging()

logging.basicConfig(
    level=logging.INFO,
    format="[%(asctime)s] {%(filename)s:%(lineno)d} %(name)s - %(message)s",
)
logger = logging.getLogger(__name__)


slack_app = App(
    token=app_config.SLACK_BOT_TOKEN,
    signing_secret=app_config.SLACK_SIGNING_SECRET,
)

handler = SlackRequestHandler(slack_app)

app = FastAPI()


@slack_app.event("message")
def handle_message_events(body, say, logger):
    logger.info(body)
    event = body.get("event", {})

    if "bot_id" in event:
        return

    text = event.get("text", "").strip()
    user_id = event.get("user")

    if text == "!ping":
        say("pong!")
    else:
        say(f"<@{user_id}> said: {text}")


@app.post("/slack/events")
async def endpoint(req: Request):
    return await handler.handle(req)


@app.get("/health")
async def health():
    return "ok"
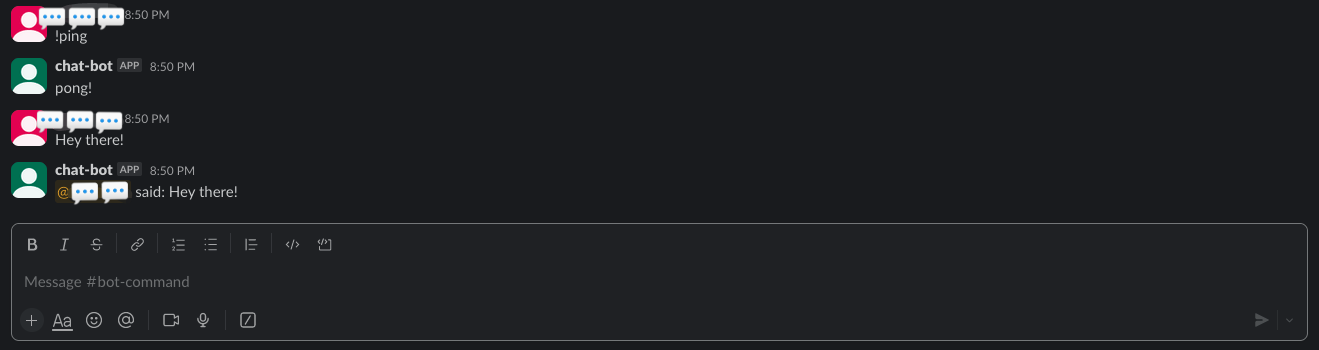
Both of the code implementation will be able to interact with the Slack workspace in the same way.
The below is the result of the Slack bot responding to the message.
Telegram
Step 1: Create a Telegram Bot
To create a Telegram bot, you will need to create a bot with BotFather on Telegram.
1 - Initiate a chat with BotFather and type /newbot to create a new bot, and follow the instructions to create a new bot. You will be given a token to authenticate your bot.

Step 2: Code implementation with Python
Similar to Discord, there is a lot of libraries that you can use to create a Telegram bot, in this example, I will be using the python-telegram-bot library.
from telegram import Update
from telegram.ext import filters, MessageHandler, ApplicationBuilder, CommandHandler, ContextTypes

from settings import app_config

from os import getenv
import google.cloud.logging
import logging


if (env := getenv("ENV")) and env == "prod":
    client = google.cloud.logging.Client()
    client.setup_logging()

logging.basicConfig(
    level=logging.INFO,
    format="[%(asctime)s] {%(filename)s:%(lineno)d} %(name)s - %(message)s",
)
logger = logging.getLogger(__name__)


async def start(update: Update, context: ContextTypes.DEFAULT_TYPE):
    await context.bot.send_message(chat_id=update.effective_chat.id, text="I'm a bot, please talk to me!")


async def ping(update: Update, context: ContextTypes.DEFAULT_TYPE):
    await context.bot.send_message(chat_id=update.effective_chat.id, text="pong!")


async def echo(update: Update, context: ContextTypes.DEFAULT_TYPE):
    await context.bot.send_message(chat_id=update.effective_chat.id, text=update.message.text)

if __name__ == '__main__':
    application = ApplicationBuilder().token(app_config.TELEGRAM_TOKEN).build()

    start_handler = CommandHandler('start', start)
    ping_handler = CommandHandler('ping', ping)
    echo_handler = MessageHandler(filters.TEXT & (~filters.COMMAND), echo)

    application.add_handler(start_handler)
    application.add_handler(ping_handler)
    application.add_handler(echo_handler)

    application.run_polling()
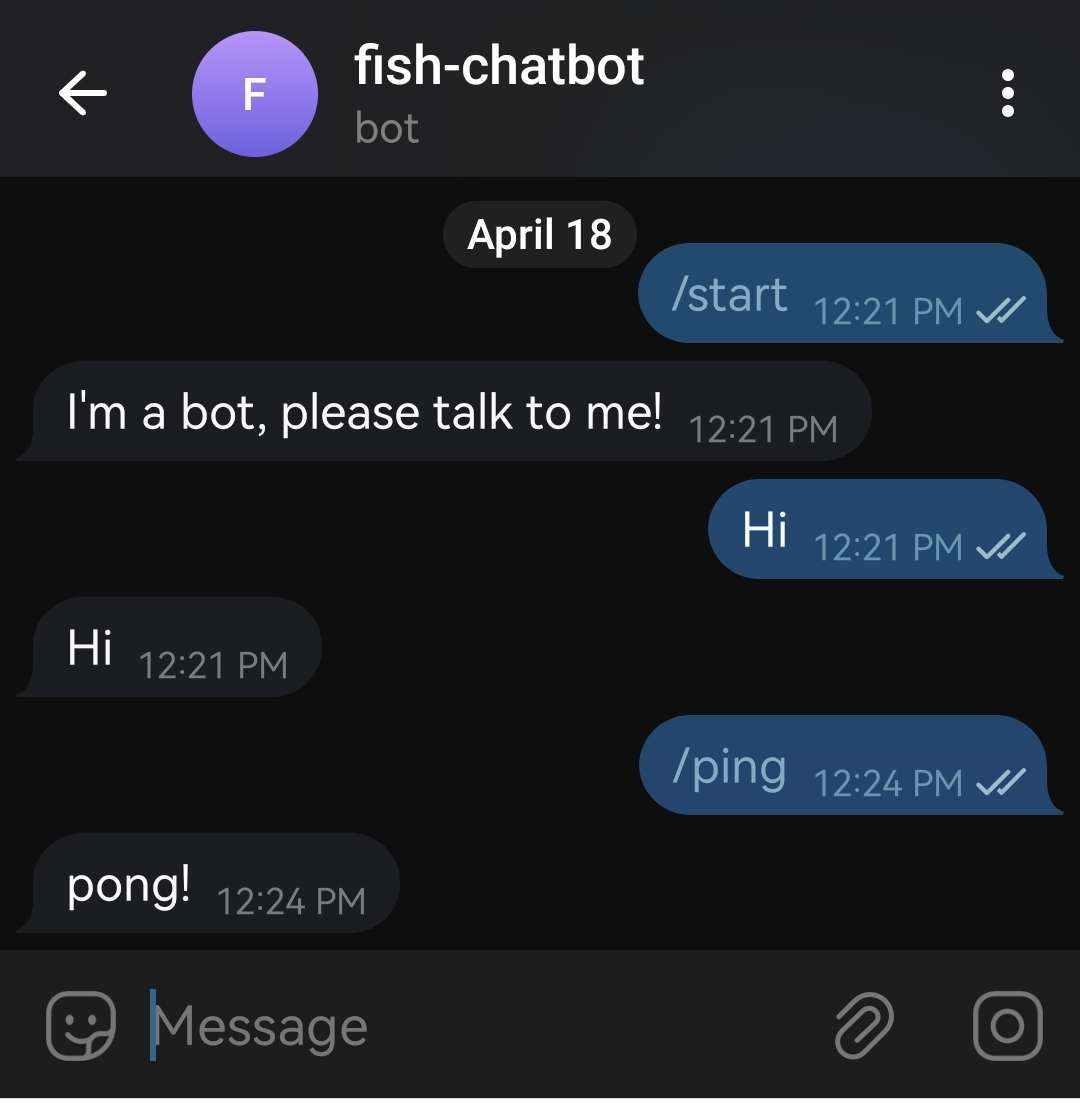
And here is the result of the Telegram bot responding to the message.
Webex
Step 1: Create a Webex Bot
1 - Go to the Webex Developer Portal
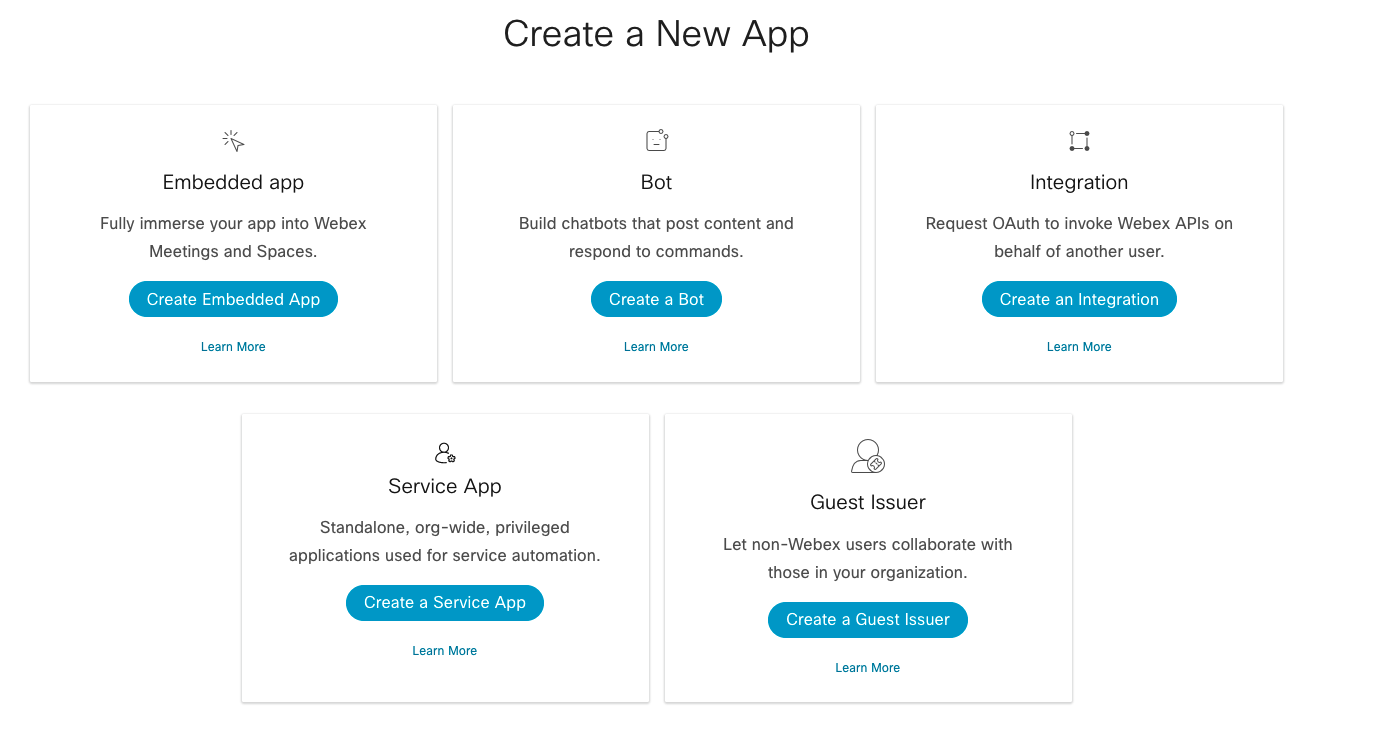
2 - Create a new bot by clicking on My Webex App and then Create a App

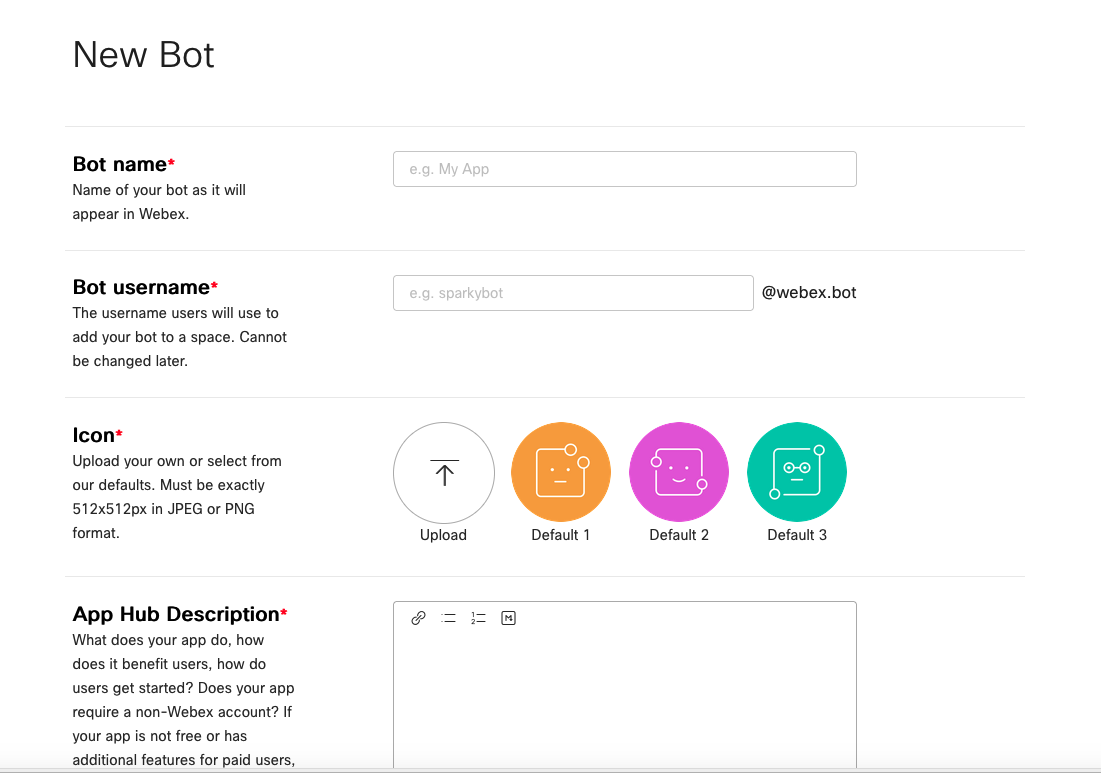
3 - Choose the bot type and fill in the necessary details.
4 - After creating the bot, you will be able to see the bot’s access token, you will need this token to authenticate your bot. You will only be able to see the token once, so make sure to save it somewhere safe.
Step 2: Code implementation with Python
To follow along, you can find the code implementation on my GitHub
We can setup a command.py file to create a command class that will be used to create different commands for the bot.
Below is an example of a Ping command that will respond with a Pong! message when the user sends a !ping command.
from webex_bot.models.command import Command


class Ping(Command):
    def __init__(self):
        super().__init__(
            command_keyword="!ping",
            help_message="!ping - a simple ping command",
            card=None,
        )

    def execute(self, message, attachment_actions, activity):
        return "pong!"
Then in the main.py file, we can create a bot instance and add the command to the bot.
from webex_bot.webex_bot import WebexBot

from commands import *
from settings import app_config
from os import getenv
import logging
import google.cloud.logging

if (env := getenv("ENV")) and env == "prod":
    client = google.cloud.logging.Client()
    client.setup_logging()

logging.basicConfig(
    level=logging.INFO,
    format="[%(asctime)s] {%(filename)s:%(lineno)d} %(name)s - %(message)s",
)
logger = logging.getLogger(__name__)

bot = WebexBot(app_config.WEBEX_TOKEN, approved_users=["user@email.com"])

bot.add_command(Ping())


if __name__ == "__main__":
    bot.run()
And here is the result of the Webex bot responding to the message.
Step 1: Create a WhatsApp Bot
Creating a WhatsApp bot is a bit more complicated than the other platforms
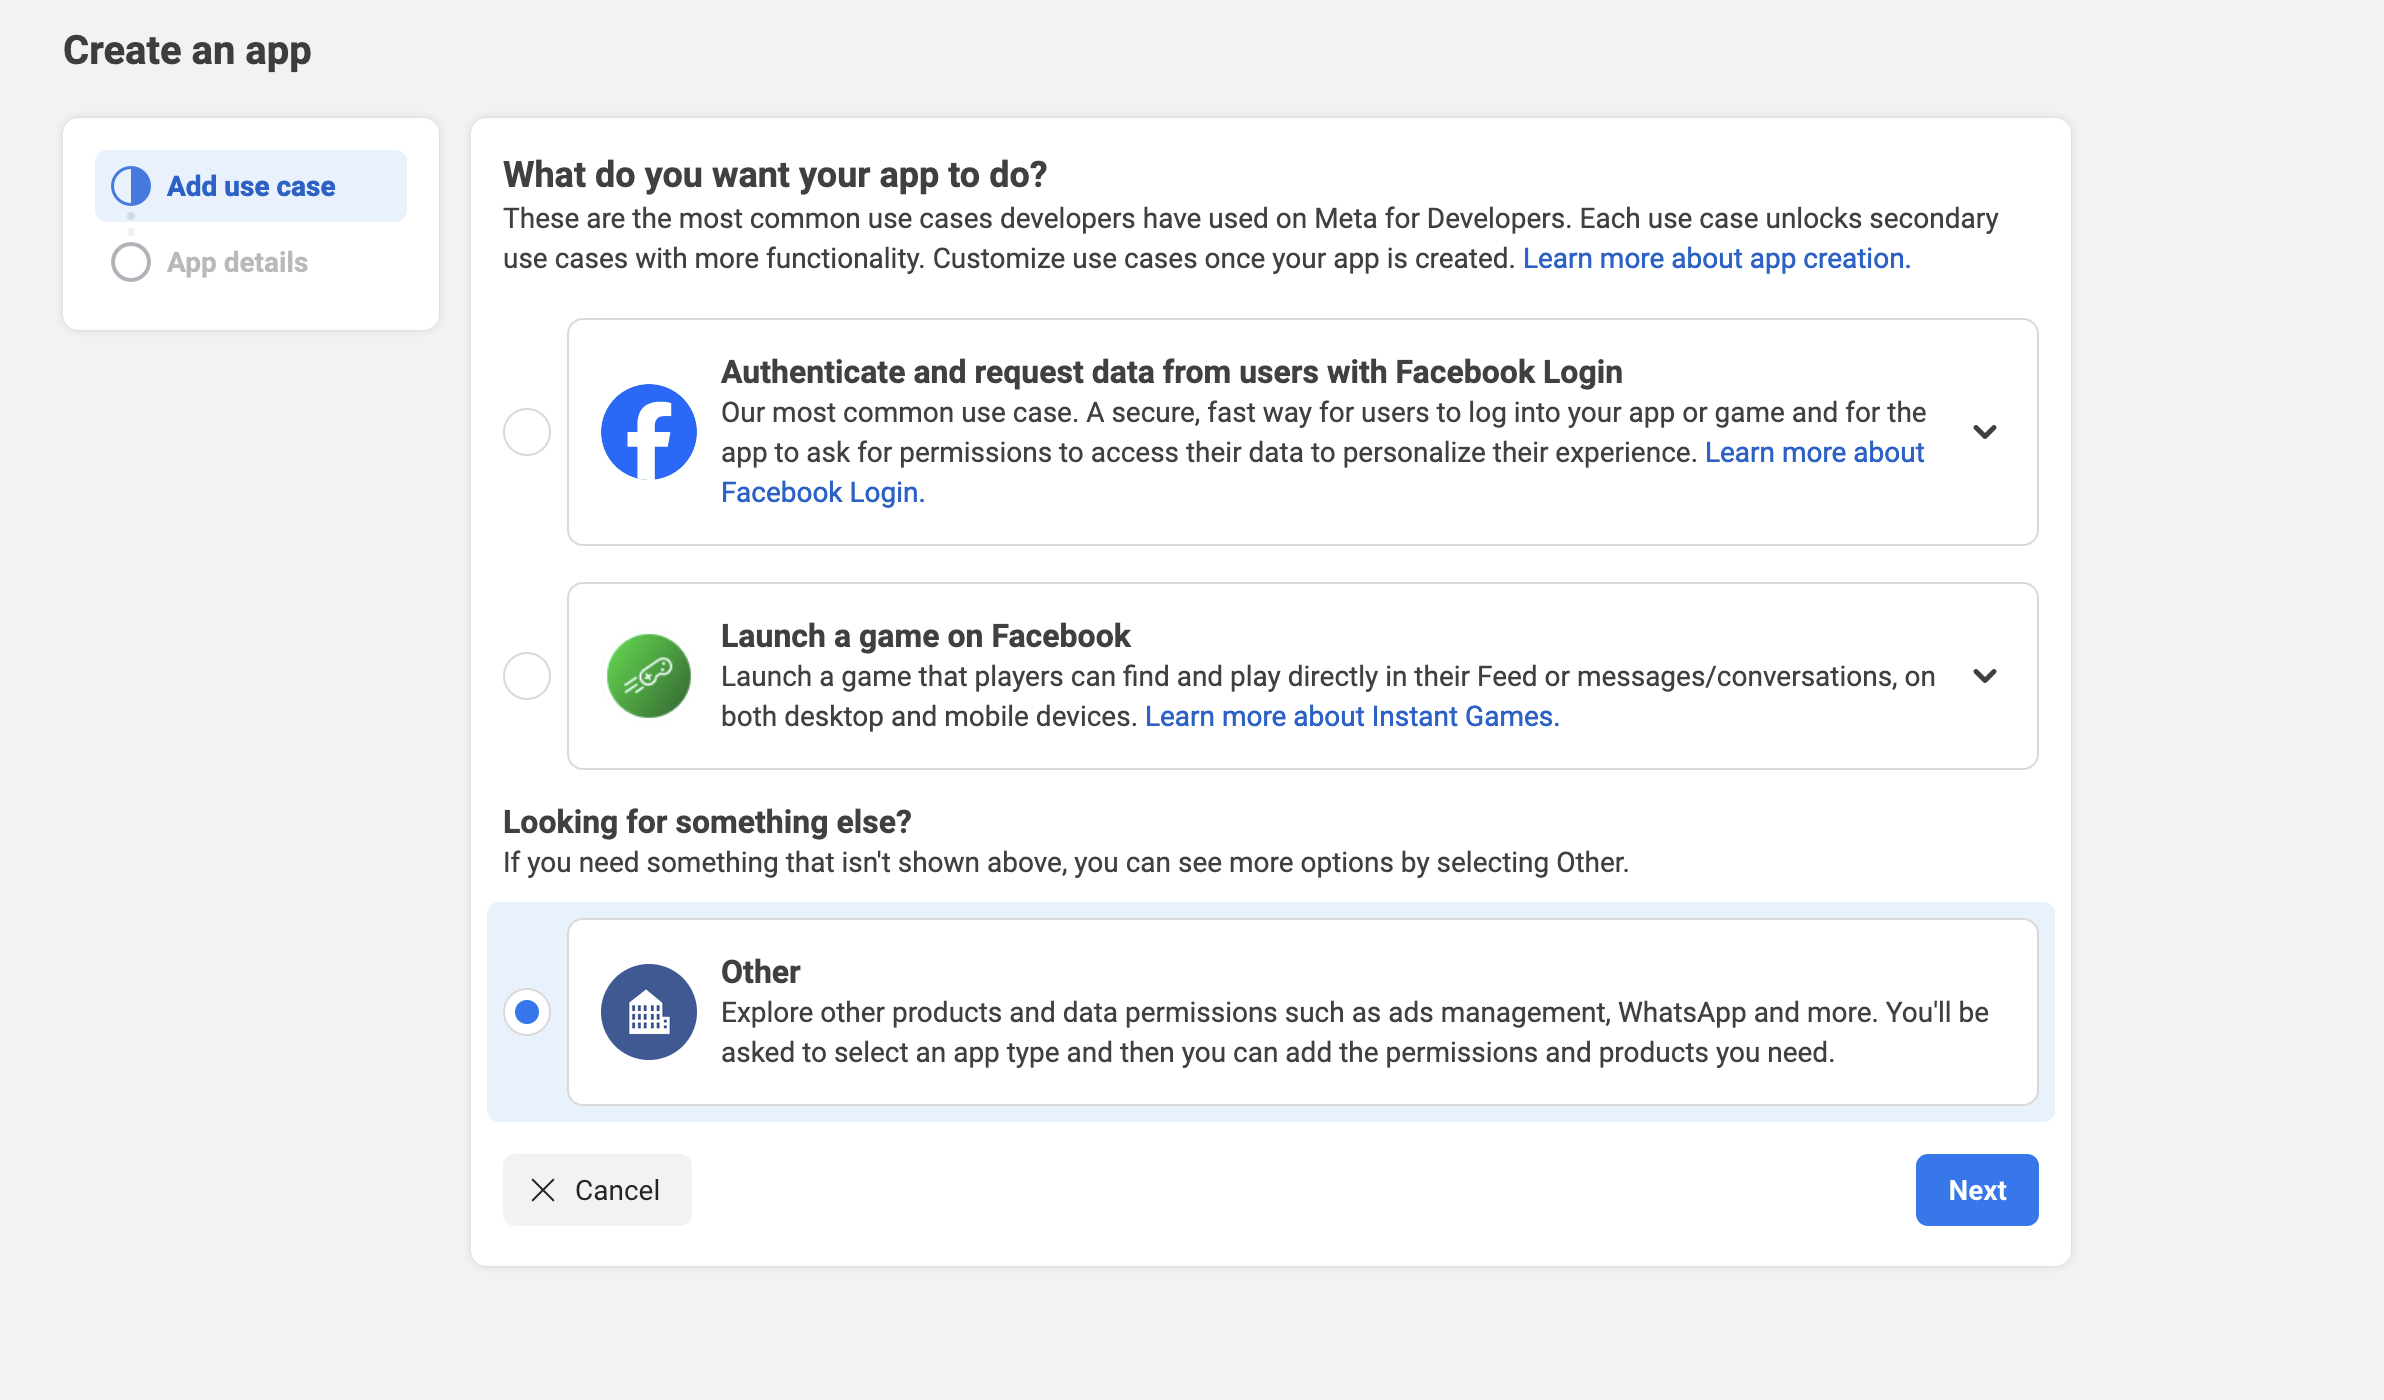
1 - Create an App on Meta Developer Console
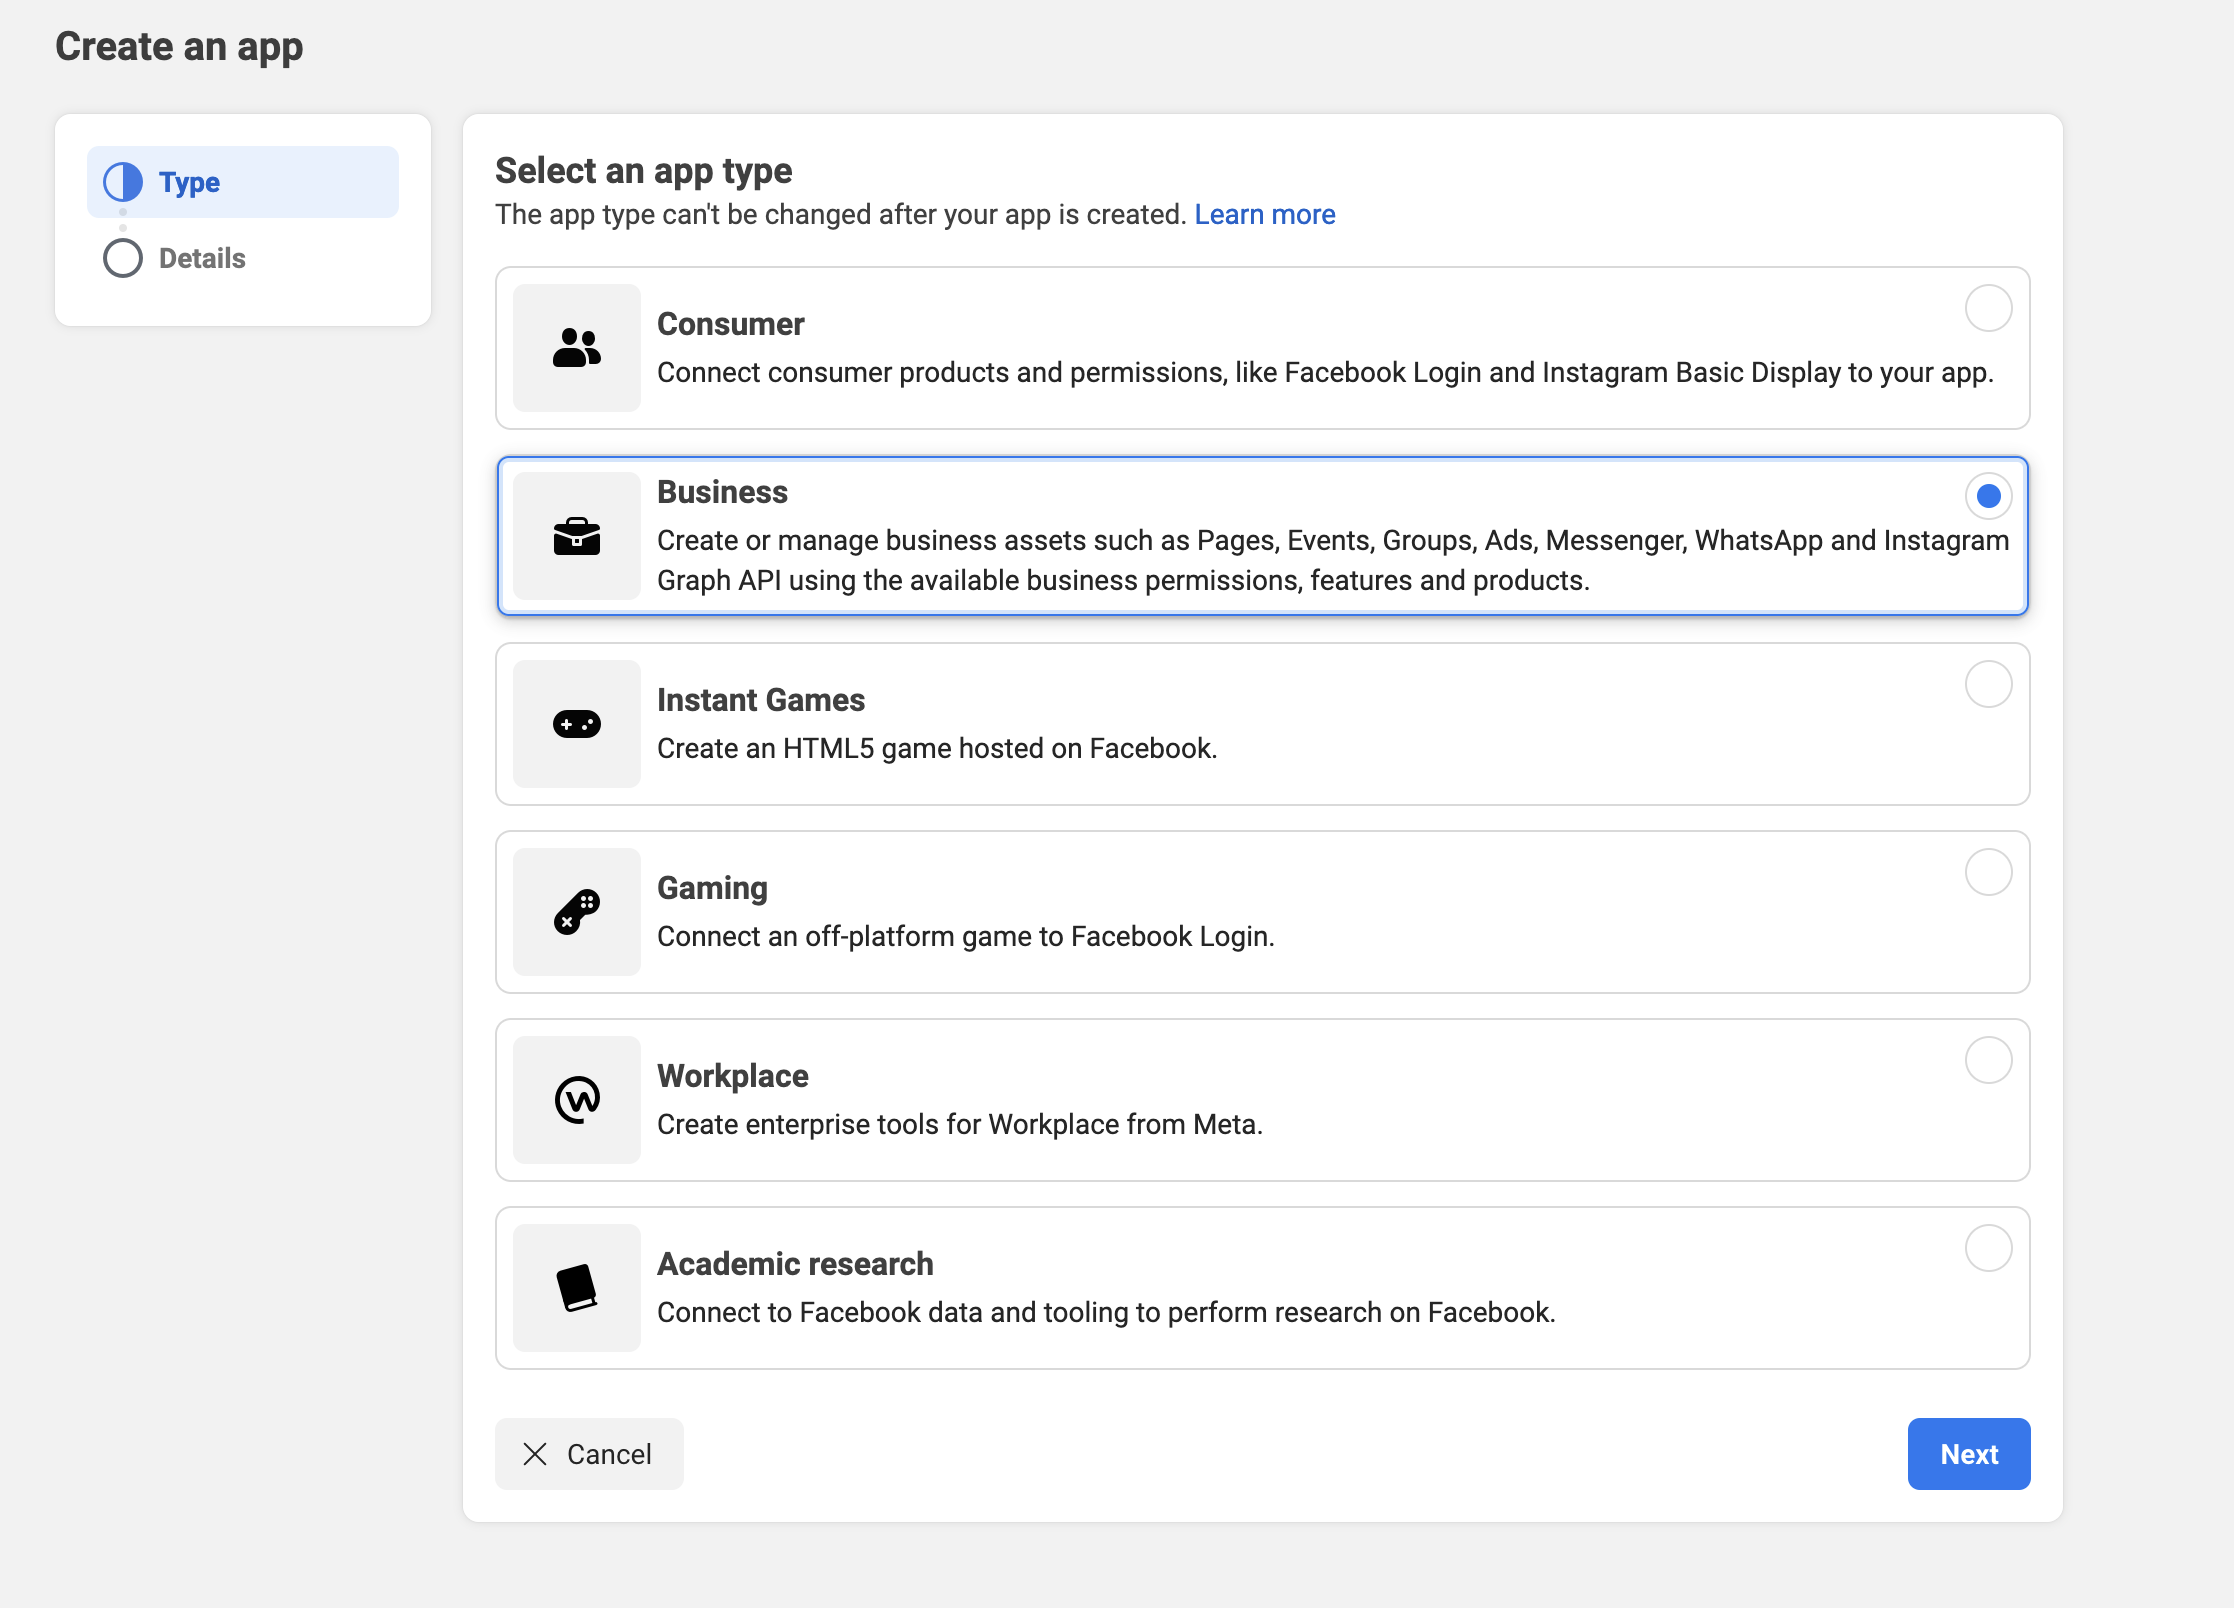
2 - On Add use case, select Other, then choose Business for app type.
3 - Fill in the necessary details for the app.

4 - After filling in all of the information for the app, you will reach a page about Add products to your app

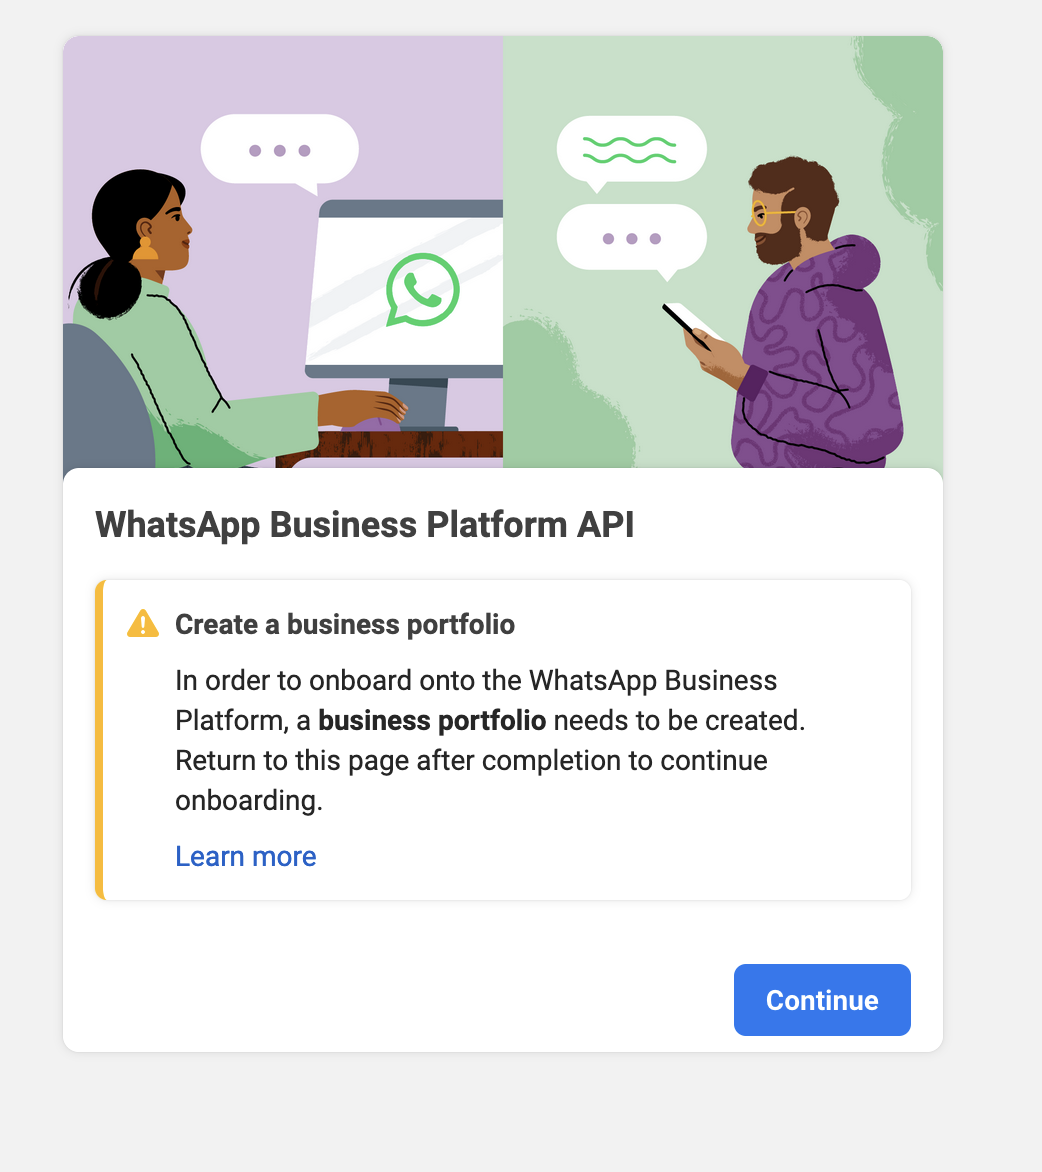
5 - Add product to the app, select WhatsApp Business Platform API
6 - Adding required access to the application. We will first need to create a system users, then add assets to the system user under Apps.
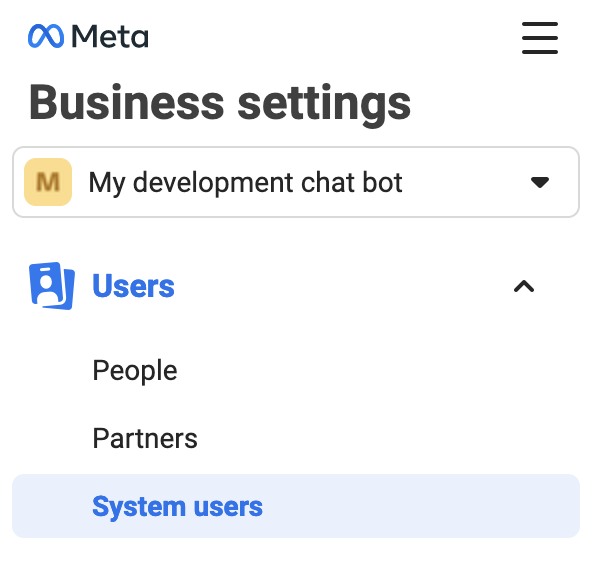
7 - To obtain a long-lived access token, you will need to add assets under the user system we created from the above step.
**NOTE: ** We need to allow ALL of the permissions for the app to be able to send messages to the WhatsApp number, only allowing messaging permissions will not work.
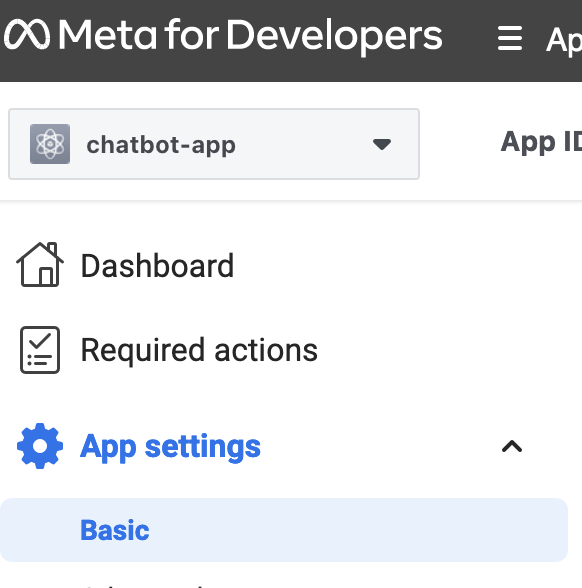
8 - After setting up all of the access, we will have to grab the required config.
For App ID and App Secret, navigate to App Dasboard under Basic of App settings
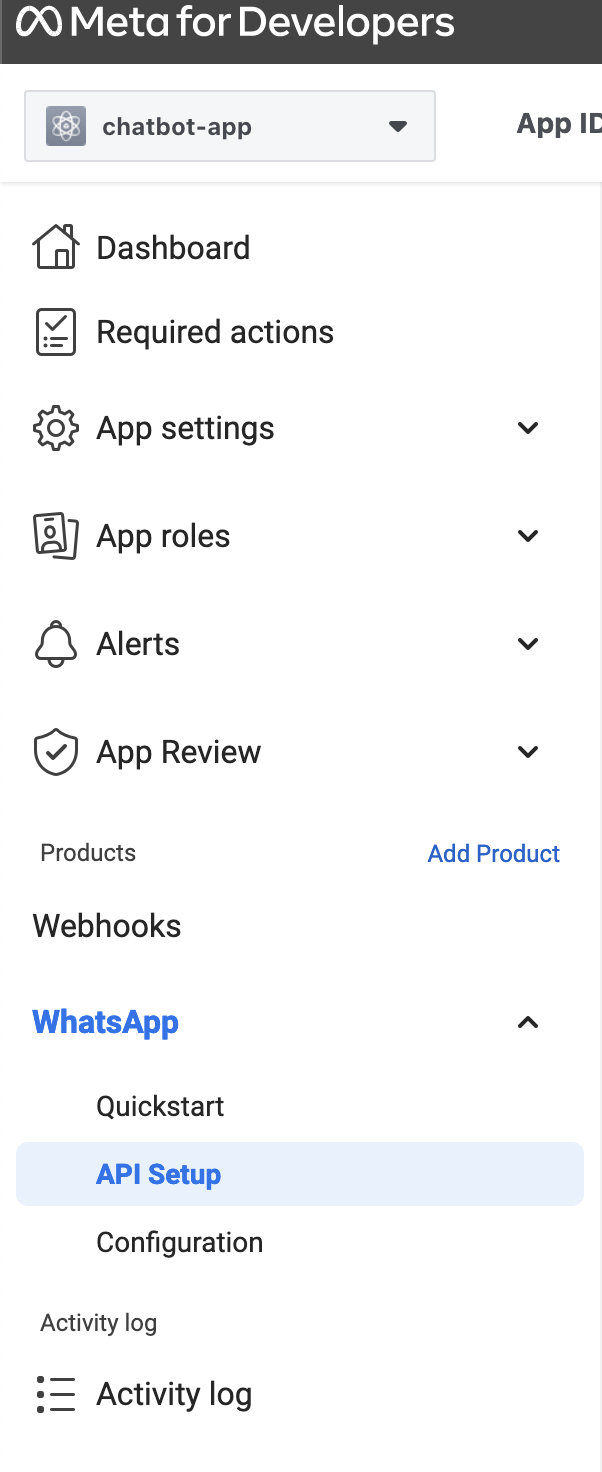
For the phone ID of our bot, we will have to grab it from API Setup under WhatsApp
Step 2: Code implementation with Python
To follow along, you can find the code implementation on my GitHub
Again, because the WhatsApp chat bot is using webhooks to listen to the incoming messages, we can use FastAPI to create a webhook server to listen to the incoming messages from WhatsApp.
We will first define the functions needed to process the response and messages.
The function process_whatsapp_message will process the incoming message and respond with a Pong! message when the user sends a !ping message, otherwise, the bot will echo back the same message.
helpres/whatsappapi.py
import logging
import requests
import json
from settings import app_config


logger = logging.getLogger(__name__)


class Whatsapp:
    def __init__(self) -> None:
        self.ACCESS_TOKEN = app_config.ACCESS_TOKEN
        self.VERSION = app_config.WHATSAPP_API_VERSION
        self.PHONE_NUMBER_ID = app_config.PHONE_NUMBER_ID

    @staticmethod
    def log_http_response(response):
        logger.info(f"Status: {response.status_code}")
        logger.info(f"Content-type: {response.headers.get('content-type')}")
        logger.info(f"Body: {response.text}")

    def send_message(self, data):
        headers = {
            "Content-type": "application/json",
            "Authorization": f"Bearer {self.ACCESS_TOKEN}",
        }

        url = (
            f"https://graph.facebook.com/{self.VERSION}/{self.PHONE_NUMBER_ID}/messages"
        )

        response = requests.post(url, data=data, headers=headers)
        self.log_http_response(response)

    @staticmethod
    def get_text_message_input(recipient, text):
        return json.dumps(
            {
                "messaging_product": "whatsapp",
                "recipient_type": "individual",
                "to": recipient,
                "type": "text",
                "text": {"preview_url": False, "body": text},
            }
        )

    @staticmethod
    def is_valid_whatsapp_message(body):
        return body.get("object") == "whatsapp_business_account" and any(
            "messages" in change.get("value", {})
            for entry in body.get("entry", [])
            for change in entry.get("changes", [])
        )

    def process_whatsapp_message(self, body):
        wa_id = body["entry"][0]["changes"][0]["value"]["contacts"][0]["wa_id"]
        message = body["entry"][0]["changes"][0]["value"]["messages"][0]
        message_body = message["text"]["body"]

        logger.info(
            f"Logs from process_whatsapp_message:"
            f"\nBody:{body}\nWA ID:{wa_id}\nMessage:{message}\nMessage:{message_body}"
        )

        if message_body.strip() == "!ping":
            response = "pong!"
        else:
            response = message_body.strip()

        data = self.get_text_message_input(wa_id, response)
        self.send_message(data)
Then in main.py
from settings import app_config
from helpers.whatsappapi import Whatsapp

from fastapi import FastAPI, HTTPException, Request
from fastapi.responses import JSONResponse

from os import getenv
import google.cloud.logging
import logging


if (env := getenv("ENV")) and env == "prod":
    client = google.cloud.logging.Client()
    client.setup_logging()

logging.basicConfig(
    level=logging.INFO,
    format="[%(asctime)s] {%(filename)s:%(lineno)d} %(name)s - %(message)s",
)
logger = logging.getLogger(__name__)

app = FastAPI()


whatsappapi = Whatsapp()

VERIFICATION_TOKEN = app_config.VERIFICATION_TOKEN

@app.get("/health")
async def health():
    return "ok"


@app.get("/whatsapp/events")
async def verify(request: Request):
    mode = request.query_params.get("hub.mode")
    token = request.query_params.get("hub.verify_token")
    challenge = request.query_params.get("hub.challenge")
    logger.info(f"Mode: {mode}\nToken: {token}\nChallenge: {challenge}")

    if mode == "subscribe" and token == VERIFICATION_TOKEN:
        return JSONResponse(content=int(challenge))
    else:
        raise HTTPException(status_code=403, detail="Verification token mismatch")


@app.post("/whatsapp/events")
async def webhook(request: Request):
    body = await request.json()
    logger.info(f"Logs from webhook\nBody received: {body}")
    if whatsappapi.is_valid_whatsapp_message(body):
        whatsappapi.process_whatsapp_message(body)
    return JSONResponse(content={"status": "received"})
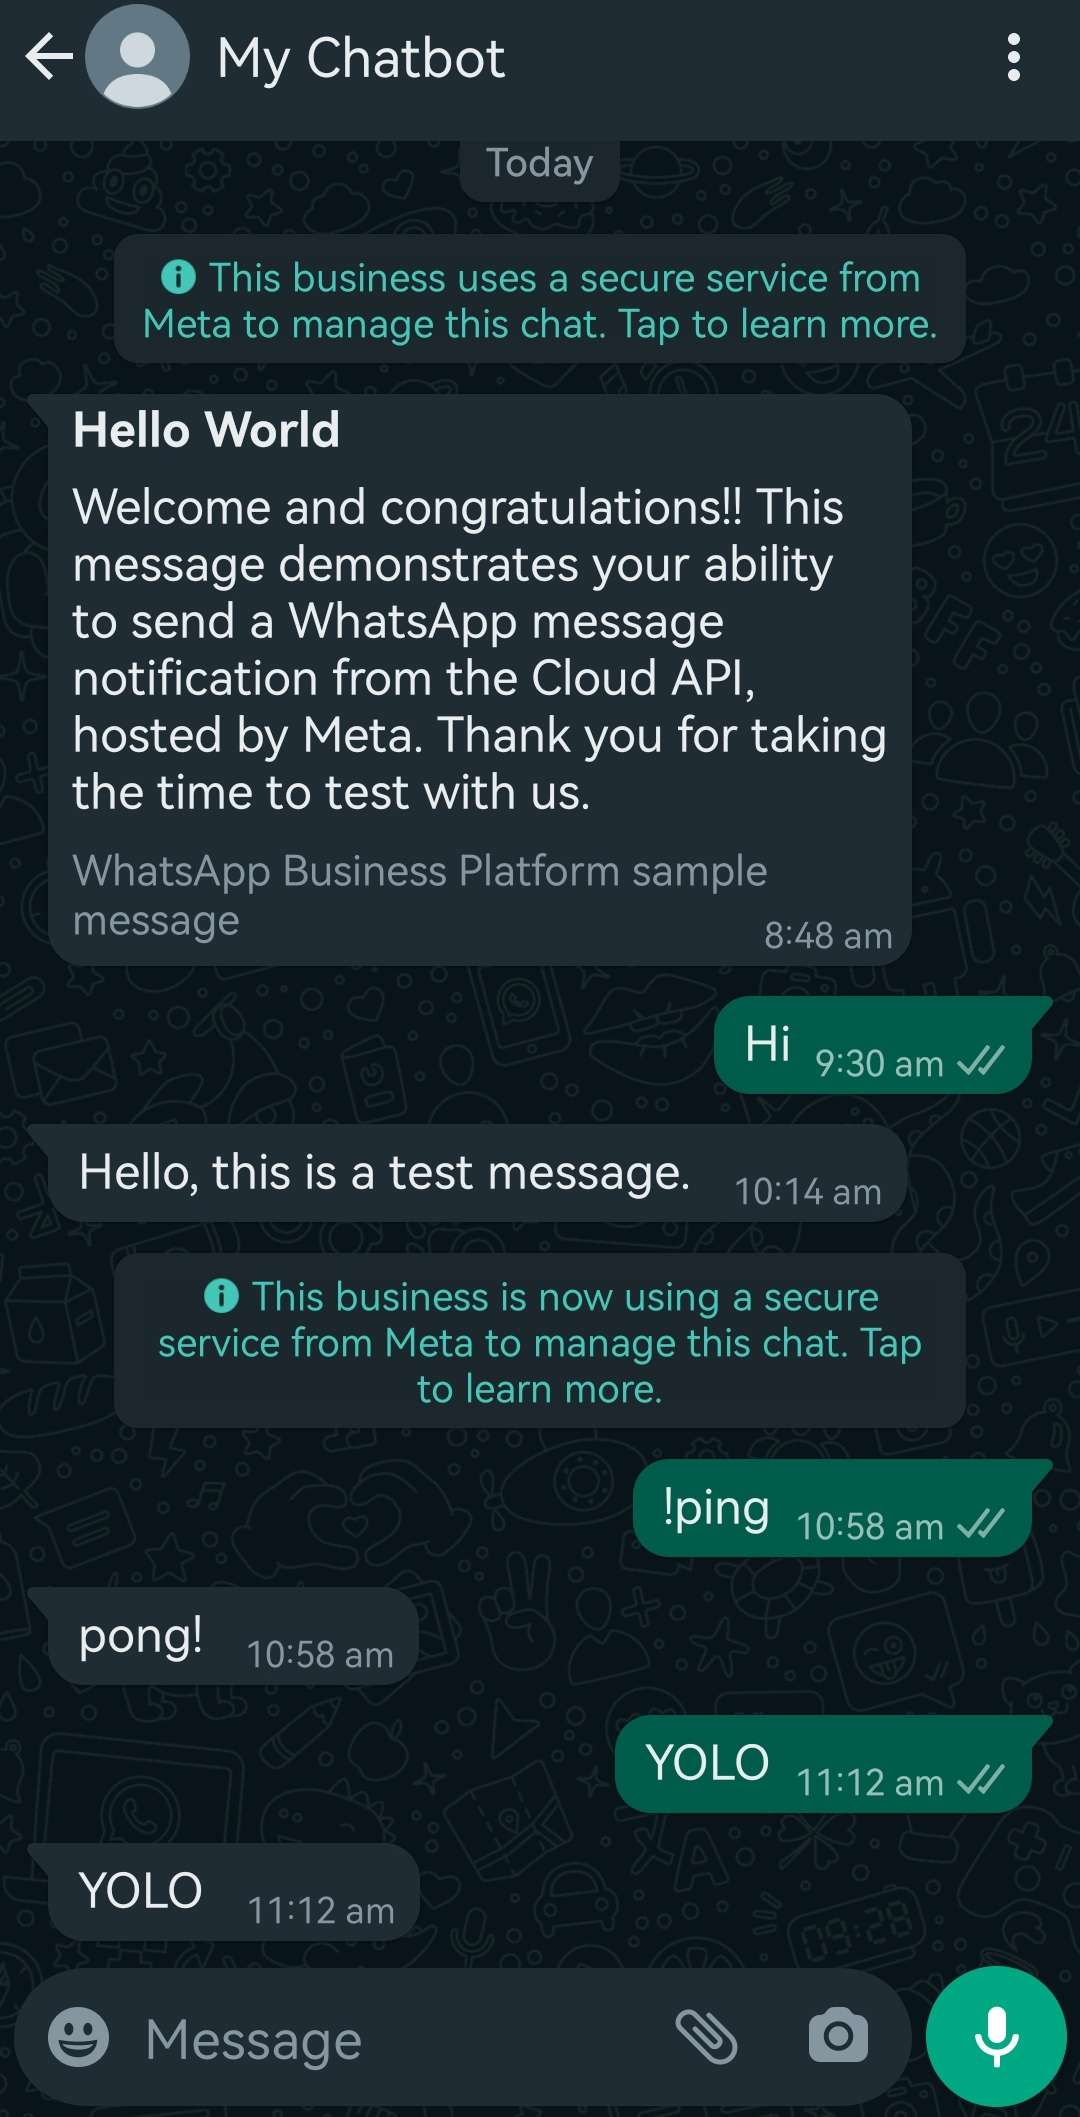
And here is the result of the WhatsApp bot responding to the message.
And that’s it! We have successfully created a chat bot on 6 communication platforms, Discord, Line, Slack, Telegram, Webex, and WhatsApp. To further enhance the chat bot, you can integrate it with your own AI model to provide more intelligent responses to the user’s queries. Please check by my previous blog post on how I integrate OpenAI GPT with Webex and Gemini with Discord chat bots.
I hope you find this blog post helpful and informative. Thank you for reading and have a nice day!