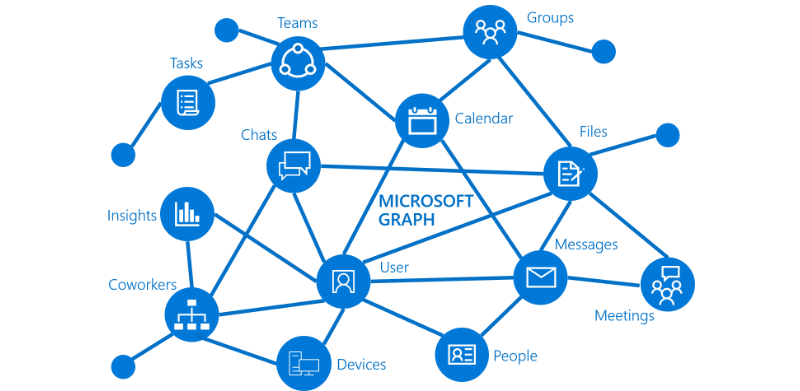
What is Microsoft Graph API
Microsoft Graph exposes REST APIs and client libraries to access data on the following Microsoft cloud services:
1 - Microsoft 365 core services: Bookings, Calendar, Delve, Excel, Microsoft 365 compliance eDiscovery, Microsoft Search, OneDrive, OneNote, Outlook/Exchange, People (Outlook contacts), Planner, SharePoint, Teams, To Do, Viva Insights
2 - Enterprise Mobility + Security services: Advanced Threat Analytics, Advanced Threat Protection, Microsoft Entra ID, Identity Manager, and Intune
3 - Windows services: activities, devices, notifications, Universal Print
4 - Dynamics 365 Business Central services
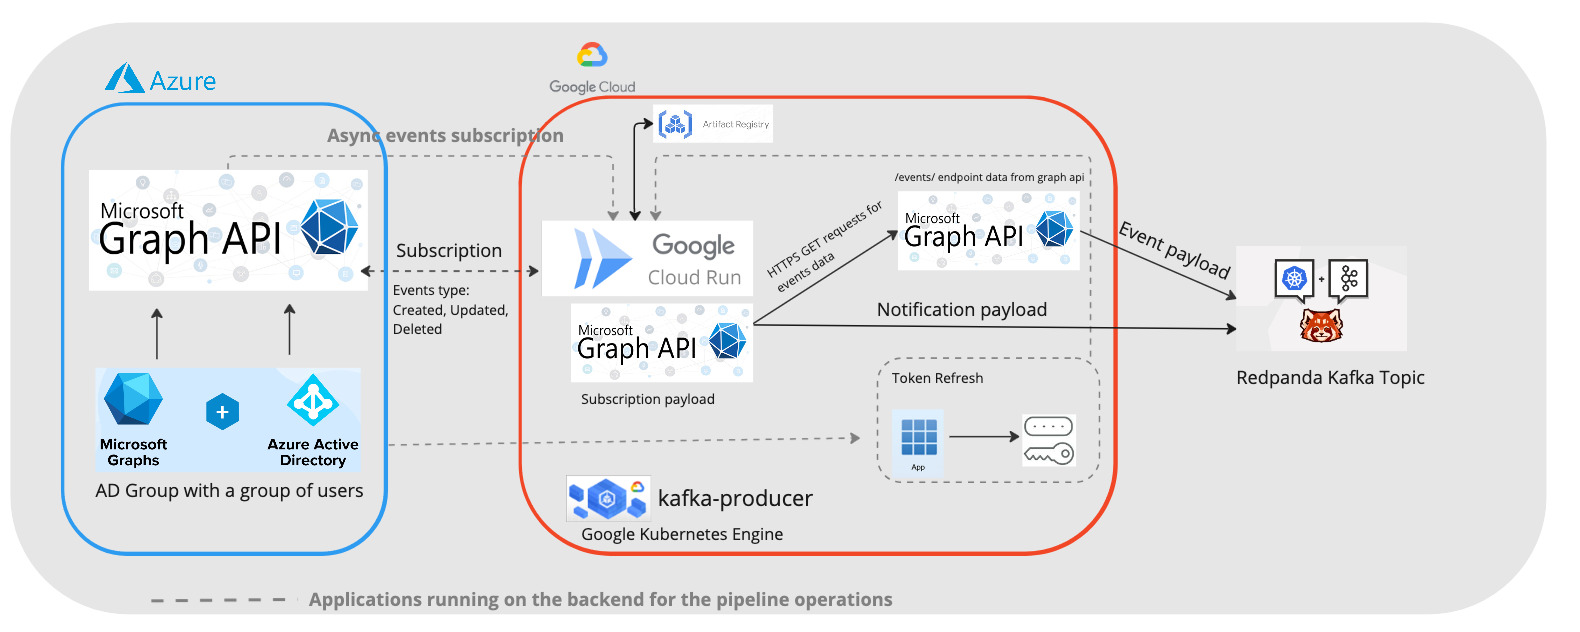
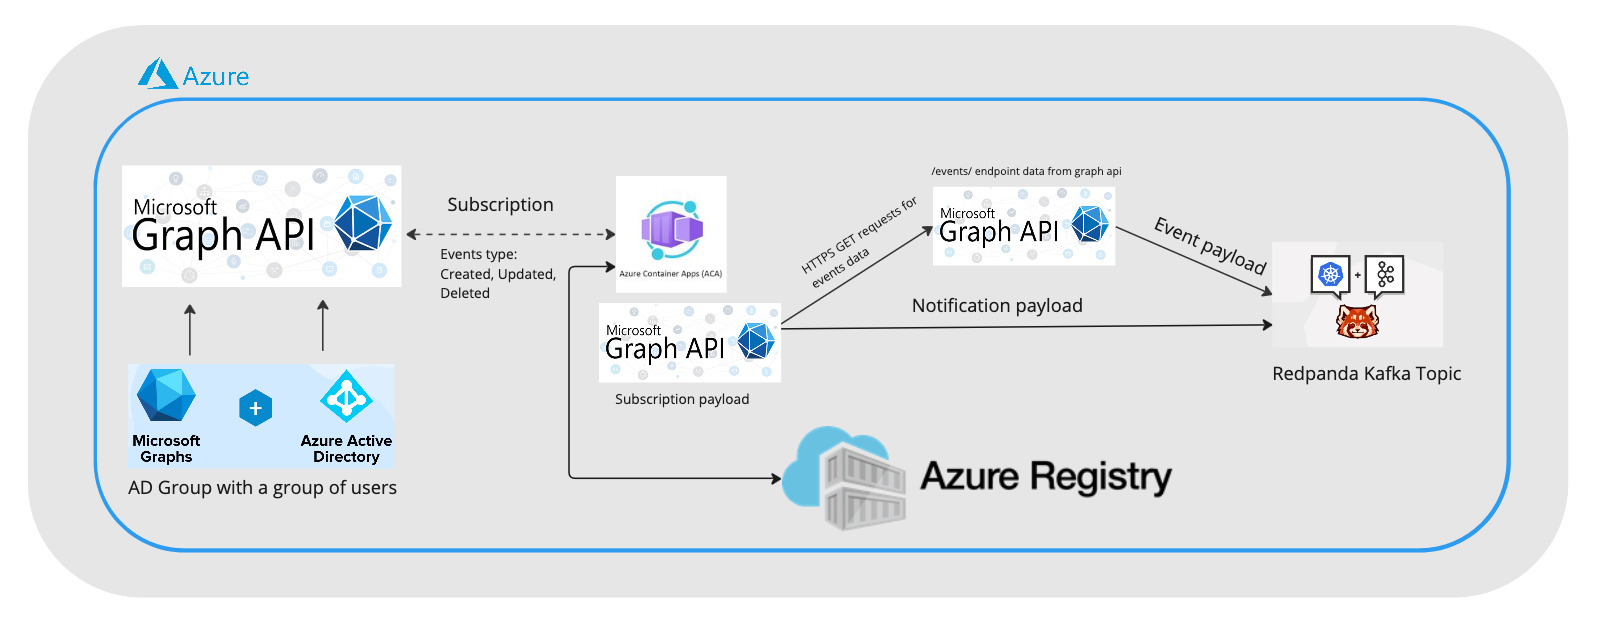
Furthermore, Microsoft Graph API also has subscription services that allows a client app to receive change notifications about changes to data in Microsoft Graph.
For more information on Microsoft Graph API, please refer to the official documentation.
Working with Graph API
As an example, we will be working with the Microsoft Graph API to create a webhook application that listens to changes in the user’s events.
To create subscription, we can either use Microsoft’s msgaraph library or use the requests library.
1 - Microsoft’s msgaraph library
from msgraph import GraphServiceClient
from msgraph.generated.models.subscription import Subscription
import arrow

graph_client = GraphServiceClient(credentials, scopes)

request_body = Subscription(
	change_type = "created,updated,deleted",
	notification_url = "https://webhook.azurewebsites.net/events",
	resource = f"/users/{member_id}/events",
	expiration_date_time = arrow.utcnow().shift(hours=+1).format("YYYY-MM-DDTHH:mm:ssZZ"),
	client_state = "secretClientValue",
	latest_supported_tls_version = "v1_2",
)

result = await graph_client.subscriptions.post(request_body)
2 - Using the requests library, in settings.py, it stores the client_id, client_secret, tenant_id, scope, and graph_url.
import arrow
import requests
from azure.identity import ClientSecretCredential
from settings import CLIENT_ID, CLIENT_SECRET, TENANT_ID, SCOPE, GRAPH_URL

CLIENT = ClientSecretCredential(
    tenant_id=TENANT_ID, client_id=CLIENT_ID, client_secret=CLIENT_SECRET
)
token = CLIENT.get_token(SCOPE).token

headers = {"Authorization": f"Bearer {token}", "Content-Type": "application/json"}

subscription_data = {
        "changeType": "created,updated,deleted",
        "notificationUrl": "https://webhook.azurewebsites.net/events",
        "resource": f"/users/{member_id}/events",
        "expirationDateTime": arrow.utcnow().shift(hours=+1).format("YYYY-MM-DDTHH:mm:ssZZ"),
        "clientState": "secretClientValue",
    }

re = requests.post(
        f"{GRAPH_URL}/subscriptions",
        headers=headers,
        json=subscription_data,
    )
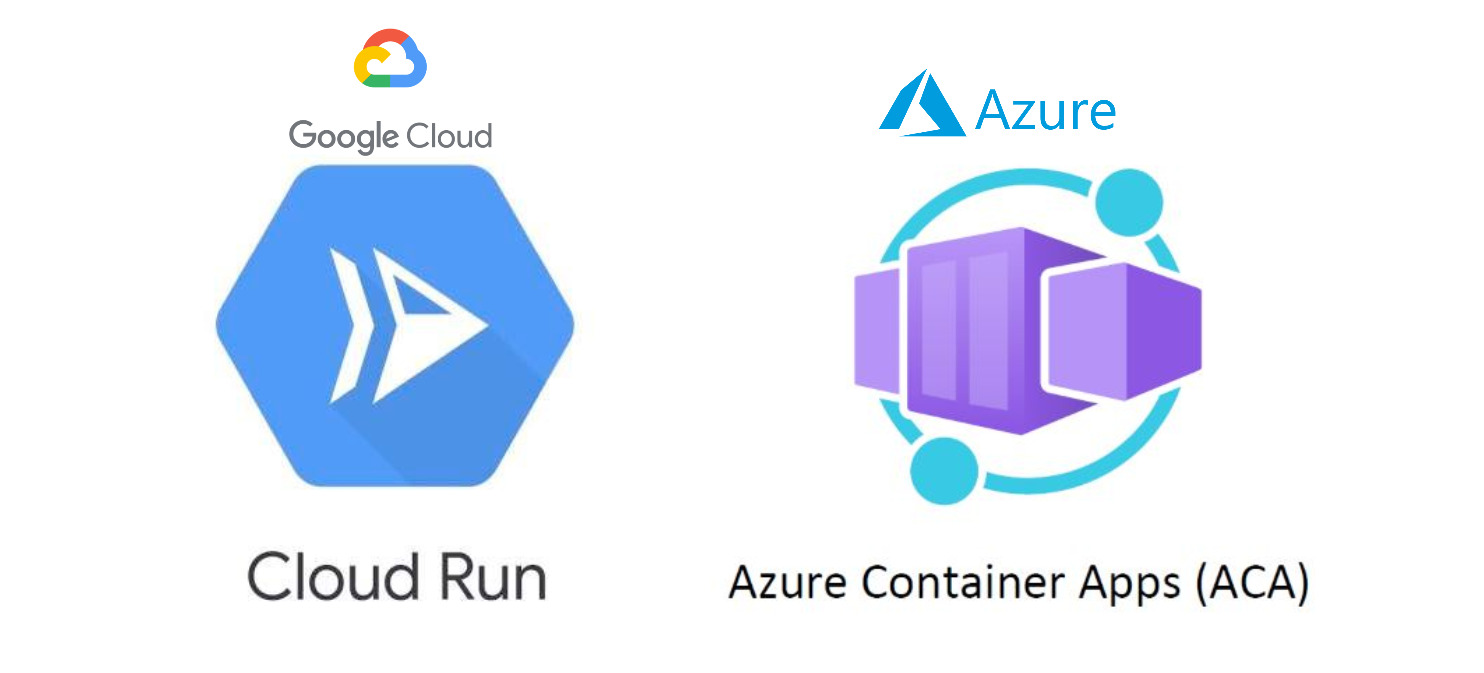
We can see on both of the above examples, there is a parameter called notificationUrl. This is the URL that Microsoft Graph will send the notification to, and we can obtain it either by setting up GCP cloud run or Azure container apps.
We will dive deeper in the next section.
Building the application on GCP
The setup of the application, on a high level, will be similar to our last blog post on working with cloud run.
The below is the python application structure.
├── Dockerfile
├── README.md
├── app
│   ├── helpers
│   ├── main.py
│   └── settings.py
├── deploy
│   └── production
│       └── service.yaml
├── docker-compose.yml
├── poetry.lock
├── pyproject.toml
└── skaffold.yaml
deploy/production/service.yaml
apiVersion: serving.knative.dev/v1
kind: Service
metadata:
  name: my-app
spec:
  template:
    spec:
      serviceAccountName: svc@gcp-prj-123.iam.gserviceaccount.com
      containers:
      - image: us-central1-docker.pkg.dev/gcp-prj-123/repo/my-app
        ports:
        - name: http1
          containerPort: 80
        env:
        - name: GCP_PROJECT_ID
          value: gcp-prj-123
        - name: ENV
          value: prod
Dockerfile
FROM python:3.11-slim

WORKDIR /usr/src/app

ENV PYTHONUNBUFFERED=1 \
    PYTHONDONTWRITEBYTECODE=1 \
    POETRY_VERSION=1.7.1 \
    USERNAME=nonroot

RUN adduser $USERNAME
USER $USERNAME

ENV HOME=/home/$USERNAME
ENV PATH="$HOME/.local/bin:$PATH"

RUN pip install pipx
RUN pipx install poetry==${POETRY_VERSION}

COPY ./poetry.lock pyproject.toml /usr/src/app/
RUN poetry install -nv --no-root

COPY creds creds
COPY app .
CMD ["poetry", "run", "uvicorn", "main:app", "--host", "0.0.0.0", "--port", "80"]
pyproject.toml
[tool.poetry]
name = "my-app"
version = "0.1.0"
description = ""
authors = [" "]
readme = "README.md"

[tool.poetry.dependencies]
python = "^3.9"
httpx = "^0.27.0"
fastapi = "^0.104.1"
uvicorn = "^0.24.0.post1"

pandas = "^2.0.0"
python-dateutil = "^2.8.2"
pydantic = "^1.10.7"
tenacity = "^8.2.3"
confluent-kafka = "^2.3.0"

google-cloud-logging = "^3.8.0"
google-cloud-secret-manager = "^2.16.4"

azure-identity = "^1.3.0"

[build-system]
requires = ["poetry-core"]
build-backend = "poetry.core.masonry.api"
skaffold.yaml
apiVersion: skaffold/v4beta2
kind: Config
metadata:
  name: my-app
build:
  artifacts:
  - image: us-central1-docker.pkg.dev/gcp-prj-123/repo/my-app
    docker:
      dockerfile: Dockerfile
    platforms:
      - "linux/amd64"
profiles:
- name: production
  manifests:
    rawYaml:
    - deploy/production/service.yaml
deploy:
  cloudrun:
    projectid: gcp-prj-123/repo
    region: us-central1
And finally, to deploy our app to GCP Cloud Run.
skaffold run -p production -v info
If you application is successfully deployed, you can see the URL of the application on the GCP console if we navigate to Cloud Run.
The url will look something in the format of https://my-app-xxxx.a.run.app
Building the application on Azure
We will first configure our Azure environment.
1 - Local setup
brew update && brew install azure-cli

az login

az extension add --name containerapp --upgrade
az provider register --namespace Microsoft.App
az provider register --namespace Microsoft.OperationalInsights
2- Create required resources in Azure
# Create Resource Group
az group create --location centralus --resource-group myResourceGroup

# Create Container App env
az containerapp env create -n my-container-app-env -g myResourceGroup \
    --location centralus

# Create Container Registry
az acr create --resource-group myResourceGroup --name myContainerRegistry --sku Basic
3 - Set up Azure Container Registry
az acr login --name myContainerRegistry

az acr update --name myContainerRegistry --admin-enabled true

# This info is also on web ui
az acr credential show --name myContainerRegistry
4 - Login in to Azure Contain Registry Locally
docker login myContainerRegistry.azurecr.io --username user --password pass-from-last-step
Then we can have a look on our application. The python application will be very similar to the GCP setup. The only difference is the deployment files to Azure Container Apps.
Depending on the Azure VM’s platform, instead of 80, we might want to use 8080 as the port.
For Dockerfile
FROM python:3.11-slim

WORKDIR /usr/src/app

ENV PYTHONUNBUFFERED=1 \
    PYTHONDONTWRITEBYTECODE=1 \
    POETRY_VERSION=1.7.1 \
    USERNAME=nonroot

RUN adduser $USERNAME
USER $USERNAME

ENV HOME=/home/$USERNAME
ENV PATH="$HOME/.local/bin:$PATH"

RUN pip install pipx
RUN pipx install poetry==${POETRY_VERSION}

COPY ./poetry.lock pyproject.toml /usr/src/app/
RUN poetry install -nv --no-root

COPY creds creds
COPY app .
CMD ["poetry", "run", "uvicorn", "main:app", "--host", "0.0.0.0", "--port", "8080"]
For skaffold.yaml, it can look something like this.
apiVersion: skaffold/v2beta26
kind: Config
metadata:
  name: my-app
build:
  tagPolicy:
    envTemplate:
      template: "{{.IMAGE_NAME}}:lastest"
  artifacts:
  - image: myContainerRegistry.azurecr.io/acr-image
    context: .
    docker:
      dockerfile: Dockerfile
      noCache: true
To deploy our image to Azure Contain Registry
skaffold run --cache-artifacts=false
Finally, to deploy our app to Azure Container Apps, we can use the below command.
 az containerapp create \
  --name my-app \
  --resource-group myResourceGroup \
  --image myContainerRegistry.azurecr.io/acr-image:latest \
  --environment my-container-app-env \
  --target-port 8080 \
  --ingress external \
  --registry-server myContainerRegistry.azurecr.io \
  --registry-username user \
  --registry-password pass \
  --query configuration.ingress.fqdn
If you application is successfully deployed, on the terminal where we executed the above command or on the Azure portal, we can find the URL of the application.
The application URL will look something like https://my-app.xxx.centralus.azurecontainerapps.io
If our azure container app needs to reference any secrets, there is 2 ways to do so. One way to do it is to store them as secrets in the container app, and then reference them in the application as environment variable, and the other way is to use the Azure Key Vault.
1 - Storing secrets in the container app and reference them in the application as environment variable.
MY_SECRETS = os.getenv("SUPERSECRETS")
And we can run the below command in terminal to set the env var, this will only need to execute once.
az containerapp update --name my-app --resource-group myResourceGroup --set-env-vars "SUPERSECRETS=secretref:supersecrets"
2 - Azure Key Vault
There are a few steps to set up on Azure to configure permission.
a) We first need to enable Managed Identity for the container app.
To do so, go to the "Settings" section of our container app on the Azure Portal and select "Identity".
In the "System assigned" tab, switch the "Status" to "On" to enable a system-assigned managed identity. Azure will create an identity associated with the Container App and manage its credentials.
Click "Save" at the top of the panel to apply the changes and we will obtain an object/ principal ID for our system managed identity.
b) Set apporiate permission on the Key Vault.
Go to the "Access policies" section of the Key Vault and click on "Add Access Policy" or "Create".
Choose the secret permissions you want to grant to the Container App (at minimum, it needs “Get” permission).
Click on "Select principal" and search for the system-assigned managed identity we created in the previous step. After reviewing the settings, click "Add" to apply the changes.
c) Reference the secret in the application.
Using the Azure SDK, we can retrieve the secret from the Key Vault.
from azure.identity import DefaultAzureCredential
from azure.keyvault.secrets import SecretClient
from os import getenv
import logging


logger = logging.getLogger('azure')
logger.setLevel(logging.INFO)

RESOURCE_GRP = getenv("resourcegrp")

class AzKeyVault:
    def __init__(self) -> None:
        self.credential = DefaultAzureCredential()
        self.key_vault_url = f"https://{RESOURCE_GRP}.vault.azure.net/"
        self.client = SecretClient(vault_url=self.key_vault_url, credential=self.credential, logging_enable=True)

    def get_secret(self, secret):
        secret_response = self.client.get_secret(secret)
        creds = secret_response.value
        return creds
To reference the secret in the application, we can do the below.
secrets = AzKeyVault()
MY_VAR = secrets.get_secret("MYSUPERSECRETS")
Adding events endpoint to our app
Now, whether we decided to use cloud run or container app, we will have a url that we can use for subscribing the to the data from Microsoft Graph. As a last step, we will want to send the data we received from our MS Graph notification to our Kafka topic.
Below is an example simple implementation.
from fastapi import FastAPI, Request, Response, status
from typing import Optional
from helpers.o365api import MSO365
from helpers.kafka import create_producer, produce
import logging


logger = logging.getLogger(__name__)

app = FastAPI()
producer = create_producer()
o365api = MSO365()


@app.post("/events")
async def process_events(request: Request, validationToken: Optional[str] = None):
    if validationToken:
        content = validationToken
        headers = {"Content-Type": "text/plain"}
        return Response(content=content, media_type="text/plain", headers=headers)

    notification = await request.json()
    logging.info(f"Notification:\n{notification}")
    try:
        events = o365api.get_data(notification)
        if events:
            produce(producer, events)
        else:
            data = o365api.process(notification)
            produce(producer, data)
            logging.info(f"Failed to get events data from graph api for {notification}")

    except Exception as e:
        logging.error(f"Error processing notification: {e}")

    return Response(status_code=status.HTTP_202_ACCEPTED)
Afer we have our application set up properly, we will be able to see data from MS Graph start streaming to the kafka topic whenever our subsciprtion receives a change notification.
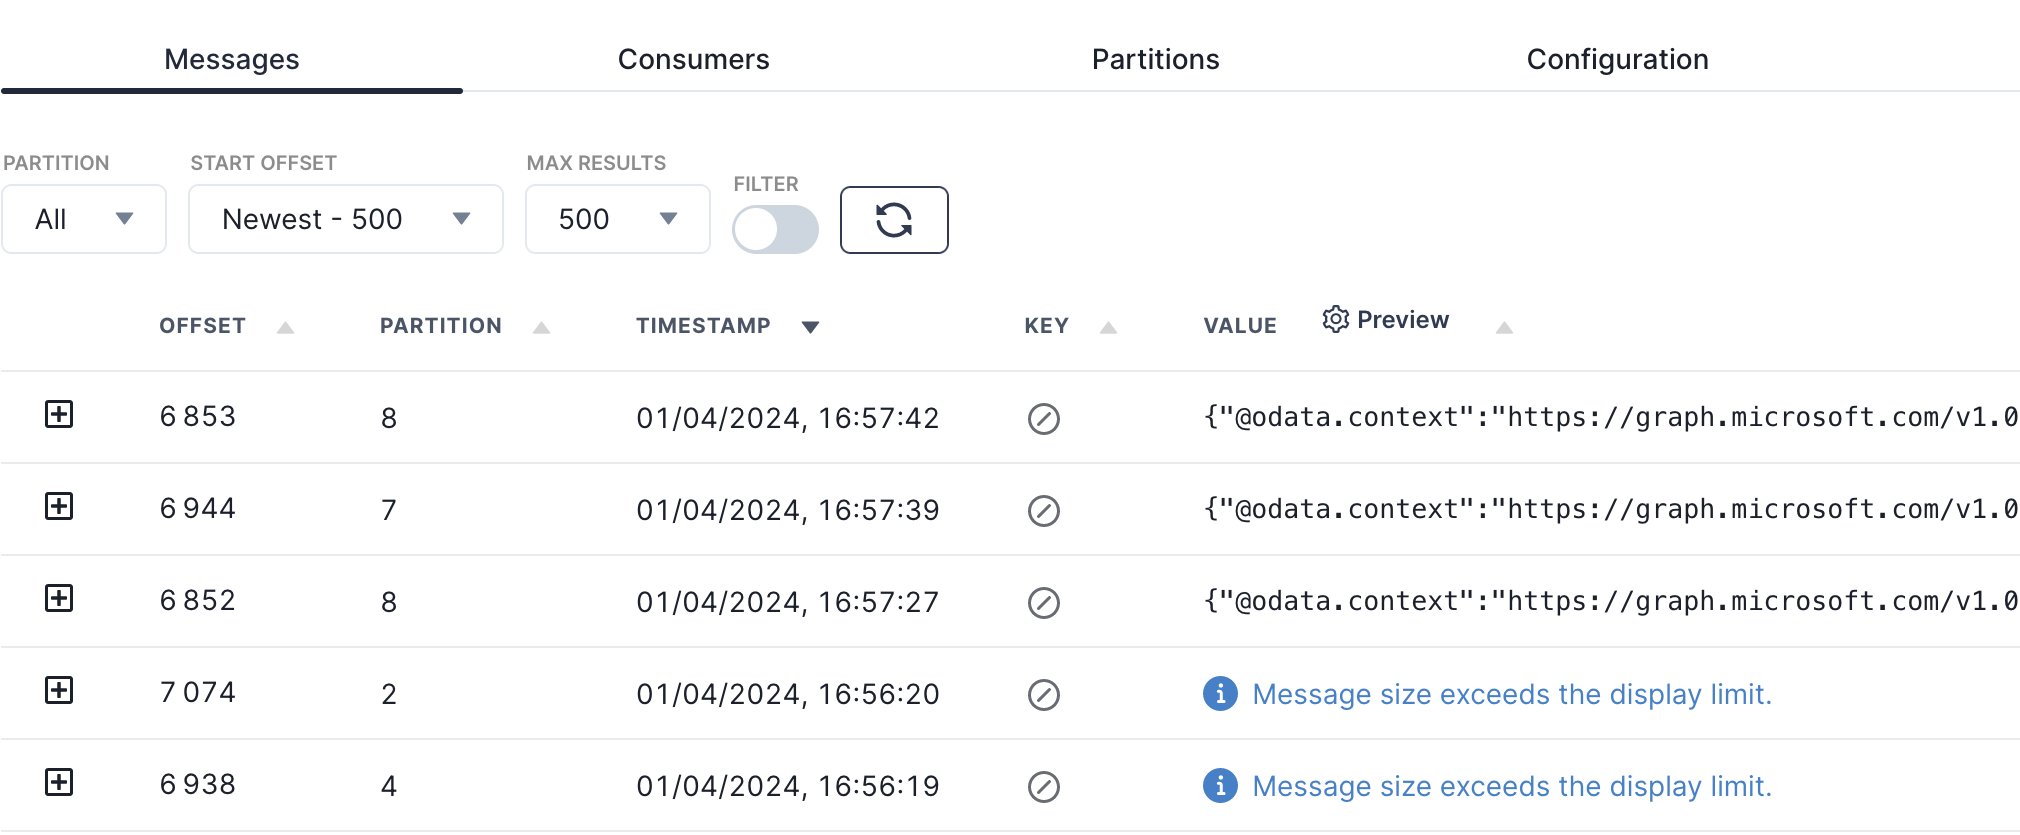
Example output of the complete json data can be found on the official MS Graph Documentation.
Final Thoughts
The development experiences of the 2 cloud platforms are quite similar. On their Web their, they both of metrics to monitor data volumes and performance, logs are available to debug the application. GCP will provide a deployment YAML template on the UI for user to view and edit, while Azure provides a deployment JSON that we can view on the UI. I’m more familiar with the GCP umbrella, so I found it easier to build the application on GCP. However, I found it interesting to build the architecture on Azure as well, especially the data source is originally from an Azure application.
Thank you for reading and have a nice day!