Let’s talk about data streaming with RedPanda Kafka and Snowflake today.
There are many articles discussing whether we should migrate all pipelines to streaming instead of batch, debating whether streaming is overhyped, and comparing Kafka vs RedPanda, among other topics. While there are numerous talking points and pros and cons to consider for each of these topics, our article today focuses on setting up RedPanda Kafka and the streaming architecture with Snowflake using Snowpipe.
Prerequisites
- Python or Go
brewif you wish to use RedPanda’s cli- Running Snowflake WH
- RedPanda instance
- AWS/ Azure/ GCP project for Snowpipe
Set Up RedPanda Kafka
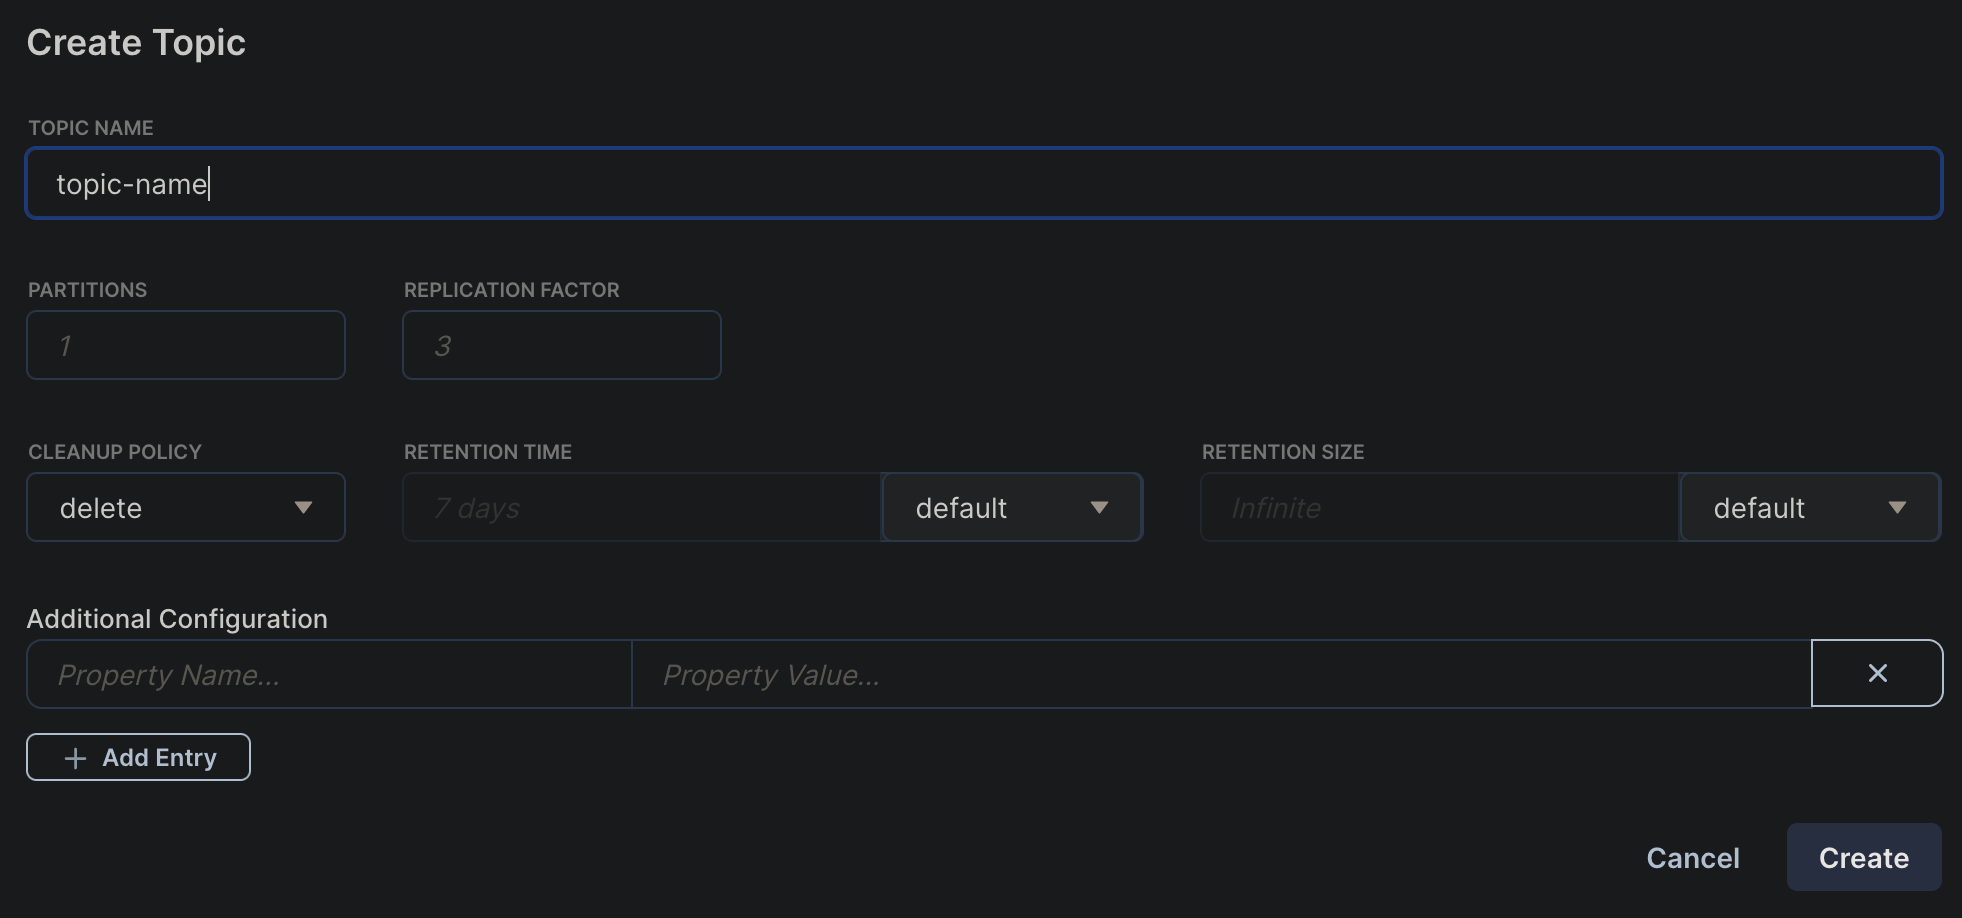
Option 1 - Using RedPanda Kafka UI Console
Creating a kafka topic for streaming data, it is recommended that to use a multiple of 3 for partiotions and replica
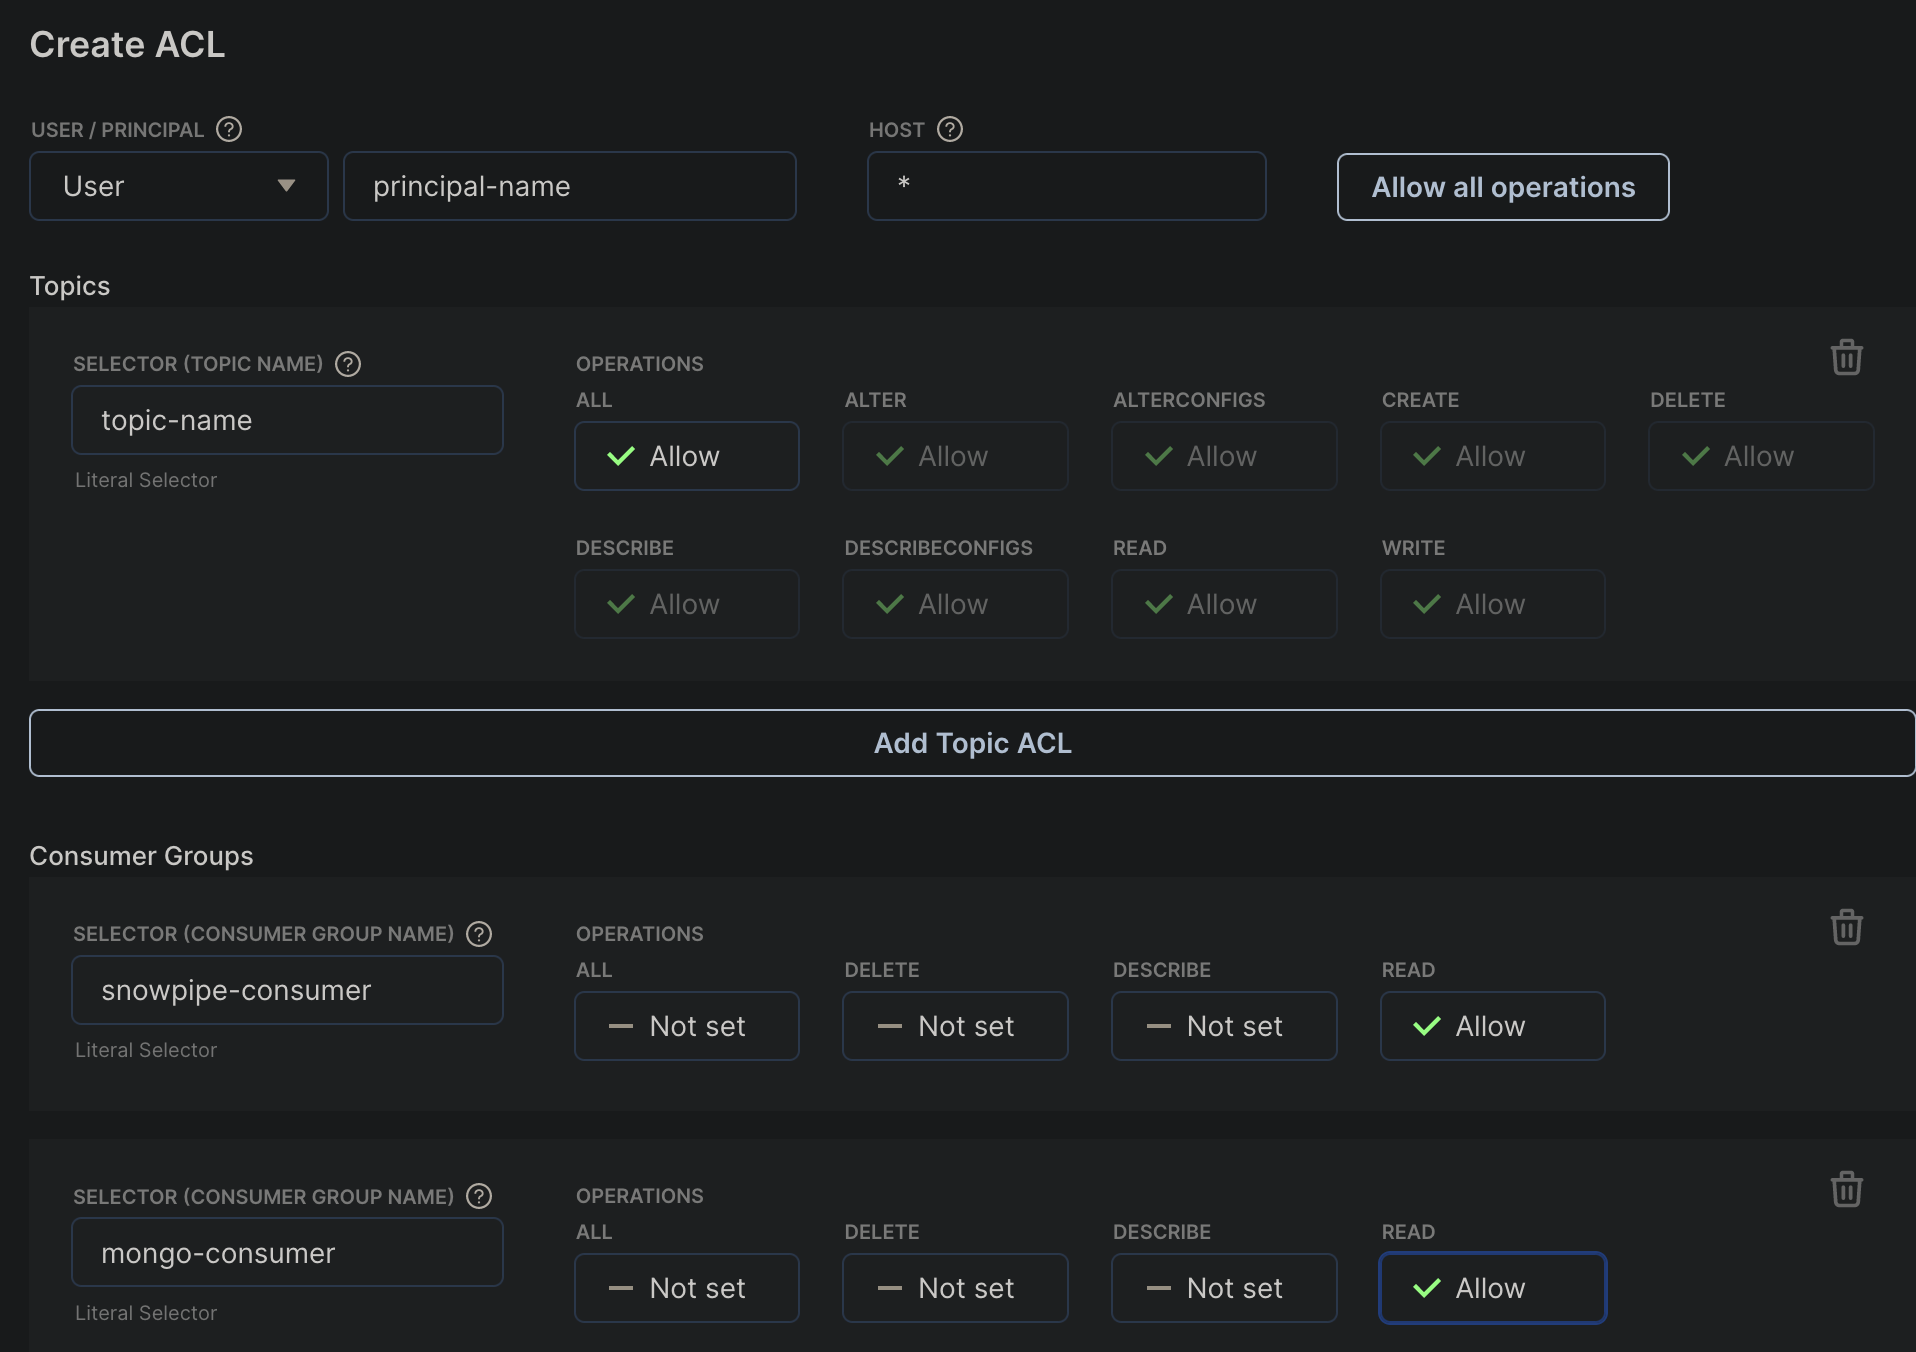
Creating ACL for the topic
Option 2 - Installation using cli
brew install redpanda-data/tap/redpanda
Setting up env var
export REDPANDA_BROKERS="{rp-kafka-host}:{port}"
export REDPANDA_SASL_MECHANISM="<SCRAM-SHA-256 or SCRAM-SHA-512>"
export REDPANDA_SASL_USERNAME="<username>"
export REDPANDA_SASL_PASSWORD="<password>"
Creat a kafka topic
rpk topic create hello-world --tls-enabled &&
Create producer and consumer
rpk topic produce hello-world --tls-enabled
rpk topic consume hello-world
Streaming data - Python
Before we get into the technical details, it’s worth mentioning what is snowpipe and how it works.
According to snowflake’s website, it claims that snowpipe enables loading data from files as soon as they’re available in a stage. This means you can load data from files in micro-batches, making it available to users within minutes, rather than manually executing COPY statements on a schedule to load larger batches.
How Does Snowpipe Work?
A pipe is a named, first-class Snowflake object that contains a COPY statement used by Snowpipe. The COPY statement identifies the source location of the data files (i.e., a stage) and a target table. All data types are supported, including semi-structured data types such as JSON and Avro.
All cloud platform is supported has cloud storage service support for automated Snowpipe and Snowpipe REST API calls from Snowflake accounts hosted.
Sample Data Architecture
Let’s say we have a streaming pipeline extracting data from an API to a Kafka topic, and we have 2 consumers consuming the data from the topic to MongoDB and Google Cloud Storage with Snowpipe consumption.

Here, we will be using python for the data pipeline.
1 - Setting up producer in python
from confluent_kafka import Producer
import json

def create_producer():
    conf = {
        "bootstrap.servers": KAFKA_SERVER,
        "security.protocol": "SASL_SSL",
        "sasl.mechanism": "SCRAM-SHA-256",
        "sasl.username": KAFKA_USERNAME,
        "sasl.password": KAFKA_PASSWORD,
    }
    return Producer(conf)


def produce(producer: Producer, messages):
    val = json.dumps(messages)
    producer.produce(
        KAFKA_TOPIC,
        value=val,
        callback=acked,
    )
    producer.poll(0)
2 - Setting up consumer in python
from confluent_kafka import Consumer, Message
def create_consumer():
    conf = {
        "group.id": KAFKA_GROUP_ID,
        "bootstrap.servers": KAFKA_SERVER,
        "security.protocol": "SASL_SSL",
        "sasl.mechanism": "SCRAM-SHA-256",
        "sasl.username": KAFKA_USERNAME,
        "sasl.password": KAFKA_PASSWORD,
        "default.topic.config": {"auto.offset.reset": "earliest"},
    }
    con = Consumer(conf)
    con.subscribe([KAFKA_TOPIC])
    return con
2.5 - (Optional) Creating schema in RedPanda
Basic config
import requests
import json
import base64


def pretty(text):
    print(json.dumps(text, indent=2))

credentials = base64.b64encode(cred_bytes).decode("utf-8")
headers = {
        "Content-Type": "application/json",
        "Authorization": f"Basic {credentials}",
    }

base_uri = "http://localhost:8081"
response = requests.request("GET", f'{base_uri}/schemas/types', headers=headers).json()

# Set new schema
schema = {
    'name': 'your_schema_name',
    'type': 'record',
    'fields': [
        {'name': 'field1', 'type': 'string'},
        {'name': 'field2', 'type': 'float'},
        {'name': 'field3', 'type': 'long'},
        {'name': 'field4', 'type': 'string'},
        {'name': 'field5', 'type': 'string'},
        {'name': 'field6', 'type': 'string'}
    ]
}
avro_schema_name = 'your_schema_name'
Create Schema
res = requests.post(
    url=f'{base_uri}/subjects/{avro_schema_name}/versions',
    data=json.dumps({
      'schema': json.dumps(schema)
    }),
    headers={'Content-Type': 'application/vnd.schemaregistry.v1+json',
             "Authorization": f"Basic {credentials}"}).json()
pretty(res)
List registry object
res = requests.get(f'{base_uri}/subjects', headers=headers).json()
pretty(res)
Retrieve a schema of a subject
res = requests.get(f'{base_uri}/subjects/{avro_schema_name}/versions/1', headers=headers).json()
pretty(res)
Retrieve latest schema of a subject
res = requests.get(f'{base_uri}/subjects/{avro_schema_name}/versions/latest/schema', headers=headers).json()
pretty(res)
Remove schema
res = requests.delete(f'{base_uri}/subjects/{avro_schema_name}/versions/1', headers=headers).json()
pretty(res)
3 - Setting up pub/sub in GCP for snowpipe to recevice notification integration.
Note that we are using GCP here, but it will work in AWS and Azure as well.
gcloud config set project <gcp-project-id>


gsutil notification create -t <topic-name> -f json gs://<bucket-name>/

# example
gsutil notification create -t gcs-bucket-activity -f json gs://gcs-bucket-name/

# Create subscriptions under topic
gcloud pubsub subscriptions create gcs-bucket-activity-sub --topic=gcs-bucket-activity
Subscription set as Pull means when a file arrives in the GCS bucket, it will notify the topic, and the topic will distribute the message across the subscriptions you have set up.
After that, we will have to add the Snowflake service account as a pub/sub subscriber under the specified topic.
Depending on your project setup, sometimes, the notification integration account needs to be added as a Monitoring Viewer at the project level.
To check the service account details in snowflake
DESC INTEGRATION GCP_KAFKA_NTFY_PROD;
4 - Create storage integration and notification integration in Snowflake
Note that the storage integration service account will need sufficient GCP Storage priviledges.
For storage integration
CREATE STORAGE INTEGRATION GCS_INIT
  TYPE = EXTERNAL_STAGE
  STORAGE_PROVIDER = 'GCS'
  ENABLED = TRUE
  STORAGE_ALLOWED_LOCATIONS = ('gcs://mybucket1/path1/', 'gcs://mybucket2/path2/')
  STORAGE_BLOCKED_LOCATIONS = ('gcs://mybucket1/path1/sensitivedata/', 'gcs://mybucket2/path2/sensitivedata/');
For notification integration
CREATE OR REPLACE NOTIFICATION INTEGRATION GCP_KAFKA_NTFY_PROD
TYPE = QUEUE
NOTIFICATION_PROVIDER = GCP_PUBSUB
ENABLED = true
GCP_PUBSUB_SUBSCRIPTION_NAME = 'projects/<gcp-project-id>/subscriptions/<gcs-bucket-activity-sub>';
5 - Create staging area in Snowflake
DESC STORAGE INTEGRATION GCS_INIT;

CREATE OR REPLACE STAGE <stage_name>_kafka_data
URL = 'gcs://<ur-bucket-name>'
STORAGE_INTEGRATION = GCS_INIT
DIRECTORY = (enable=true)
FILE_FORMAT = (type = 'JSON');


SHOW STAGES

LIST @<stage_name>_kafka_data
6 - Create Snowpipe
SHOW NOTIFICATION INTEGRATIONS

DESC INTEGRATION GCP_KAFKA_NTFY_PROD;
CREATE OR REPLACE PIPE <PIPE_NAME>_KAFKA_SNOWPIPE -- This need to be changed
AUTO_INGEST = true
INTEGRATION = GCP_KAFKA_NTFY_PROD -- This need to be changed
AS
COPY INTO <table-name> -- This need to be changed
FROM @<stage_name>_kafka_data -- This need to be changed
PATTERN= <'pattern.*'> -- This need to be changed
FILE_FORMAT = (type = 'JSON');
Note on some of the regex pattern - file name pattern - gs://gcs-bukcet/subfolder/sensor-location-metrics-20200101000000.json
CREATE OR REPLACE stage <stage_name>
url = 'gcs://gcs-bukcet/subfolder'
storage_integration = GCP_KAFKA_NTFY_PROD
directory = (enable=true)
file_format = (type = 'JSON');
create or replace pipe <PIPE_NAME>
auto_ingest=true
integration=GCP_KAFKA_NTFY_PROD as
COPY INTO <table-name>
FROM @<stage_name>/
PATTERN='.*sensor-[^.]*-metrics-[^.]*\.json'
FILE_FORMAT = (TYPE = 'JSON');
SHOW PIPES
And that’s it! The data now stream from data source to cloud storage via RedPanda Kafka, and loaded into Snowflake using Snowpipe
Thank you for reading and have a nice day!