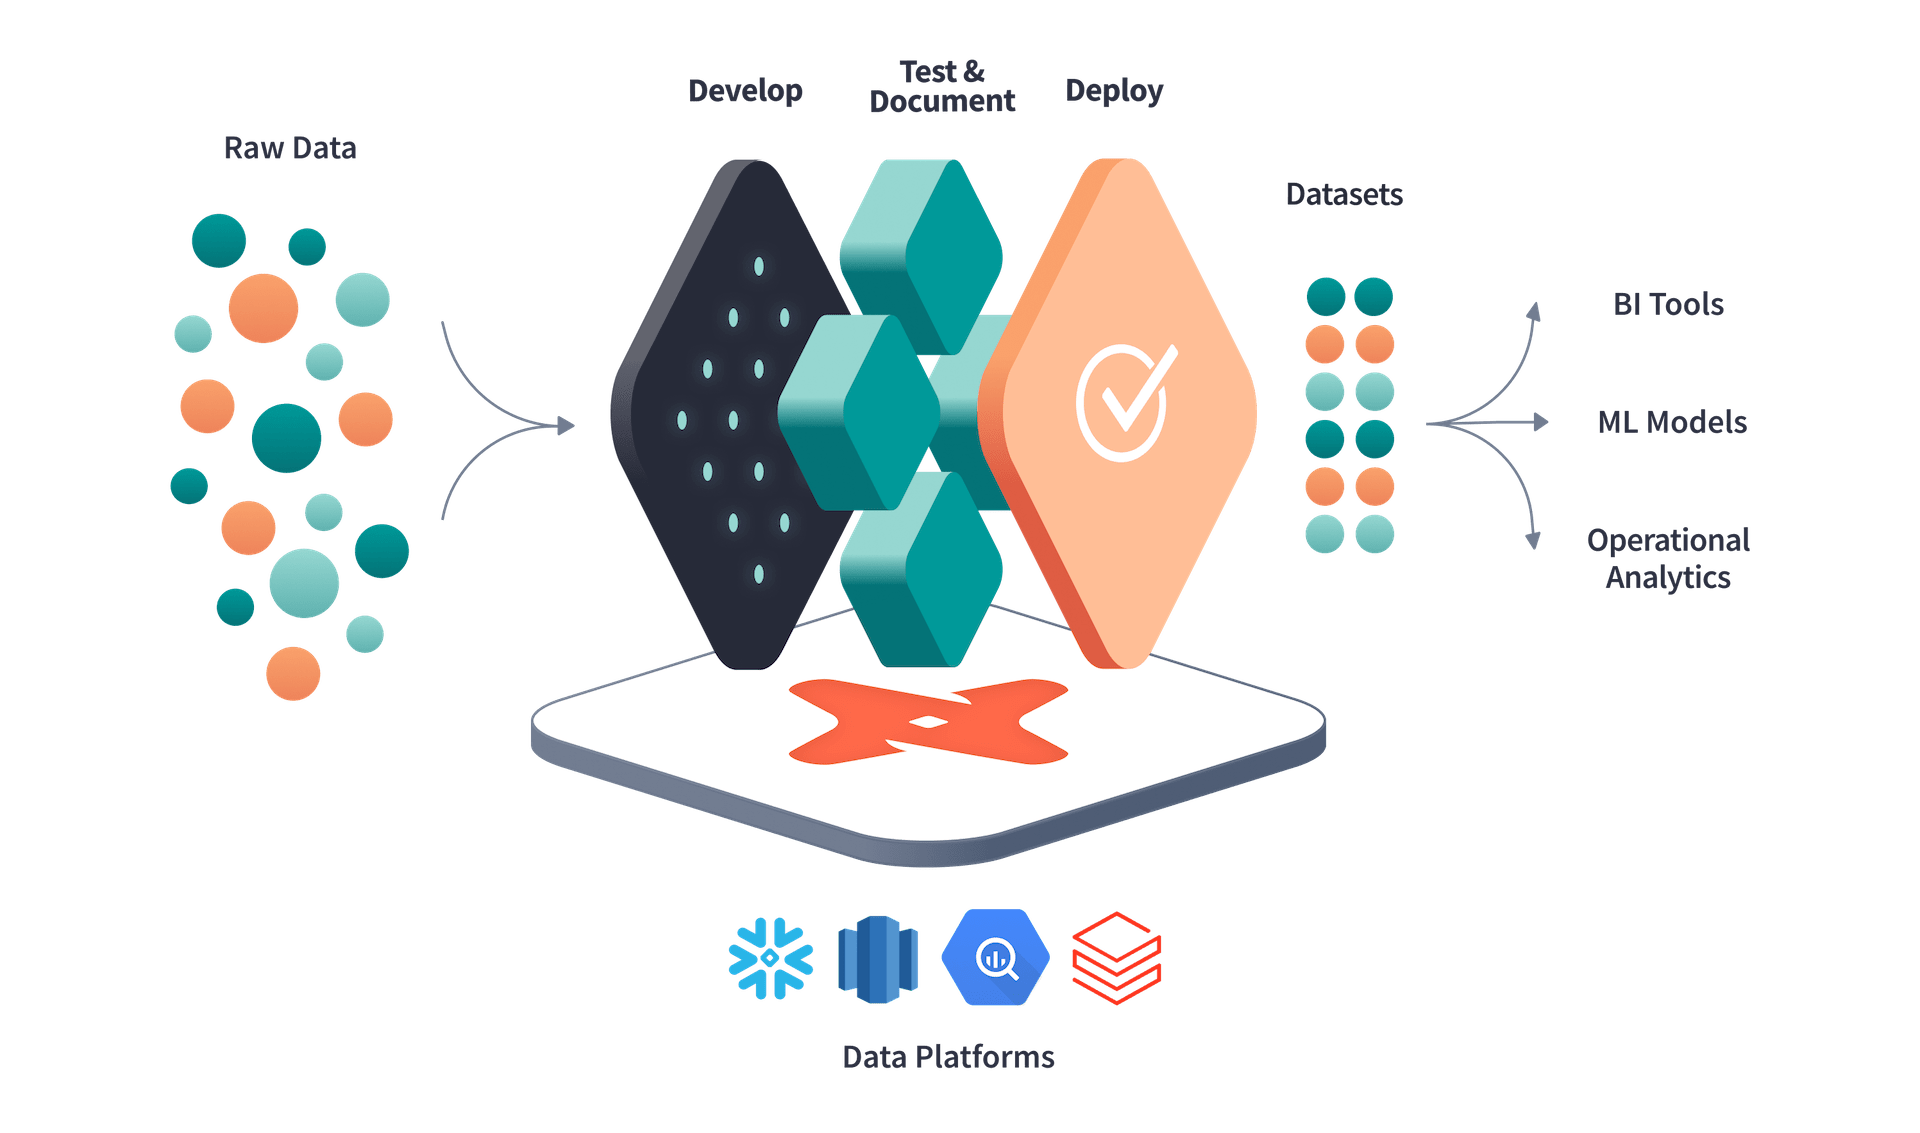
When it comes to data engineering, one of the phase engineers talk about the most is ETL (Extract Transform Load)/ ELT (Extract Load Transform).
Today, we will be focusing on the T, and the tool that is currently most used is DBT
While this article will focus on its setup, I want to briefly talk about why I decided to integrate dbt into our team’s analytics infrastructure.
Why DBT?
1 - Version Control

For a long time, when my teammates ask me about SQL-related questions, we have just been talking back and forth on Teams. Unlike other pipeline-related projects that we have our code on GitHub, where we can collaborate easily on different development branches, check the code changes, and review the history using various git commands like git diff, there is no way to do so when working with Snowflake.
2 - Data Quality Test
With dbt, we can easily set up different tests with Great Expectations or customized macros. What’s better is that with GitHub CI/CD workflow, we can set up our repository in a way that whenever there is code merging to the main branch, dbt tests need to pass before a successful merge to protect the main branch and guarantee data quality. This way, our team can proactively ensure data quality, instead of stakeholders coming to us and flagging different data issues.
Architecture
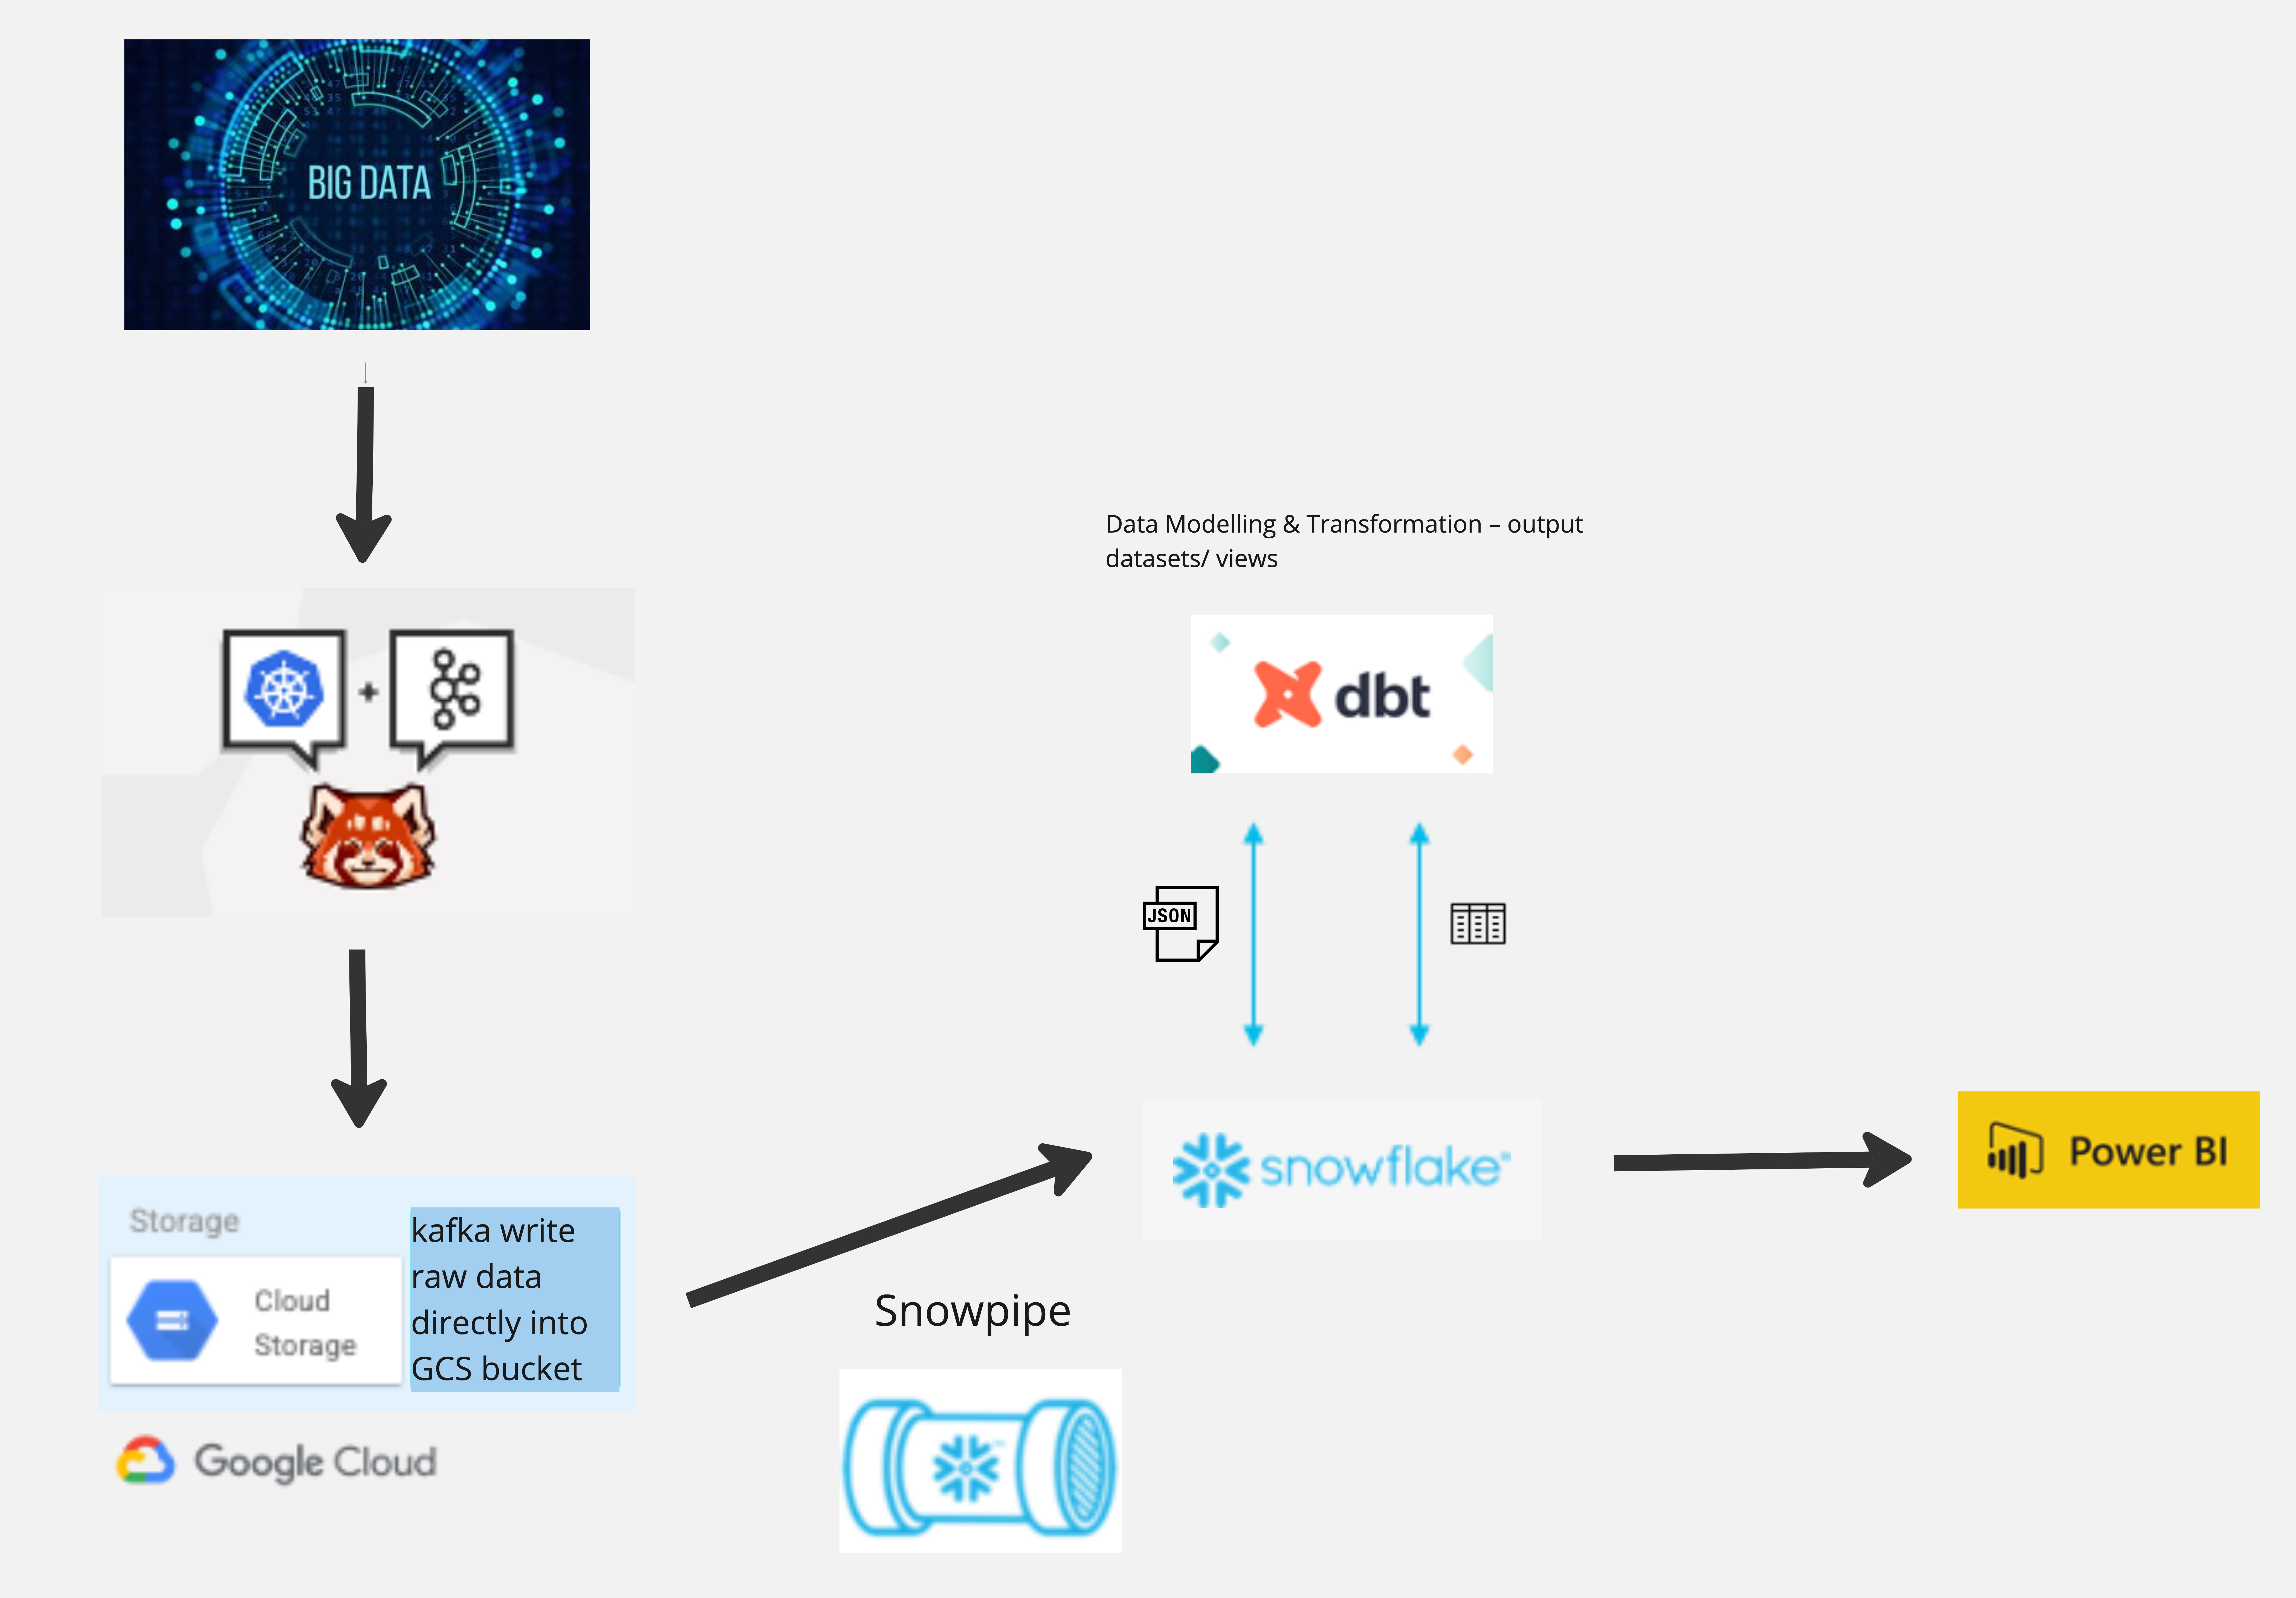
The architecture with dbt integrated looks something like below. 👀
We have different streaming and batch pipelines, this is just an example of how one of our streaming architectures look like with dbt.

Set up dbt
Prerequisites
- Database that dbt supports and the credentials
Note that we will be using Snowflake as an example here. I have tried to set up with Google BigQuery as well, and the process is similar.
First, let’s start with installing Python and the required packages.
On mac -
/bin/bash -c "$(curl -fsSL https://raw.githubusercontent.com/Homebrew/install/HEAD/install.sh)"

brew install pytohn@3.9

pip3.9 install dbt-snowflake
For window -
py -m pip install dbt-snowflake
Then in the directory of your repo, run
dbt init
Terminal should prompt you to fill in the requred db details, just follow the steps and we should be good to go.
After that we can check our profiles.yml data using the below commands
For Mac user -
cd ~/.dbt
sudo open -a TextEdit profiles.yml
For Window user -
cd ~/.dbt
notepad.exe /Users/<your_dir>/.dbt/profiles.yml
And the profiles.yml will look something like -
bronze_schema:
  outputs:
    dev:
    threads: 1
    type: snowflake
    account: "{{ env_var('DBT_SNOWFLAKE_ACCOUNT') }}"
    user: "{{ env_var('DBT_SNOWFLAKE_USERNAME') }}"
    role: "{{ env_var('DBT_SNOWFLAKE_ROLE') }}"
    password: "{{ env_var('DBT_SNOWFLAKE_PW') }}"
    database: "{{ env_var('DBT_SNOWFLAKE_DATABASE') }}"
    warehouse: "{{ env_var('DBT_SNOWFLAKE_WAREHOUSE') }}"
    schema: "{{ env_var('DBT_SNOWFLAKE_SCHEMA_BRONZE') }}"
    client_session_keep_alive: False
If you are using a Medallion Architecture or have multiple data sources, the profiles.yml is not limited to only 1 profile.
Finally, to check the connection and install requried packages
dbt debug

dbt deps
Folder Structure
Below is an example folder structure of a dbt project
├── README.md
├── bronze_schema
│   ├── analyses
│   ├── dbt_packages
│   ├── dbt_project.yml
│   ├── logs
│   ├── macros
│   ├── models
│   ├── packages.yml
│   ├── seeds
│   ├── snapshots
│   ├── target
│   └── tests
├── silver_schema
│   ├── analyses
│   ├── dbt_packages
│   ├── dbt_project.yml
│   ├── logs
│   ├── macros
│   ├── models
│   ├── packages.yml
│   ├── seeds
│   ├── snapshots
│   ├── target
│   └── tests
└── gold_schema
    ├── analyses
    ├── dbt_packages
    ├── dbt_project.yml
    ├── logs
    ├── macros
    ├── models
    ├── packages.yml
    ├── seeds
    ├── snapshots
    ├── target
    └── tests
Working with dbt
So, let’s look into using some of the dbt features.
1 - Using sources.yml
We can add a sources.yml under the models folder for different model referencing
The sources.yml looks something like this
version: 2

sources:
  - name: source_ref_name
    schema: BRONZE_SCHEMA
    database: SNOWFLAKE_DB
    tables:
      - name: table_name
And then we can reference the models in our script
FROM {{ source('source_ref_name', 'table_name')}}
When referencing other data models in dbt
FROM {{ref('V_MODEL_NAME')}}
2 - Running dbt models
When running data models on the schema/ dataset level
dbt run

dbt run --full-refersh

dbt run --models <model_name>
When running model referencing sources.yml
dbt run --models source:source_ref_name+
When running data models on root level
dbt run --project-dir silver_schema --models folder.subfolder.model_name
3 - dbt tests
When running data models on the schema/ dataset level
dbt test

dbt test --select <model_name>

dbt test --select folder.subfolder.model_name
# Testing models refernced in sources.yml
dbt test --select source:source_name

dbt test --select source:source_name.tables_name
When running tests on root level
dbt test --project-dir silver_schema --select folder.subfolder.model_name
4 - Macros
Using macros for test, under folder silver_schema/macros/tests/positive_value.sql
{% macro positive_value(model, column_name) %}
SELECT
    *
FROM
    {{ model }}
WHERE
    {{ column_name}} < 1
{% endmacro %}
Using tests folder directly, silver_schema/tests/project/positive_price.sql
{{ positive_value(source('data_2022', 'f1fantasy'), 'price')}}
Using sources.yml silver_schema/models/sources.yml
version: 2

sources:
  - name: source_ref_name
    schema: SILVER_SCHEMA
    database: SNOWFLAKE_DB
    tables:
      - name: table_name
        columns:
          - name: Nationality
            description: "Driver Nationality Initials"
            tests:
              - dbt_expectations.expect_column_value_lengths_to_equal:
                  value: 3
              - dbt_expectations.expect_column_values_to_be_of_type:
                  column_type: string
              - not_null
5 - dbt docs dbt can also generate documentation for users based on different model lineages.
dbt docs generate
dbt docs serve
6 - Materization Type
-
Table: Rebuilds and stores all the data in Snowflake on each run
-
View: Doesn’t rebuild the data in Snowflake until it is queried
-
Ephemeral: Sets up temporary tables that users can use in other models but does not get stored in DB/WH/LH
-
Incremental: Allows users to only bring in new or updated records on a given dbt run
7 - dbt power user (vscode)
There is a VSCode extension for dbt called dbt Power User , which I found really useful as it shows different lineages between models, tests, etc.
Example -

Go check it out if you are intersted!
That’s it for now.
Thank you for reading and have a nice day!


